
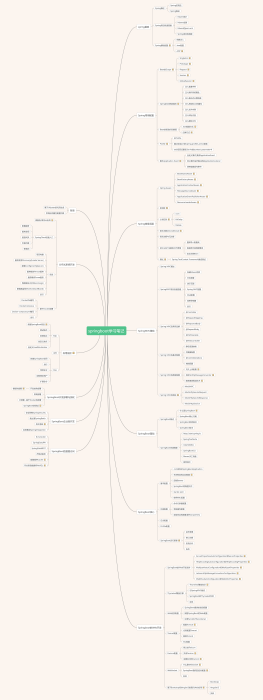
SpringBoot
2021-04-22 11:33:54 20 举报AI智能生成
SpringBoot入门使用,整合mybatis,thymeleaf,扩展定时任务,异步任务,邮件发送,短信发送
springboot
模板推荐
作者其他创作
大纲/内容
第一个springbooot项目
新建一个springboot项目
完善项目结构
强迫症不喜欢多余的文件,该删删,删成这样就行了
一个标准的web应用目录结构
小彩蛋
启动项目控制台的输出是这样的
resource目录下新建banner.txt,输入你想要的效果
编写测试controller
<pre style="background-color: rgb(43, 43, 43); font-family: "JetBrains Mono", monospace; font-size: 9.8pt; color: rgb(169, 183, 198);">package com.xiaoye.controller;<br><br>import org.springframework.stereotype.Controller;<br>import org.springframework.web.bind.annotation.RequestMapping;<br>import org.springframework.web.bind.annotation.ResponseBody;<br><br>/**<br> * @author 小也<br> * @create 2021/4/11 19:03<br> */<br>@Controller<br>@RequestMapping("/hello")<br>public class HelloWorldController {<br><br> @ResponseBody<br> @RequestMapping("/h1")<br> public String hello(){<br> return "Hello,World";<br> }<br>}<br></pre>
还有一个规范点:springboot的配置文件官方建议使用yaml,而不是properties
yaml的语法:以<b style="color: rgb(243, 132, 174);">空格</b><font color="#381e11">区分层次关系</font>
key:(空格)value
yaml的强大之处在于可以给实体类赋值
定义实体类
<pre style="background-color: rgb(43, 43, 43); font-family: "JetBrains Mono", monospace; font-size: 9.8pt;"><font color="#a9b7c6">package com.xiaoye.pojo;<br><br>import lombok.AllArgsConstructor;<br>import lombok.Data;<br>import lombok.NoArgsConstructor;<br>import org.springframework.boot.context.properties.ConfigurationProperties;<br>import org.springframework.stereotype.Component;<br><br>/**<br> * @author 小也<br> * @create 2021/4/12 8:33<br> */<br></font><font color="#f15a23"><b style="">@Data //这是lombok插件,偷懒神器,不用手写get/set方法了</b><br></font><b style=""><font color="#f15a23">@AllArgsConstructor //全参构造注解<br>@NoArgsConstructor //无参构造注解</font><font color="#f384ae"><br>@Component //把该实体类作为组件交给IOC容器<br>@ConfigurationProperties(prefix = "</font><font color="#16884a">user</font><font color="#f384ae">") //这是把该实体类属性与yaml配置文件中的值对应绑定 </font></b><font color="#a9b7c6"><br>public class User {<br> private String name;<br> private int age;<br> private String sex;<br>}<br></font></pre>
这里会爆红,pom.xml引入一个依赖就可以解决了,不引入也不影响运行
<pre style="background-color: rgb(43, 43, 43); font-family: "JetBrains Mono", monospace; font-size: 9.8pt;"><font color="#cfd0d2"> <dependency><br> <groupId>org.springframework.boot</groupId><br> <artifactId>spring-boot-configuration-processor</artifactId><br> <optional>true</optional><br> </dependency></font><font color="#a9b7c6"><br></font></pre>
编写yaml
<pre style="background-color: rgb(43, 43, 43); font-family: "JetBrains Mono", monospace; font-size: 9.8pt;"><b style=""><font color="#16884a">user</font></b><font color="#cfd0d2">:<br> name: xiaoye <br> age: 20<br> sex: 男</font><font color="#a9b7c6"><br></font></pre>
⭐yaml对空格要求极为严格
启动项目,请求接口,看看是否成功输出HelloWorld<br>
初探原理
maven项目我们当然要先看pom.xml文件<br>
我们发现这个项目依赖父项目<br>
<pre style="background-color: rgb(43, 43, 43); font-family: "JetBrains Mono", monospace; font-size: 9.8pt; color: rgb(169, 183, 198);"><br><parent><br> <groupId>org.springframework.boot</groupId><br> <artifactId>spring-boot-starter-parent</artifactId><br> <version>2.2.5.RELEASE</version><br> <relativePath/> <!-- lookup parent from repository --><br></parent><br></pre>
再往上还有一个父项目
<pre style="background-color: rgb(43, 43, 43); font-family: "JetBrains Mono", monospace; font-size: 9.8pt; color: rgb(169, 183, 198);"><br><parent><br> <groupId>org.springframework.boot</groupId><br> <artifactId>spring-boot-dependencies</artifactId><br> <version>2.2.5.RELEASE</version><br> <relativePath>../../spring-boot-dependencies</relativePath><br></parent><br></pre>
这里才是springboot的控制中心,所有的依赖版本都在这里了
启动器:spring-boot-starter
springboot-boot-starter-xxx:就是spring-boot的场景启动器
spring-boot-starter-web:帮我们导入了web模块正常运行所依赖的组件;
springboot把所有的功能场景抽离出来形成一个个starter(启动器)<br>
只需要引入需要的starter,springboot就会帮我们引入相关的依赖
我们再来看主启动类
<pre style="background-color: rgb(43, 43, 43); font-family: "JetBrains Mono", monospace; font-size: 9.8pt; color: rgb(169, 183, 198);">//@SpringBootApplication 来标注一个主程序类,说明这是一个SpringBoot应用 <br>@SpringBootApplication<br>public class SpringbootApplication {<br><br> public static void main(String[] args) {<br> //这里并不是启动一个方法而已,他其实启动了一个服务<br> SpringApplication.run(SpringbootApplication.class, args);<br> }<br><br>}<br></pre>
我们分析一下这个主程序启动类中唯一的注解:@SpringBootApplication
追进这个注解发现这里面还有很多别的注解,我们找几个重要的看
@SpringBootConfiguration
SpringBoot的配置类 ,标注在某个类上 , 表示这是一个SpringBoot的配置类;
继续追进去
@Configuration说明这是一个配置类
@EnableAutoConfiguration
springboot开启自动配置功能
继续追进去
@AutoConfigurationPackage:自动配置包
继续追进去
@Import({Registrar.class}):这是把主程序所在包及其子包的所有bean加载到spring容器中
@Import({AutoConfigurationImportSelector.class}):给容器导入组件
AutoConfigurationImportSelector :自动配置导入选择器
追进去会发现几个重要的方法
<pre style="background-color: rgb(43, 43, 43); font-family: "JetBrains Mono", monospace; font-size: 9.8pt;"><font color="#a9b7c6"> protected List<String> getCandidateConfigurations(AnnotationMetadata metadata, AnnotationAttributes attributes) {<br> List<String> configurations = </font><b style=""><font color="#f384ae">SpringFactoriesLoader.loadFactoryNames</font></b><font color="#a9b7c6">(<br> this.getSpringFactoriesLoaderFactoryClass(), <br> this.getBeanClassLoader() );<br> Assert.notEmpty(configurations, "No auto configuration classes found in META-INF/spring.factories. <br> If you are using a custom packaging, make sure that file is correct.");<br> //返回的就是我们最先看到的启动自动导入配置文件的注解类:@EnableAutoConfiguration<br> return configurations;<br> }<br></font></pre><br>
这里调用了SpringFactoriesLoader类的静态方法loadFactoryNames
<pre style="background-color: rgb(43, 43, 43); font-family: "JetBrains Mono", monospace; font-size: 9.8pt;"><font color="#cfd0d2"> public static List<String> loadFactoryNames(Class<?> factoryType, @Nullable ClassLoader classLoader) {<br> ClassLoader classLoaderToUse = classLoader;<br> if (classLoader == null) {<br> classLoaderToUse = SpringFactoriesLoader.class.getClassLoader();<br> }<br><br> String factoryTypeName = factoryType.getName();<br> //这里调用该类的</font><b style=""><font color="#f384ae">loadSpringFactories</font></b><font color="#cfd0d2">方法<br> return (List)loadSpringFactories(classLoaderToUse).getOrDefault(factoryTypeName, Collections.emptyList());<br> }</font><br></pre>
<pre style="background-color: rgb(43, 43, 43); font-family: "JetBrains Mono", monospace; font-size: 9.8pt;"><font color="#cfd0d2"> private static Map<String, List<String>> loadSpringFactories(ClassLoader classLoader) {<br> </font><b style=""><font color="#f384ae">//获取classloader</font></b><font color="#cfd0d2"><br> Map<String, List<String>> result = (Map)cache.get(classLoader);<br> if (result != null) {<br> return result;<br> } else {<br> HashMap result = new HashMap();<br><br> try {<br> </font><b style=""><font color="#f384ae">//这里获取一个资源:"/META-INF/spring-factories"</font></b><font color="#cfd0d2"><br> Enumeration urls = classLoader.getResources("META-INF/spring.factories");<br> </font><b><font color="#f384ae">//遍历得到的资源,封装成Properties</font></b><font color="#cfd0d2"><br> while(urls.hasMoreElements()) {<br> URL url = (URL)urls.nextElement();<br> UrlResource resource = new UrlResource(url);<br> Properties properties = PropertiesLoaderUtils.loadProperties(resource);<br> Iterator var6 = properties.entrySet().iterator();<br><br> while(var6.hasNext()) {<br> Entry<?, ?> entry = (Entry)var6.next();<br> String factoryTypeName = ((String)entry.getKey()).trim();<br> String[] factoryImplementationNames = StringUtils.commaDelimitedListToStringArray((String)entry.getValue());<br> String[] var10 = factoryImplementationNames;<br> int var11 = factoryImplementationNames.length;<br><br> for(int var12 = 0; var12 < var11; ++var12) {<br> String factoryImplementationName = var10[var12];<br> ((List)result.computeIfAbsent(factoryTypeName, (key) -> {<br> return new ArrayList();<br> })).add(factoryImplementationName.trim());<br> }<br> }<br> }<br><br> result.replaceAll((factoryType, implementations) -> {<br> return (List)implementations.stream().distinct().collect(<br> Collectors.collectingAndThen(Collectors.toList(), <br> Collections::unmodifiableList));<br> });<br> cache.put(classLoader, result);<br> return result;<br> } catch (IOException var14) {<br> throw new IllegalArgumentException("Unable to load factories from location [META-INF/spring.factories]", var14);<br> }<br> }<br> }</font><br></pre><br>
我们再来看一下这个spring.factories
这里面都是一个个的自动配置文件,里面找个认识的追进去会发现是java配置类<br>
所以springboot的自动装配是从classpath中搜寻所有的META-INF/spring.factories配置文件,通过反射获取实例注入到IOC容器中的<br>
得到结论
springboot启动时从类路径/META-INF/spring.properties中读取EnableAutoConfiguration指定的值<br>
把这些值的自动装配类导入容器,自动装配类就生效了<br>
整个javaee的整体解决方案和自动装配都在springboot-autoconfiguration的jar包中<br>
有了自动装配类,就免去了我们手动配置、注入功能组件的操作<br>
纵向观察
yaml
yaml配置类中可以设置的属性值都是XXXAutoConfiguration自动类中的属性<br>
XXXAutoConfiguration自动类
这些都是java配置类,如果yaml中没有配置属性,就从XXXPeoteries文件中读取默认值
XXXPeoteries
这里存放的都是Java配置类中的默认属性值
@ComponentScan
自动扫描并加载符合条件的组件或者bean , 将这个bean定义加载到IOC容器中
最后看下SpringApplication.run()
这个类主要做了以下四件事情
推断应用的类型是普通的项目还是Web项目
查找并加载所有可用初始化器 , 设置到initializers属性中
找出所有的应用程序监听器,设置到listeners属性中
推断并设置main方法的定义类,找到运行的主类
查看类构造器
<pre style="background-color: rgb(43, 43, 43); font-family: "JetBrains Mono", monospace; font-size: 9.8pt;"><font color="#a9b7c6"> public SpringApplication(ResourceLoader resourceLoader, Class<?>... primarySources) {<br> this.sources = new LinkedHashSet();<br> this.bannerMode = Mode.CONSOLE;<br> this.logStartupInfo = true;<br> this.addCommandLineProperties = true;<br> this.addConversionService = true;<br> this.headless = true;<br> this.registerShutdownHook = true;<br> this.additionalProfiles = Collections.emptySet();<br> this.isCustomEnvironment = false;<br> this.lazyInitialization = false;<br> this.applicationContextFactory = ApplicationContextFactory.DEFAULT;<br> this.applicationStartup = ApplicationStartup.DEFAULT;<br> this.resourceLoader = resourceLoader;<br> Assert.notNull(primarySources, "PrimarySources must not be null");<br> this.primarySources = new LinkedHashSet(Arrays.asList(primarySources));<br> </font><b style=""><font color="#f384ae">this.webApplicationType = WebApplicationType.deduceFromClasspath();</font></b><font color="#a9b7c6"><br> this.bootstrappers = new ArrayList(this.getSpringFactoriesInstances(Bootstrapper.class));<br></font><b style=""><font color="#f384ae"> this.setInitializers(this.getSpringFactoriesInstances(ApplicationContextInitializer.class));<br> this.setListeners(this.getSpringFactoriesInstances(ApplicationListener.class));<br> this.mainApplicationClass = this.deduceMainApplicationClass();</font></b><font color="#a9b7c6"><br> }<br></font></pre>
web开发:网站开发走起
首先创建一个项目,不必多说
然后我们解决一下静态资源导出问题
webjars(这个只是简单说一下,我们使用下面那种方式)
通过导入maven的方式
映射到localhost:8080/webjars/
public / static / resources
映射到localhost:8080/
优先级
resources > static(默认) > public
⭐扩展装配springmvc
新建MyMvcConfig实现WebMvcConfigurer接口<br>
⭐添加@Configuration注解<br>
⭐一定不要添加@EnableWebMvc<br>
这个注解会使自动装配失效<br>
原理
观察WebMvcAutoConfiguration自动装配类<br>
而我们再看看这个@EnableWebMvc注解
它实际上是导入了DegatingWebMvcConfiguration类,我们追进去
直接发现这个东西继承了WebMvcConfigurationSupport<br>
简单设计一下首页
创建首页index,放在静态资源目录下(templates )
引入thymeleft模板引擎
导入依赖
<pre style="background-color: rgb(43, 43, 43); font-family: "JetBrains Mono", monospace; font-size: 9.8pt; color: rgb(169, 183, 198);"> <!--模板引擎,基于3.x开发--><br> <dependency><br> <groupId>org.thymeleaf</groupId><br> <artifactId>thymeleaf.spring5</artifactId><br> </dependency><br> <dependency><br> <groupId>org.thymeleaf.extras</groupId><br> <artifactId>thymeleaf-extras-java8time</artifactId><br> </dependency><br></pre>
引入头文件
<pre style="background-color: rgb(43, 43, 43); font-family: "JetBrains Mono", monospace; font-size: 9.8pt;"><font color="#a9b7c6"><!DOCTYPE html><br></font><b style=""><font color="#f384ae"><html lang="en" xmlns:th="http://www.thymeleaf.org"></font></b><font color="#a9b7c6"><br><html lang="en"><br> <head><br> <meta charset="UTF-8"><br> <title>Title</title><br> </head><br> <body><br> <h1 th:text="${msg}"></h1><br> </body><br></html><br></font></pre>
templates里的html页面都需要通过controller返回<br>
⭐但是首页根资源我们使用springmvc配置映射
配置首页映射(重写addViewControllers方法)
<pre style="background-color: rgb(43, 43, 43); font-family: "JetBrains Mono", monospace; font-size: 9.8pt;"><font color="#a9b7c6">@Configuration<br>public class MyMvcConfig implements WebMvcConfigurer {<br> </font><b style=""><font color="#f384ae">@Override<br> public void addViewControllers(ViewControllerRegistry registry) {<br> registry.addViewController("</font><font color="#f15a23">/</font><font color="#f384ae">").setViewName("</font><font color="#f15a23">index</font><font color="#f384ae">");<br> }</font></b><font color="#a9b7c6"><br>}<br></font></pre>
只要路径地址是/,就会映射到index
首页找个bootstrap的模板吧,记得下载css<br>网址:https://getbootstrap.com/docs/4.0/examples/<br>
<pre style="background-color: rgb(43, 43, 43); font-family: "JetBrains Mono", monospace; font-size: 9.8pt; color: rgb(169, 183, 198);"><!DOCTYPE html><br><html lang="en" xmlns:th="http://www.thymeleaf.org"><br> <head><br> <meta http-equiv="Content-Type" content="text/html; charset=UTF-8"><br> <meta name="viewport" content="width=device-width, initial-scale=1, shrink-to-fit=no"><br> <meta name="description" content=""><br> <meta name="author" content=""><br><br> <title>NaN~NaN</title><br><br> <link th:href="@{/css/bootstrap.min.css}" rel="stylesheet"><br> <link th:href="@{/css/signin.css}" rel="stylesheet"><br> </head><br><br> <body class="text-center"><br> <form class="form-signin"><br> <h1 class="h3 mb-3 font-weight-normal">Please sign in</h1><br> <label for="inputEmail" class="sr-only">Email address</label><br> <input type="email" id="inputEmail" class="form-control" placeholder="Email address" required="" autofocus=""><br> <label for="inputPassword" class="sr-only">Password</label><br> <input type="password" id="inputPassword" class="form-control" placeholder="Password" required=""><br> <div class="checkbox mb-3"><br> <label><br> <input type="checkbox" value="remember-me"> Remember me<br> </label><br> </div><br> <button class="btn btn-lg btn-primary btn-block" type="submit">Sign in</button><br> <div class="mt-3"><br> <a th:href="@{/}" th:text="中文"/><br> <a th:href="@{/}" th:text="English"/><br> </div><br> <p class="mt-3 mb-3 text-muted">© 2017-2018</p><br> </form><br> </body><br></html><br></pre>
整个国际化,显得高大上
首先保证我们开发环境是基于UTF-8的
建立资源目录---i18n(Internationalization的简写,还有个相同的k8s)<br>
创建配置文件
zh_CN中文,en_US英文
采用可视化配置
首先打开可视化配置界面
开始配置
配置application.yaml
spring.message.basename: i18n.login<br>
使用#{ }在html页面取值
button元素和其他的不同
配置自己的地区化解析器<br>
新建MyLocaleResolver类实现LocaleResolver接口
<pre style="background-color: rgb(43, 43, 43); font-family: "JetBrains Mono", monospace; font-size: 9.8pt;"><font color="#a9b7c6">package com.admin.config;<br><br>import org.springframework.web.servlet.LocaleResolver;<br>import org.thymeleaf.util.StringUtils;<br><br>import javax.servlet.http.HttpServletRequest;<br>import javax.servlet.http.HttpServletResponse;<br>import java.util.Locale;<br><br>/**<br> * @author 小也<br> * @create 2021/4/14 8:46<br> */<br>public class MyLocaleResolver </font><b style=""><font color="#f15a23">implements </font></b><b style=""><font color="#f15a23">LocaleResolver </font></b><font color="#a9b7c6">{<br> @Override<br> public Locale resolveLocale(HttpServletRequest httpServletRequest) {<br> //获取请求携带的地区参数<br> String language = httpServletRequest.getParameter("language");<br> </font><b style=""><font color="#fdb813">//声明一个默认的locale<br> Locale locale = Locale.getDefault();</font></b><font color="#a9b7c6"><br> //如果请求携带的地区值不为空就返回自定义的locale<br> if(!StringUtils.isEmpty(language)){<br> </font><b style=""><font color="#f384ae">String[] split = language.split("_");<br> locale = new Locale(split[0], split[1]);</font></b><font color="#a9b7c6"><br> }<br> return locale;<br> }<br><br> @Override<br> public void setLocale(HttpServletRequest httpServletRequest, HttpServletResponse httpServletResponse, Locale locale) {<br><br> }<br>}<br></font></pre>
把自定义的地区化解析器配置到springmvc中,通过构造函数实现自动装配
<pre style="background-color: rgb(43, 43, 43); font-family: "JetBrains Mono", monospace; font-size: 9.8pt;"><font color="#cfd0d2">package com.admin.config;<br><br>import org.springframework.context.annotation.Bean;<br>import org.springframework.context.annotation.Configuration;<br>import org.springframework.web.servlet.config.annotation.ViewControllerRegistry;<br>import org.springframework.web.servlet.config.annotation.WebMvcConfigurer;<br><br><br>/**<br> * @author 小也<br> * @create 2021/4/13 19:44<br> * 扩展 springmvc<br> */<br>@Configuration<br>public class MyMvcConfig implements WebMvcConfigurer {<br> @Override<br> public void addViewControllers(ViewControllerRegistry registry) {<br> registry.addViewController("/").setViewName("index");<br> registry.addViewController("/index.html").setViewName("index");<br> }<br><br> </font><b style=""><font color="#f384ae">@Bean<br> public </font><font color="#16884a">LocaleResolver localeResolver</font><font color="#f384ae">(){<br> return new </font><font color="#f15a23">MyLocaleResolver</font><font color="#f384ae">();<br> }</font></b><font color="#cfd0d2"><br><br>}</font><br></pre><br>
html页面的切换按钮,携带参数跳转
<pre style="background-color: rgb(43, 43, 43); font-family: "JetBrains Mono", monospace; font-size: 9.8pt;"><font color="#cfd0d2"> <div><br> <a th:href="</font><b style=""><font color="#f15a23">@{/index.html</font><font color="#16884a">(language='zh_CN')</font><font color="#f15a23">}</font></b><font color="#cfd0d2">" th:text="中文" class="mr-3"/><br> <a th:href="</font><b style=""><font color="#f15a23">@{/index.html</font><font color="#16884a">(language='en_US')</font><font color="#f15a23">}</font></b><font color="#cfd0d2">" th:text="English" class="ml-3"/><br> </div></font><br></pre>
实现登录功能
html页面表单提交地址
<span style="font-size: inherit;"><form class="form-signin" th:action="</span><b style="font-size: inherit;"><font color="#0076b3">@{/login/toHome}</font></b><span style="font-size: inherit;">"></span><br>
controller控制是否登录成功,新建controller
<pre style="background-color: rgb(43, 43, 43); font-family: "JetBrains Mono", monospace; font-size: 9.8pt;"><font color="#cfd0d2">package com.admin.controller;<br><br>import org.springframework.stereotype.Controller;<br>import org.springframework.ui.Model;<br>import org.springframework.web.bind.annotation.RequestMapping;<br>import org.springframework.web.bind.annotation.RequestParam;<br><br>/**<br> * @author 小也<br> * @create 2021/4/14 9:07<br> */<br>@Controller<br></font><b style=""><font color="#f384ae">@RequestMapping("/login")</font></b><font color="#cfd0d2"><br>public class LoginController {<br><br> </font><b style=""><font color="#f384ae">@RequestMapping("/toHome")</font></b><font color="#cfd0d2"><br> public String toHome(@RequestParam("username")String username,<br> @RequestParam("password")String password,<br> Model model){<br> //这里应该是查数据库的操作,但是我们先构建出项目框架模板再加入数据库,所以这里写固定值<br> if(username.equals("asd") && password.equals("asd")){<br> model.addAttribute("username",username);<br> </font><b style=""><font color="#c41230">//转发重定向,防止表单重复提交</font></b><font color="#cfd0d2"><br> return "redirect:/home.html";<br> }else{<br> </font><b style=""><font color="#fdb813">//登陆失败返回登录页,并且提示账户名或者密码错误</font></b><font color="#cfd0d2"><br> model.addAttribute("msg","用户名或密码错误");<br> return "index";<br> }<br> }<br>}</font><br></pre>
重定向的视图映射
<pre style="background-color: rgb(43, 43, 43); font-family: "JetBrains Mono", monospace; font-size: 9.8pt;"><font color="#cfd0d2">package com.admin.config;<br><br>import org.springframework.context.annotation.Bean;<br>import org.springframework.context.annotation.Configuration;<br>import org.springframework.web.servlet.LocaleResolver;<br>import org.springframework.web.servlet.config.annotation.ViewControllerRegistry;<br>import org.springframework.web.servlet.config.annotation.WebMvcConfigurer;<br><br><br>/**<br> * @author 小也<br> * @create 2021/4/13 19:44<br> * 扩展 springmvc<br> */<br>@Configuration<br>public class MyMvcConfig implements WebMvcConfigurer {<br> @Override<br> public void addViewControllers(ViewControllerRegistry registry) {<br> registry.addViewController("/").setViewName("index");<br> registry.addViewController("/index.html").setViewName("index");<br> </font><b style=""><font color="#f15a23">registry.addViewController("/home.html").setViewName("home");</font></b><font color="#cfd0d2"><br> }<br><br> @Bean<br> public LocaleResolver localeResolver(){<br> return new MyLocaleResolver();<br> }<br><br>}</font><br></pre>
重定向到主页面后,我们发现不需要账户名和密码,直接url栏访问主页面也可以,所以我们配置拦截器
首先创建LoginHandlerInterceptor类实现HandlerInterceptor接口,实现pre方法<br>
<pre style="background-color: rgb(43, 43, 43); font-family: "JetBrains Mono", monospace; font-size: 9.8pt;"><font color="#cfd0d2">package com.admin.config;<br><br>import org.springframework.web.servlet.HandlerInterceptor;<br><br>import javax.servlet.http.HttpServletRequest;<br>import javax.servlet.http.HttpServletResponse;<br><br>/**<br> * @author 小也<br> * @create 2021/4/14 12:29<br> * 继承拦截器接口,进入页面前拦截<br> */<br>public class LoginHandlerInterceptor </font><b style=""><font color="#f384ae">implements HandlerInterceptor</font></b><font color="#cfd0d2"> {<br> @Override<br> public boolean </font><b style=""><font color="#f15a23">preHandle</font></b><font color="#cfd0d2">(HttpServletRequest request, HttpServletResponse response, Object handler) throws Exception {<br> //查看session是否有值,有就放行,没有就拦截<br> Object username = request.getSession().getAttribute("username");<br> if(username == null){<br> //添加提示信息<br> request.setAttribute("msg","您没有访问权限,请先登录...");<br> </font><b style=""><font color="#c41230">//转发到登录首页<br> request.getRequestDispatcher("index.html").forward(request,response);<br> return false;</font></b><font color="#cfd0d2"><br> }else{<br> </font><b style=""><font color="#0076b3">//查询到值,放行</font></b><font color="#cfd0d2"><br> </font><b style=""><font color="#0076b3">return true;</font></b><font color="#cfd0d2"><br> }<br> }<br>}</font><br></pre>
然后通过springmvc扩展类装配
<pre style="background-color: rgb(43, 43, 43); font-family: "JetBrains Mono", monospace; font-size: 9.8pt;"><font color="#cfd0d2">package com.admin.config;<br><br>import org.springframework.context.annotation.Bean;<br>import org.springframework.context.annotation.Configuration;<br>import org.springframework.web.servlet.LocaleResolver;<br>import org.springframework.web.servlet.config.annotation.InterceptorRegistry;<br>import org.springframework.web.servlet.config.annotation.ViewControllerRegistry;<br>import org.springframework.web.servlet.config.annotation.WebMvcConfigurer;<br><br><br>/**<br> * @author 小也<br> * @create 2021/4/13 19:44<br> * 扩展 springmvc<br> */<br>@Configuration<br>public class MyMvcConfig implements WebMvcConfigurer {<br> @Override<br> public void addViewControllers(ViewControllerRegistry registry) {<br> registry.addViewController("/").setViewName("index");<br> registry.addViewController("/index.html").setViewName("index");<br> registry.addViewController("/home.html").setViewName("home");<br> }<br><br> @Bean<br> public LocaleResolver localeResolver(){<br> return new MyLocaleResolver();<br> }<br><br> </font><b style=""><font color="#31a8e0">@Override<br> public void addInterceptors(InterceptorRegistry registry) {<br> </font><font color="#16884a">//配置资源拦截<br> //addPathPatterns("/**")==》拦截所有请求<br> //excludePathPatterns("/","/css/**","/img/**","/js/**","/index.html","/login/toHome")不拦截这些请求 </font><font color="#31a8e0"><br> registry.addInterceptor(new LoginHandlerInterceptor())<br> .addPathPatterns("/**")<br> .excludePathPatterns("/","/css/**","/img/**","/js/**","/index.html","/login/toHome");<br> }</font></b><font color="#cfd0d2"><br>}</font><br></pre>
实现注销功能
登录后我们在登录的controller里添加一个注销方法,很简单,就是单纯的去除session
<pre style="background-color: rgb(43, 43, 43); font-family: "JetBrains Mono", monospace; font-size: 9.8pt;"><font color="#cfd0d2">package com.admin.controller;<br><br>import org.springframework.stereotype.Controller;<br>import org.springframework.ui.Model;<br>import org.springframework.web.bind.annotation.RequestMapping;<br>import org.springframework.web.bind.annotation.RequestParam;<br><br>import javax.servlet.http.HttpSession;<br><br>/**<br> * @author 小也<br> * @create 2021/4/14 9:07<br> */<br>@Controller<br>@RequestMapping("/login")<br>public class LoginController {<br><br> @RequestMapping("/toHome")<br> public String toHome(@RequestParam("username")String username,<br> @RequestParam("password")String password,<br> Model model,HttpSession session){<br> //这里应该是查数据库的操作,但是我们先构建出项目框架模板再加入数据库,所以这里写固定值<br> if(username.equals("asd") && password.equals("asd")){<br> //登录信息加载到session中<br> session.setAttribute("username",username);<br> //转发重定向,防止表单重复提交<br> return "redirect:/home.html";<br> }else{<br> model.addAttribute("msg","用户名或密码错误");<br> return "index";<br> }<br> }<br><br> </font><b style=""><font color="#0076b3">@RequestMapping("/signOut")<br> public String toHome(HttpSession session){<br> </font><font color="#f15a23">session.setAttribute("username",null);</font><font color="#0076b3"><br> return "index";<br> }</font></b><font color="#cfd0d2"><br>}</font><br></pre>
抽离出页面多次使用的代码形成组件,实现代码复用(使用th:freagment和th:replace)
抽离代码形成组件
实现复用
组件间通信
错误页面,直接在templates目录下建一个error文件夹,里面新建404、500等错误页面,springboot会帮我们自动找到这些页面
然后CRUD就不必多说了吧,我们现在有大概模板了,上数据库<br>
pom导入druid依赖(因为druid集成了后台监控,我们试试这个东西)
application.yaml进行配置
<pre style="background-color: rgb(43, 43, 43); font-family: "JetBrains Mono", monospace; font-size: 9.8pt;"><font color="#cfd0d2">spring:<br> datasource:<br> username: root<br> password: root<br> url: jdbc:mysql://localhost:3306/sbs?useSSL=false&useUnicode=true&characterEncoding=utf-8&setTimezone=CTT<br> driver-class-name: com.mysql.jdbc.Driver<br> </font><b style=""><font color="#f384ae">type: com.alibaba.druid.pool.DruidDataSource</font></b><br></pre>
编写配置类
@Configuration声明配置类,@Bean交给Spring接管
<pre style="background-color: rgb(43, 43, 43); font-family: "JetBrains Mono", monospace; font-size: 9.8pt;"><font color="#cfd0d2">package com.admin;<br><br>import com.alibaba.druid.pool.DruidDataSource;<br>import com.alibaba.druid.support.http.StatViewServlet;<br>import org.springframework.boot.context.properties.ConfigurationProperties;<br>import org.springframework.boot.web.servlet.ServletRegistrationBean;<br>import org.springframework.context.annotation.Bean;<br>import org.springframework.context.annotation.Configuration;<br><br>import javax.sql.DataSource;<br>import java.util.HashMap;<br><br>/**<br> * @author 小也<br> * @create 2021/4/14 18:18<br> */<br>@Configuration<br>public class DruidConfig {<br><br> </font><b style=""><font color="#0076b3">@Bean<br> @ConfigurationProperties(prefix = "spring.datasource")<br> public DataSource druidDataSource(){<br> return new DruidDataSource();<br> }<br><br> @Bean<br> public ServletRegistrationBean statViewServlet(){<br> ServletRegistrationBean bean = new ServletRegistrationBean(new StatViewServlet(),"/druid/*");<br><br> HashMap<String,String> hashMap = new HashMap<>();<br><br> </font><font color="#c41230">//这是进入后台监控的账号密码,map的key一定不能写错</font><font color="#0076b3"><br> </font><font color="#f15a23">hashMap.put("loginUsername","root");<br> hashMap.put("loginPassword","root");<br></font><font color="#0076b3"><br> bean.setInitParameters(hashMap);<br><br> return bean;<br> }<br></font></b><font color="#cfd0d2"><br><br><br>}</font><br></pre><br>
配置成功就能进入这样的后台页面(别人写好的,我们直接使用就好)
整合mybatis
导入整合包依赖
<pre style="background-color: rgb(43, 43, 43); font-family: "JetBrains Mono", monospace; font-size: 9.8pt;"><font color="#cfd0d2"> <!--mybatis整合包--><br> <dependency><br> <groupId>org.mybatis.spring.boot</groupId><br> <artifactId>mybatis-spring-boot-starter</artifactId><br> <version>2.1.4</version><br> </dependency></font><br></pre>
更改一下druid的版本,因为localdate的问题,遇到的一个坑,希望大家不要浪费时间在这
<pre style="background-color: rgb(43, 43, 43); font-family: "JetBrains Mono", monospace; font-size: 9.8pt;"><font color="#cfd0d2"> <!--druid数据源--><br> <dependency><br> <groupId>com.alibaba</groupId><br> <artifactId>druid</artifactId><br> <version>1.1.22</version><br> </dependency></font><br></pre>
配置springmvc.config(其实我知道这样是不标准的,因为明明yuml中有配置信息,为什么还手写呢?因为我拿不出来yuml的数据,。。。。。。。)<br>
<pre style="background-color: rgb(43, 43, 43); font-family: "JetBrains Mono", monospace; font-size: 9.8pt;"><font color="#cfd0d2">package com.admin.config;<br><br>import com.alibaba.druid.pool.DruidDataSource;<br>import org.springframework.beans.factory.annotation.Autowired;<br>import org.springframework.beans.factory.annotation.Value;<br>import org.springframework.boot.context.properties.ConfigurationProperties;<br>import org.springframework.context.annotation.Bean;<br>import org.springframework.context.annotation.Configuration;<br>import org.springframework.web.servlet.LocaleResolver;<br>import org.springframework.web.servlet.config.annotation.InterceptorRegistry;<br>import org.springframework.web.servlet.config.annotation.ViewControllerRegistry;<br>import org.springframework.web.servlet.config.annotation.WebMvcConfigurer;<br><br>import javax.sql.DataSource;<br><br><br>/**<br> * @author 小也<br> * @create 2021/4/13 19:44<br> * 扩展 springmvc<br> */<br>@Configuration<br>public class MyMvcConfig implements WebMvcConfigurer {<br><br> @Bean<br> public LocaleResolver localeResolver(){<br> return new MyLocaleResolver();<br> }<br><br> @Bean DataSource druidDataSource(){<br> </font><b style=""><font color="#fdb813">DruidDataSource dataSource = new DruidDataSource();<br> dataSource.setUrl("jdbc:mysql://localhost:3306/sbs?useSSL=false&useUnicode=true&charaterEncoding=utf-8&serverTimezome=UTC");<br> dataSource.setUsername("root");<br> dataSource.setPassword("root");<br> return dataSource;</font></b><font color="#cfd0d2"><br> }<br><br> @Override<br> public void addViewControllers(ViewControllerRegistry registry) {<br> registry.addViewController("/").setViewName("index");<br> registry.addViewController("/index.html").setViewName("index");<br> registry.addViewController("/home.html").setViewName("home");<br> }<br><br> @Override<br> public void addInterceptors(InterceptorRegistry registry) {<br> //配置资源拦截<br> //addPathPatterns("/**")==》拦截所有请求<br> //excludePathPatterns("/","/css/**","/img/**","/js/**","/index.html","/login/toHome")不拦截这些请求<br> registry.addInterceptor(new LoginHandlerInterceptor())<br> .addPathPatterns("/**").excludePathPatterns("/","/css/**","/img/**","/js/**","/index.html","/login/toHome");<br> }<br><br><br>}</font><br></pre>
创建mapper,这个我们放在classpath:mybatis/mapper下
目录结构
mapper文件
<pre style="background-color: rgb(43, 43, 43); font-family: "JetBrains Mono", monospace; font-size: 9.8pt;"><font color="#cfd0d2"><?xml version="1.0" encoding="UTF-8" ?><br><!DOCTYPE mapper<br> PUBLIC "-//mybatis.org//DTD Mapper 3.0//EN"<br> "http://mybatis.org/dtd/mybatis-3-mapper.dtd"><br><mapper namespace="com.admin.mapper.StudentMapper"><br><br> <!--</font><b style=""><font color="#16884a">这里这么配置,是因为数据库中的_连接符都需要变成驼峰写法</font></b><font color="#cfd0d2">--><br> </font><b style=""><font color="#f384ae"><resultMap id="studentOne" type="com.admin.pojo.Student"><br> <result column="major_id" property="majorId"/><br> <result column="admission_date" property="admissionDate"/><br> </resultMap></font></b><font color="#cfd0d2"><br><br> <select id="getAllStudents" resultMap="studentOne"><br> select * from student<br> </select><br><br> <select id="getStudentByUsername" resultMap="studentOne"><br> select * from student where username = #{username}<br> </select><br></mapper></font><br></pre>
配置yuml的mybatis相关配置项(别名以及扫描包)
<pre style="background-color: rgb(43, 43, 43); font-family: "JetBrains Mono", monospace; font-size: 9.8pt;"><font color="#cfd0d2">mybatis:<br> type-aliases-package: com.admin.pojo<br> mapper-locations: classpath:mybatis/mapper/*.xml</font><br></pre>
编写mapper的dao层接口
<pre style="background-color: rgb(43, 43, 43); font-family: "JetBrains Mono", monospace; font-size: 9.8pt;"><font color="#cfd0d2">package com.admin.mapper;<br><br>import com.admin.pojo.Student;<br>import org.apache.ibatis.annotations.Mapper;<br>import org.apache.ibatis.annotations.Param;<br>import org.springframework.stereotype.Repository;<br><br>import java.util.List;<br><br>/**<br> * @author 小也<br> * @create 2021/4/14 20:28<br> *<br> * @Mapper 表明这是一个myabtis的mapperl类<br> * @Repository 把给类交给spring管理<br> */<br>@Mapper<br>@Repository<br>public interface StudentMapper {<br><br> /**<br> * 查询所有学生<br> * @return List<Student><br> */<br> List<Student> getAllStudents();<br><br> /**<br> * 根据名字查找<br> * @param username<br> * @return Student<br> */<br> Student getStudentByUsername(@Param("username")String username);<br>}</font><br></pre>
现在加上service接口和实现类,配合controller就可以快乐的CURD了
扩展功能
安全扩展(认证、授权)
⭐SpringSecurity
shiro
swagger接口文档
添加pom依赖
<pre style="background-color: rgb(43, 43, 43); font-family: "JetBrains Mono", monospace; font-size: 9.8pt;"><font color="#cfd0d2"> <!--swagger接口文档--><br> <dependency><br> <groupId>io.springfox</groupId><br> <artifactId>springfox-swagger2</artifactId><br> <version>2.7.0</version><br> </dependency><br> <dependency><br> <groupId>io.springfox</groupId><br> <artifactId>springfox-swagger-ui</artifactId><br> <version>2.7.0</version><br> </dependency></font><font color="#a9b7c6"><br></font></pre>
启动类添加@EnableSwagger2注解开启swagger
项目启动后,输入localhost:8080/swagger-ui.html就可以访问默认界面了
⭐这个功能在项目上线后必须关闭,它不仅会暴露接口造成风险,还会降低性能
异步任务(比如后台响应需要时间,但是前台等待会影响体验)
在需要异步处理的方法上加上@Async注解
在主启动类上添加@EnableAsync注解开启异步功能
邮件发送
导入依赖
<pre style="background-color: rgb(43, 43, 43); font-family: "JetBrains Mono", monospace; font-size: 9.8pt;"><font color="#cfd0d2"> <!--邮件发送--><br> <dependency><br> <groupId>org.springframework.boot</groupId><br> <artifactId>spring-boot-starter-mail</artifactId><br> </dependency></font><font color="#a9b7c6"><br></font></pre>
邮箱开启smtp,获得授权码<br>
配置yml文件
<pre style="background-color: rgb(43, 43, 43); font-family: "JetBrains Mono", monospace; font-size: 9.8pt;"><font color="#cfd0d2">spring:<br> mail:<br> username: 邮箱地址<br> password: 授权码 <br> host: smtp.相关邮箱.com<br> properties:<br> mail:<br> smtp:<br> ssl:<br> enable: true</font><font color="#a9b7c6"><br></font></pre>
编写测试代码(需要用到JavaMailSenderImpl类,我们用spring的自动装配实现)<br>
简单文本<br>直接发送SimpleMailMessage对象
代码
<pre style="background-color: rgb(43, 43, 43); font-family: "JetBrains Mono", monospace; font-size: 9.8pt;"><font color="#cfd0d2"> SimpleMailMessage message = new SimpleMailMessage();<br><br> message.setSubject("SimpleMailMessage");<br> message.setText("<h1 style='color:red'>SimpleMailMessage</h1>");<br><br> message.setFrom("自己的邮箱地址");<br> message.setTo("收件人邮箱地址");<br><br> mailSender.send(message);</font><font color="#a9b7c6"><br></font></pre>
注意点
简单邮件电脑端不支持html解析,想要支持html解析就使用MimeMessage
其实,手机是支持html标签解析的,但是建议不要使用了,毕竟官方建议需要html解析使用MimeMessage
带附件传送,可解析html<br>MimeMessage对象是邮件的基本内容,需要MimeMssageHelaper组装发送
<pre style="background-color: rgb(43, 43, 43); font-family: "JetBrains Mono", monospace; font-size: 9.8pt;"><font color="#cfd0d2"> </font><b style=""><font color="#f15a23">MimeMessage message = mailSender.createMimeMessage();<br> MimeMessageHelper helper = new MimeMessageHelper(message,true);</font></b><font color="#cfd0d2"> //这个true是开启多附件传输 <br><br> helper.setSubject("MimeMessage");<br> helper.setText("<h1 style='color:red'>这是MimeMessage的测试邮件主题</h1>",true);<br> helper.addAttachment("1.jpg", new File("C:\\Users\\22944\\Pictures\\联想锁屏壁纸\\1.jpg"));<br> helper.setFrom("自己的邮箱");<br> helper.setTo("收件人邮箱");<br><br><br> mailSender.send(message);</font><font color="#a9b7c6"><br></font></pre>
短信发送(我选择使用阿里云的服务【大鱼】)
登录阿里云大鱼平台,开通短信服务,新人有使用,可以领取测试<br>https://dayu.aliyun.com/<br>
进入控制台,右上角头像悬浮鼠标,创建AccessKey
添加签名
定时任务
在需要异步处理的方法上加上@Schdule(cron = "秒 分 时 日 月 星期")注解
大家需要去了解一下cron表达式
在主启动类上添加@EnableSchdule注解开启异步功能
测试
<pre style="background-color: rgb(43, 43, 43); font-family: "JetBrains Mono", monospace; font-size: 9.8pt;"><font color="#cfd0d2">package com.admin.utils;<br><br>import org.springframework.scheduling.annotation.Scheduled;<br>import org.springframework.stereotype.Component;<br><br>import java.time.LocalDateTime;<br><br>/**<br> * @author 小也<br> * @create 2021/4/22 11:16<br> */<br>@Component<br>public class MySchedule {<br><br> </font><b style=""><font color="#f15a23">@Scheduled(cron = "0/2 * * * * *") //每两秒打印一次时间 </font></b><font color="#cfd0d2"><br> public void now(){<br> System.out.println(LocalDateTime.now());<br> }<br>}</font><br></pre>


Collect
Get Started

Collect
Get Started

Collect
Get Started

Collect
Get Started
评论
0 条评论
下一页

