
Spring
2018-09-03 21:40:27 191 举报AI智能生成
spring
spring
模板推荐
作者其他创作
大纲/内容
为什么要使用Spring?
DI(Dependency Injection,依赖注入)
<h2><font face="SimSun"><span style="font-size:16px;">当某个角色 需要另外一个角色协助的时候,在传统的程序设计过程中,通常由调用者来创建被调用者的实例。但在spring中 创建被调用者的工作不再由调用者来完成,因此称为控制反转。创建被调用者的工作由spring来完成,然后注入调用者 因此也称为依赖注入。 </span></font></h2>
在Spring创建对象的过程中,把对象依赖的属性注入到类中。
<p style="TEXT-ALIGN: left; PADDING-BOTTOM: 0px; WIDOWS: 1; TEXT-TRANSFORM: none; BACKGROUND-COLOR: rgb(255,255,255); TEXT-INDENT: 0px; MARGIN: 0px; PADDING-LEFT: 0px; PADDING-RIGHT: 0px; FONT: 14px/1.5em verdana, arial, helvetica, sans-serif; WHITE-SPACE: normal; LETTER-SPACING: normal; COLOR: rgb(0,0,0); WORD-SPACING: 0px; PADDING-TOP: 0px; -webkit-text-stroke-width: 0px">●<strong>谁依赖于谁:</strong>当然是应用程序依赖内部的属性</p> <br><p style="TEXT-ALIGN: left; PADDING-BOTTOM: 0px; WIDOWS: 1; TEXT-TRANSFORM: none; BACKGROUND-COLOR: rgb(255,255,255); TEXT-INDENT: 0px; MARGIN: 0px; PADDING-LEFT: 0px; PADDING-RIGHT: 0px; FONT: 14px/1.5em verdana, arial, helvetica, sans-serif; WHITE-SPACE: normal; LETTER-SPACING: normal; COLOR: rgb(0,0,0); WORD-SPACING: 0px; PADDING-TOP: 0px; -webkit-text-stroke-width: 0px">●<strong>为什么需要依赖:</strong>应用程序需要IoC容器来提供对象需要的外部资源;</p> <br><p style="TEXT-ALIGN: left; PADDING-BOTTOM: 0px; WIDOWS: 1; TEXT-TRANSFORM: none; BACKGROUND-COLOR: rgb(255,255,255); TEXT-INDENT: 0px; MARGIN: 0px; PADDING-LEFT: 0px; PADDING-RIGHT: 0px; FONT: 14px/1.5em verdana, arial, helvetica, sans-serif; WHITE-SPACE: normal; LETTER-SPACING: normal; COLOR: rgb(0,0,0); WORD-SPACING: 0px; PADDING-TOP: 0px; -webkit-text-stroke-width: 0px">●<strong>谁注入谁:</strong>很明显是IoC容器注入应用程序某个对象,应用程序依赖的对象;</p> <br><p style="TEXT-ALIGN: left; PADDING-BOTTOM: 0px; WIDOWS: 1; TEXT-TRANSFORM: none; BACKGROUND-COLOR: rgb(255,255,255); TEXT-INDENT: 0px; MARGIN: 0px; PADDING-LEFT: 0px; PADDING-RIGHT: 0px; FONT: 14px/1.5em verdana, arial, helvetica, sans-serif; WHITE-SPACE: normal; LETTER-SPACING: normal; COLOR: rgb(0,0,0); WORD-SPACING: 0px; PADDING-TOP: 0px; -webkit-text-stroke-width: 0px"><strong>●注入了什么:</strong>就是注入某个对象所需要的外部资源(包括对象、资源、常量数据)。</p>
IOC(inversion of control,控制反转)
<strong>是通过IOC容器实现的,由IOC容器负责创建和获取依赖对象,对象只是被动地接受依赖对象。</strong>
IOC,另外一种说法叫DI(Dependency Injection),即依赖注入。它是一种设计思想。在任何一个有实际开发意义的程序项目中,我们会使用很多<b>类来描述它们特有的功能,并且通过类与类之间的相互协作来完成特定的业务逻辑</b>。这个时候,每个类都需要负责管理与自己有交互的类的引用和依赖,代码将会变的异常难以维护和极度的高耦合。而IOC的出现正是用来解决这个问题,我们通过IOC将这些<b>相互依赖对象的创建、协调工作交给Spring容器去处理</b>,每个对象只需要关注其自身的业务逻辑关系就可以了。在这样的角度上来看,获得依赖的对象的方式,进行了反转,变成了由spring容器控制对象如何获取外部资源(包括其他对象和文件资料等等)。
例子
<img data-original-src="//upload-images.jianshu.io/upload_images/2567753-baab17c00faef609" data-original-width="292" data-original-height="293" data-original-format="image/png" data-original-filesize="5922" style="cursor: zoom-in;" class="" src="https://upload-images.jianshu.io/upload_images/2567753-baab17c00faef609?imageMogr2/auto-orient/strip%7CimageView2/2/w/292">
<img data-original-src="//upload-images.jianshu.io/upload_images/2567753-dfa3182699e6a89c" data-original-width="334" data-original-height="404" data-original-format="image/png" data-original-filesize="16012" style="cursor: zoom-in;" class="" src="https://upload-images.jianshu.io/upload_images/2567753-dfa3182699e6a89c?imageMogr2/auto-orient/strip%7CimageView2/2/w/334">
面向对象设计法则之一—— 好莱坞法则:“别找我们,我们找你”;即由IoC容器帮对象找相应的依赖对象并注入,而不是由对象主动去找。
<ul><li>控制指的是:<strong>当前对象对内部成员的控制权</strong>。</li><li>反转指的是:这种控制权<strong>不由当前对象管理</strong>了,由其他(类,第三方容器)来管理。<span style="line-height:normal;background-color:#ffc0cb;">获得依赖对象的方式反转了。</span></li></ul>
<ul><li>原理就是通过Java的<strong>反射技术</strong>来实现的!通过反射我们可以获取类的所有信息(成员变量、类名等等等)!</li><li>再通过配置文件(xml)或者注解来<strong>描述</strong>类与类之间的关系</li><li>我们就可以通过这些配置信息和反射技术来<strong>构建</strong>出对应的对象和依赖关系了!</li></ul>
AOP(Aspect Oriented Programming,面向切面编程)
AOP的本质是在一系列纵向的控制流程中,把那些相同的子流程提取成一个横向的面
简化java开发
激发pojo的潜能
依赖注入
应用切面
使用模版消除样板式代码
容纳你的bean
与应用上下文共事
bean的生命周期
Spring是一个库,它的功能是提供了一个软件框架,这个框架目的是使软件之间的逻辑更加清晰,配置更灵活,实现这个目的的手段使用AOP和IoC,而AOP和IoC是一种思想
Bean
JavaBean的规范
每一个类实现了Bean的规范才可以由Spring来接管,那么Bean的规范是什么呢?
<br>
<br>必须是个公有(public)类
<br>有无参构造函数
<br>用公共方法暴露内部成员属性(getter,setter)
<br>实现这样规范的类,被称为Java Bean。即是一种可重用的组件。
生命周期
1.Spring对bean进行实例化;<br>2.Spring将值和bean的引用注入到bean对应的属性中;<br>3.如果bean实现了BeanNameAware接口,Spring将bean的ID传递给setBean-Name()方法;<br>4.如果bean实现了BeanFactoryAware接口,Spring将调用setBeanFactory()方法,将BeanFactory容器实例传入;<br>5.如果bean实现了ApplicationContextAware接口,Spring将调用setApplicationContext()方法,将bean所在的应用上下文的引用传入进来;<br>6.如果bean实现了BeanPostProcessor接口,Spring将调用它们的post-ProcessBeforeInitialization()方法;<br>7.如果bean实现了InitializingBean接口,Spring将调用它们的after-PropertiesSet()方法。类似地,如果bean使用init-method声明了初始化方法,该方法也会被调用;<br>8.如果bean实现了BeanPostProcessor接口,Spring将调用它们的post-ProcessAfterInitialization()方法;<br>9.此时,bean已经准备就绪,可以被应用程序使用了,它们将一直驻留在应用上下文中,直到该应用上下文被销毁;<br>10.如果bean实现了DisposableBean接口,Spring将调用它的destroy()接口方法。同样,如果bean使用destroy-method声明了销毁方法,该方法也会被调用。
<p>1) Bean的建立,由BeanFactory读取Bean定义文件,并创建Bean实例; <br>2) 执行Bean的属性注入,Setter注入; <br>3) 如果Bean类实现了org.springframework.beans.factory.BeanNameAware接口,则执行其setBeanName方法; <br>4) 如果Bean类实现了org.springframework.beans.factory.BeanFactoryAware接口,则执行其setBeanFactory方法; <br>5) 如果容器中有实现org.springframework.beans.factory.BeanPostProcessors接口的实例,则任何Bean在初始化之前都会执行这个实例的processBeforeInitialization()方法; <br>6) 如果Bean类实现了org.springframework.beans.factory.InitializingBean接口,则执行其afterPropertiesSet()方法; <br>7) 调用Bean的初始化方法”init-method” (!!注意,init-method方法没有参数); <br>8) 如果容器中有实现org.springframework.beans.factory.BeanPostProcessors接口的实例,则任何Bean在初始化之后都会执行这个实例的processAfterInitialization()方法; <br>9) 使用Bean做一些业务逻辑…. <br>10) 使用完,容器关闭,如果Bean类实现了org.springframework.beans.factory.DisposableBean接口,则执行它的destroy()方法; <br>11) 在容器关闭时,可以在Bean定义文件中使用“destory-method”定义的方法,销毁Bean (!!注意,destory-method方法没有参数);</p><p>ApplicationContext中bean的生命周期也是类似的。</p>
作用域
单例(Singleton):在整个应用中,只创建bean的一个实例。
对无状态的bean则应该使用singleton作用域
无状态则不保存信息,是线程安全的,可以共享
原型(Prototype):每次注入或者通过Spring应用上下文获取的时候,都会创建一个新的bean实例。
当一个Bean被设置为prototype 后Spring就不会对一个bean的整个生命周期负责,容器在初始化、配置、装饰或者是装配完一个prototype实例后,将它交给客户端,随后就对该prototype实例不闻不问了
对有状态的bean应该使用prototype作用域
所谓有状态就是该bean有保存信息的能力,不能共享,否则会造成线程安全问题
会话(Session):在Web应用中,为每个会话创建一个bean实例。
请求(Rquest):在Web应用中,为每个请求创建一个bean实例。
在默认情况下,Spring应用上下文中所有bean都是作为以单例(singleton)的形式创建的。
声明Bean
注解(自动检测)
@Component 组件,没有明确的角色(都可以用)
@Service 在业务逻辑层使用
@Repository 在数据访问层使用
@Controller 在展现层使用(MVC -> Spring MVC)使用
Spring支持将@Named(<b>Java依赖注入规范</b>)作为@Component注解的替代方案。两者之间有一些细微的差异,但是在大多数场景中,它们是可以互相替换的。
需要在applicationContext.xml中声明<contex:component-scan...>一项,指明Spring容器扫描组件的包目录。
<span><span style="font-size:14px;"><span style="color:#333333;"></span><span style="color:#ff0000;background-color:rgb(255,204,204);"><strong>自动检测配置,也是springmvc中最牛的一项功能。只要一个配置<context:component-scan base-package="">,b</strong></span></span></span>
<p style="font-family:Arial, 'Microsoft YaHei';">
<span><span style="font-size:14px;background-color:rgb(255,204,204);"><span style="color:#ff0000;"><strong>ase-package属性指定要自动检测扫描的包。</strong></span></span></span></p>
<h2>基于xml配置Bean<br>(<span style="font-size:18px;">需要提供setter方法</span>)</h2>
<div class="cnblogs_code">
<pre><span style="color: #0000ff;"><</span><span style="color: #800000;">bean </span><span style="color: #ff0000;">id</span><span style="color: #0000ff;">="userDao"</span><span style="color: #ff0000;"> class</span><span style="color: #0000ff;">="com.baobaotao.anno.UserDao"</span><span style="color: #0000ff;">/></span></pre>
</div>
(工厂方法注入)
静态工厂
public class CarFactory {<br> public <font color="#c41230"><b>static</b></font> Car createHongQiCar(){<br> Car car = new Car();<br> car.setBrand("红旗CA72");<br> return car;<br> }<br> <br> public static Car createCar(){<br> Car car = new Car();<br> return car;<br> }<br>}
<pre> <span style="color: #0000ff;"><</span><span style="color: #800000;">bean </span><span style="color: #ff0000;">id</span><span style="color: #0000ff;">="car6"</span><span style="color: #ff0000;"> class</span><span style="color: #0000ff;">="com.baobaotao.ditype.CarFactory"</span><span style="color: #ff0000;">
factory-method</span><span style="color: #0000ff;">="createCar"</span><span style="color: #0000ff;">></</span><span style="color: #800000;">bean</span><span style="color: #0000ff;">></span></pre>
实例工厂
public class CarFactory {<br> public Car createHongQiCar(){<br> Car car = new Car();<br> car.setBrand("红旗CA72");<br> return car;<br> }<br> <br> public static Car createCar(){<br> Car car = new Car();<br> return car;<br> }<br>}
<pre> <span style="color: #008000;"><!--</span><span style="color: #008000;"> 工厂方法</span><span style="color: #008000;">--></span>
<span style="color: #0000ff;"><</span><span style="color: #800000;">bean </span><span style="color: #ff0000;">id</span><span style="color: #0000ff;">="carFactory"</span><span style="color: #ff0000;"> class</span><span style="color: #0000ff;">="com.baobaotao.ditype.CarFactory"</span> <span style="color: #0000ff;">/></span>
<span style="color: #0000ff;"><</span><span style="color: #800000;">bean </span><span style="color: #ff0000;">id</span><span style="color: #0000ff;">="car5"</span><span style="color: #ff0000;"> factory-bean</span><span style="color: #0000ff;">="carFactory"</span><span style="color: #ff0000;"> factory-method</span><span style="color: #0000ff;">="createHongQiCar"</span><span style="color: #0000ff;">></span>
<span style="color: #0000ff;"></</span><span style="color: #800000;">bean</span><span style="color: #0000ff;">></span></pre>
<h2>基于java类提供Bean定义(配置类)<br></h2><h2>(<span style="font-size:18px;">需要提供setter方法</span>)</h2>
@Configuation
@Configuration标注在类上,相当于把该类作为spring的xml配置文件中的<beans>,作用为:配置spring容器(应用上下文)
][
@Configuration启动容器+@Bean注册Bean,@Bean下管理bean的生命周期
@Configuration
<br>public class TestConfiguration {
<br> public TestConfiguration() {
<br> System.out.println("TestConfiguration容器启动初始化。。。");
<br> }
<br>
<br> // @Bean注解注册bean,同时可以指定初始化和销毁方法
<br> // @Bean(name="testBean",initMethod="start",destroyMethod="cleanUp")
<br> @Bean
<br> @Scope("prototype")
<br> public TestBean testBean() {
<br> return new TestBean();
<br> }
<br>}
(1)、@Bean注解在返回实例的方法上,如果未通过@Bean指定bean的名称,则默认与标注的方法名相同;
<br>(2)、@Bean注解默认作用域为单例singleton作用域,可通过@Scope(“prototype”)设置为原型作用域;
<br>(3)、既然@Bean的作用是注册bean对象,那么完全可以使用@Component、@Controller、@Service、@Ripository等注解注册bean,当然需要配置@ComponentScan注解进行自动扫描。
@Configuration启动容器+@Component注册Bean
配置类的注册方式
配置类的注册方式是将其传递给 AnnotationConfigApplicationContext 构造函数
<br>复制代码
<br>public static void main(String[] args) {
<br>
<br> // @Configuration注解的spring容器加载方式,用AnnotationConfigApplicationContext替换ClassPathXmlApplicationContext
<br> ApplicationContext context = new AnnotationConfigApplicationContext(TestConfiguration.class);
<br>
<br> //获取bean
<br> TestBean tb = (TestBean) context.getBean("testBean");
<br> tb.sayHello();
<br> }
public static void main(String[] args) {
<br> ApplicationContext ctx = new AnnotationConfigApplicationContext();
<br> ctx.register(AppContext.class)
<br>}
配置Web应用程序(web.xml中配置AnnotationConfigApplicationContext)
之前
<web-app>
<br> <context-param>
<br> <param-name>contextConfigLocation</param-name>
<br> <param-value>/WEB-INF/applicationContext.xml</param-value>
<br> </context-param>
<br> <listener>
<br> <listener-class>
<br> org.springframework.web.context.ContextLoaderListener
<br> </listener-class>
<br> </listener>
<br> <servlet>
<br> <servlet-name>sampleServlet</servlet-name>
<br> <servlet-class>
<br> org.springframework.web.servlet.DispatcherServlet
<br> </servlet-class>
<br> </servlet>
<br>
<br>...
<br></web-app>
之后
<web-app>
<br> <context-param>
<br> <param-name>contextClass</param-name>
<br> <param-value>
<br> org.springframework.web.context.
<br> support.AnnotationConfigWebApplicationContext
<br> </param-value>
<br> </context-param>
<br> <context-param>
<br> <param-name>contextConfigLocation</param-name>
<br> <param-value>
<br> demo.AppContext
<br> </param-value>
<br> </context-param>
<br> <listener>
<br> <listener-class>
<br> org.springframework.web.context.ContextLoaderListener
<br> </listener-class>
<br> </listener>
<br> <servlet>
<br> <servlet-name>sampleServlet</servlet-name>
<br> <servlet-class>
<br> org.springframework.web.servlet.DispatcherServlet
<br> </servlet-class>
<br> <init-param>
<br> <param-name>contextClass</param-name>
<br> <param-value>
<br> org.springframework.web.context.
<br> support.AnnotationConfigWebApplicationContext
<br> </param-value>
<br> </init-param>
<br> </servlet>
<br>
<br>...
<br></web-app>
您要将 web.xml 中的上述代码更改为使用 AnnotationConfigApplicationContext 类。切记,XmlWebApplicationContext 是 Spring 为 Web 应用程序使用的默认上下文实现,因此您永远不必在您的web.xml 文件中显式指定这个上下文类。现在,您将使用基于 Java 的配置,因此在配置 Web 应用程序时,需要在web.xml 文件中指定 AnnotationConfigApplicationContext 类。现在定义了 AnnotationConfigWebApplicationContext 上下文类,并将其作为上下文参数和 servlet 元素的一部分。上下文配置位置现在指向 AppContext 配置类。
@Configuation总结
@Configuation等价于<Beans></Beans>
<br>
<br> @Bean等价于<Bean></Bean>
<br>
<br> @ComponentScan等价于<context:component-scan base-package="com.dxz.demo"/>
组合多个配置类
在@configuration中引入spring的xml配置文件
@Configuration
<br>@ImportResource("classpath:applicationContext-configuration.xml")
<br>public class WebConfig {
<br>}
在@configuration中引入其它注解配置
@Configuration
<br>@ImportResource("classpath:applicationContext-configuration.xml")
<br>@Import(TestConfiguration.class)
<br>public class WebConfig {
<br>}
@configuration嵌套(嵌套的Configuration必须是静态类)
@Configuration
<br>@ComponentScan(basePackages = "com.dxz.demo.configuration3")
<br>public class TestConfiguration {
<br> public TestConfiguration() {
<br> System.out.println("TestConfiguration容器启动初始化。。。");
<br> }
<br>
<br> @Configuration
<br> static class DatabaseConfig {
<br> @Bean
<br> DataSource dataSource() {
<br> return new DataSource();
<br> }
<br> }
<br>}
http://www.cnblogs.com/duanxz/p/7493276.html
https://blog.csdn.net/isea533/article/details/78072133?locationNum=7&fps=1
@Configuration 注解:<br><br>@Target(ElementType.TYPE)<br><br>@Retention(RetentionPolicy.RUNTIME)<br><br>@Documented<br><br>@Component<br><br>public @interface Configuration {<br><br> String value() default "";<br><br>}<br><br>从定义来看, @Configuration 注解本质上还是 @Component,因此 <context:component-scan/> 或者 @ComponentScan 都能处理@Configuration 注解的类。
依赖注入<br>(<strong><span style="color:#FF0000;">所有的属性必须有setter</span></strong>)
属性注入
通过setXxx()方法注入Bean的属性值或依赖对象
注入简单值
<span style="color:#008080;"><</span><span style="color:#3F7F7F;">property</span><span style="color:#7F007F;">name</span>=<em><span style="color:#2A00FF;">"name"</span></em><span style="color:#7F007F;">value</span>=<em><span style="color:#2A00FF;">"</span><span style="color:#2A00FF;">陈冠希"</span></em><span style="color:#008080;">></</span><span style="color:#3F7F7F;">property</span><span style="color:#008080;">></span>
注入其他bean
<span style="color:#008080;"><</span><span style="color:#3F7F7F;">property</span><span style="color:#7F007F;">name</span>=<em><span style="color:#2A00FF;">"address"</span></em><span style="color:#7F007F;">ref</span>=<em><span style="color:#2A00FF;">"address"</span></em><span style="color:#008080;">></</span><span style="color:#3F7F7F;">property</span><span style="color:#008080;">></span>
注入数组
<span style="color:#008080;"><</span><span style="color:#3F7F7F;">property</span><span style="color:#7F007F;"> name</span>=<em><span style="color:#2A00FF;">"books"</span></em><span style="color:#008080;">></span><br> <span style="color:#008080;"><</span><span style="color:#3F7F7F;">array</span><span style="color:#008080;">></span><br><p> <span style="color:#008080;"><</span><span style="color:#3F7F7F;">value</span><span style="color:#008080;">></span>小白书<span style="color:#008080;"></</span><span style="color:#3F7F7F;">value</span><span style="color:#008080;">></span></p><br><p> <span style="color:#008080;"><</span><span style="color:#3F7F7F;">value</span><span style="color:#008080;">></span>白皮书<span style="color:#008080;"></</span><span style="color:#3F7F7F;">value</span><span style="color:#008080;">></span></p><br><p> <span style="color:#008080;"><</span><span style="color:#3F7F7F;">value</span><span style="color:#008080;">></span>把妹秘籍<span style="color:#008080;"></</span><span style="color:#3F7F7F;">value</span><span style="color:#008080;">></span></p><br><p> <span style="color:#008080;"></</span><span style="color:#3F7F7F;">array</span><span style="color:#008080;">><br></span> <span style="color:#008080;"></</span><span style="color:#3F7F7F;">property</span><span style="color:#008080;">></span><br><span style="color:#008080;"></span></p>
注入集合
注入list
<p> <span style="color:#008080;"><</span><span style="color:#3F7F7F;">property</span><span style="color:#7F007F;">name</span>=<em><span style="color:#2A00FF;">"courses"</span></em><span style="color:#008080;">></span></p><br><p> <span style="color:#008080;"><</span><span style="color:#3F7F7F;">list</span><span style="color:#008080;">></span></p><br><p> <span style="color:#008080;"><</span><span style="color:#3F7F7F;">value</span><span style="color:#008080;">></span>java从入门到精通<span style="color:#008080;"></</span><span style="color:#3F7F7F;">value</span><span style="color:#008080;">></span></p><br><p> <span style="color:#008080;"><</span><span style="color:#3F7F7F;">value</span><span style="color:#008080;">></span>java从精通到精辟<span style="color:#008080;"></</span><span style="color:#3F7F7F;">value</span><span style="color:#008080;">></span></p><br><p> <span style="color:#008080;"></</span><span style="color:#3F7F7F;">list</span><span style="color:#008080;">></span></p><br><p> <span style="color:#008080;"></</span><span style="color:#3F7F7F;">property</span><span style="color:#008080;">></span></p>
注入set
<p> <span style="color:#3F5FBF;"><!-- Set </span><span style="color:#3F5FBF;">注入 --></span></p><br><p> <span style="color:#008080;"><</span><span style="color:#3F7F7F;">property</span><span style="color:#7F007F;">name</span>=<em><span style="color:#2A00FF;">"games"</span></em><span style="color:#008080;">></span></p><br><p> <span style="color:#008080;"><</span><span style="color:#3F7F7F;">set</span><span style="color:#008080;">></span></p><br><p> <span style="color:#008080;"><</span><span style="color:#3F7F7F;">value</span><span style="color:#008080;">></span>王者荣耀<span style="color:#008080;"></</span><span style="color:#3F7F7F;">value</span><span style="color:#008080;">></span></p><br><p> <span style="color:#008080;"><</span><span style="color:#3F7F7F;">value</span><span style="color:#008080;">></span>LOL<span style="color:#008080;"></</span><span style="color:#3F7F7F;">value</span><span style="color:#008080;">></span></p><br><p> <span style="color:#008080;"><</span><span style="color:#3F7F7F;">value</span><span style="color:#008080;">></span><u>dota</u><span style="color:#008080;"></</span><span style="color:#3F7F7F;">value</span><span style="color:#008080;">></span></p><br><p> <span style="color:#008080;"></</span><span style="color:#3F7F7F;">set</span><span style="color:#008080;">></span></p>
注入map
<span style="color:#008080;"><</span><span style="color:#3F7F7F;">property</span><span style="color:#7F007F;">name</span>=<em><span style="color:#2A00FF;">"cards"</span></em><span style="color:#008080;">></span><br><p> <span style="color:#008080;"><</span><span style="color:#3F7F7F;">map</span><span style="color:#008080;">></span></p><br><p> <span style="color:#008080;"><</span><span style="color:#3F7F7F;">entry</span><span style="color:#008080;">></span></p><br><p> <span style="color:#008080;"><</span><span style="color:#3F7F7F;">key</span><span style="color:#008080;">><</span><span style="color:#3F7F7F;">value</span><span style="color:#008080;">></span>ICBC<span style="color:#008080;"></</span><span style="color:#3F7F7F;">value</span><span style="color:#008080;">></</span><span style="color:#3F7F7F;">key</span><span style="color:#008080;">></span></p><br><p> <span style="color:#008080;"><</span><span style="color:#3F7F7F;">value</span><span style="color:#008080;">></span>工商银行<span style="color:#008080;"></</span><span style="color:#3F7F7F;">value</span><span style="color:#008080;">></span></p><br><p> <span style="color:#008080;"></</span><span style="color:#3F7F7F;">entry</span><span style="color:#008080;">></span> </p><br><p> <span style="color:#008080;"><</span><span style="color:#3F7F7F;">entry</span><span style="color:#7F007F;">key</span>=<em><span style="color:#2A00FF;">"ABC"</span></em><span style="color:#008080;">></span></p><br><p> <span style="color:#008080;"><</span><span style="color:#3F7F7F;">value</span><span style="color:#008080;">></span>农业银行<span style="color:#008080;"></</span><span style="color:#3F7F7F;">value</span><span style="color:#008080;">></span></p><br><p> <span style="color:#008080;"></</span><span style="color:#3F7F7F;">entry</span><span style="color:#008080;">></span> </p><br><p> <span style="color:#008080;"></</span><span style="color:#3F7F7F;">map</span><span style="color:#008080;">></span></p><br><p> <span style="color:#008080;"></</span><span style="color:#3F7F7F;">property</span><span style="color:#008080;">></span></p>
注入空值
<span style="color:#008080;"><</span><span style="color:#3F7F7F;">property</span><span style="color:#7F007F;">name</span>=<em><span style="color:#2A00FF;">"wife"</span></em><span style="color:#008080;">><</span><span style="color:#3F7F7F;">null</span><span style="color:#008080;">/></</span><span style="color:#3F7F7F;">property</span><span style="color:#008080;">></span>
注入Properties
<span style="color:#008080;"><</span><span style="color:#3F7F7F;">property</span><span style="color:#7F007F;">name</span>=<em><span style="color:#2A00FF;">"properties"</span></em><span style="color:#008080;">></span><br><p> <span style="color:#008080;"><</span><span style="color:#3F7F7F;">props</span><span style="color:#008080;">></span></p><br><p> <span style="color:#008080;"><</span><span style="color:#3F7F7F;">prop</span><span style="color:#7F007F;">key</span>=<em><span style="color:#2A00FF;">"driver"</span></em><span style="color:#008080;">></span>com.mysql.jdbc.Driver<span style="color:#008080;"></</span><span style="color:#3F7F7F;">prop</span><span style="color:#008080;">></span></p><br><p> <span style="color:#008080;"><</span><span style="color:#3F7F7F;">prop</span><span style="color:#7F007F;">key</span>=<em><span style="color:#2A00FF;">"url"</span></em><span style="color:#008080;">></span>jdbc:mysql://<u>localhost</u>:3306/<u>mybatis</u><span style="color:#008080;"></</span><span style="color:#3F7F7F;">prop</span><span style="color:#008080;">></span></p><br><p> <span style="color:#008080;"><</span><span style="color:#3F7F7F;">prop</span><span style="color:#7F007F;">key</span>=<em><span style="color:#2A00FF;">"username"</span></em><span style="color:#008080;">></span>root<span style="color:#008080;"></</span><span style="color:#3F7F7F;">prop</span><span style="color:#008080;">></span></p><br><p> <span style="color:#008080;"><</span><span style="color:#3F7F7F;">prop</span><span style="color:#7F007F;">key</span>=<em><span style="color:#2A00FF;">"password"</span></em><span style="color:#008080;">></span>root<span style="color:#008080;"></</span><span style="color:#3F7F7F;">prop</span><span style="color:#008080;">></span></p><br><p> <span style="color:#008080;"></</span><span style="color:#3F7F7F;">props</span><span style="color:#008080;">></span> </p><br><p> <span style="color:#008080;"></</span><span style="color:#3F7F7F;">property</span><span style="color:#008080;">></span></p>
<ul><li><span style="font-size:16px;">属性过多时,构造函数变的臃肿可怕</span></li><li><span style="font-size:16px;">构造函数注入灵活性不强,有时需要为属性注入null值</span></li><li><span style="font-size:16px;">多个构造函数时,配置上产生歧义,复杂度升高</span></li><li><span style="font-size:16px;">构造函数不利于类的继承和扩展</span></li><li><span style="font-size:16px;">构造函数注入会引起循环依赖的问题</span></li></ul>
构造器注入<br>
使用构造函数注入的前提是Bean必须提供带参数的构造函数
<pre> <span style="color: #0000ff;"><</span><span style="color: #800000;">constructor-arg </span><span style="color: #ff0000;">ref</span><span style="color: #0000ff;">="logDao"</span><span style="color: #0000ff;">></</span><span style="color: #800000;">constructor-arg</span><span style="color: #0000ff;">></span></pre>
<ul><li><span style="font-size:16px;">构造函数保证重要属性预先设置</span></li><li><span style="font-size:16px;">无需提供每个属性Setter方法,减少类的方法个数</span></li><li><span style="font-size:16px;">可更好的封装类变量,避免外部错误调用</span></li></ul>
在Spring创建对象的过程中,把对象依赖的属性注入到类中。
装配<br>
概念
<span><span style="font-size:14px;">创建<b>应用对象之间协作关系的行为</b>称为装配。也就是说当</span></span><span><span style="font-size:14px;">一个对象的属性是另一个对象时,实例化时,需要为这个对象属性进行实例化。这就是装配。如果一个对象只通过接口来表明依赖</span></span><span><span style="font-size:14px;"><span style="color:#333333;">关系,那么这种依赖就能够在对象本身毫不知情的情况下,用不同的具体实现进行切换。</span></span></span>
<span style="font-size:18px;">装配的类型</span>
no:顾名思义, 显式指明不使用Spring的自动装配功能
byName:根据属性和组件的名称匹配关系来实现bean的自动装配
byType:根据属性和组件的类型匹配关系来实现bean的自动装配,有多个适合类型的对象时装配失败
constructor:与byType类似是根据类型进行自动装配,但是要求待装配的bean有相应的构造函数
在constructor模式下,存在单个实例则优先按类型进行参数匹配(无论名称是否匹配),当存在多个类型相同实例时,按名称优先匹配,如果没有找到对应名称,则注入失败,此时可以使用autowire-candidate=”false” 过滤来解决。
autodetect:<span><span style="font-size:14px;"><span style="color:#333333;"></span><span style="color:#6600cc;">autodetect是constructor与byTy</span></span></span>
<p style="font-family:Arial, 'Microsoft YaHei';">
<span><span style="font-size:14px;"><span style="color:#6600cc;">pe的组合,会先进行constructor,如果不成功,再进行byType</span><span style="color:#333333;">。</span></span></span></p>
自动装配
基于注解的自动装配<br><span><span style="font-size:14px;">配置文件中配置<br><context:annotation-config /></span></span>
@Autowired Spring提供的注解<br>在属性上不需要setter方法<br>
<span><span style="font-size:14px;"><span style="color:#333333;"></span><span style="color:#ff0000;">@Autowired注解是byType类</span></span></span><br><p style="font-family:Arial, 'Microsoft YaHei';"><br><span><span style="font-size:14px;"><span style="color:#ff0000;">型的,这个注解可以用在属性上面,setter方面上面以及构造器上面。使用这个注解时,就不需要在类中为属性添加setter方法</span></span></span></p><br><p style="font-family:Arial, 'Microsoft YaHei';"><br><span><span style="font-size:14px;"><span style="color:#ff0000;">了。但是这个属性是强制性的,也就是说必须得装配上,如果没有找到合适的bean能够装配上,就会抛出异常。这时可以使用requir</span></span></span></p><br><p style="font-family:Arial, 'Microsoft YaHei';"><br><span><span style="font-size:14px;"><span style="color:#ff0000;">ed=false来允许可以不被装配上,默认值为true。</span><span style="color:#333333;"></span></span></span></p>
<span><span style="font-size:14px;"><span><span style="color:#ff0000;">另一种情况是同时有多个bean是一个类型</span></span></span></span><br><p style="font-family:Arial, 'Microsoft YaHei';"><br><span><span style="font-size:14px;"><span style="color:#ff0000;"><span>的,</span>也会抛出这个异常。此时需要进一步明确要装配哪一个Bean,这时可以<b>组合使用@Qualifier</b>注解,值为Bean的名字即可。</span></span></span></p>
@Qualifier
@Qualifier注解限定Bean的名称
<span><span style="font-size:14px;"><span style="color:#ff0000;"></span><span style="color:#333333;">@Qu</span></span></span><span><span style="font-size:14px;">alifier注解使用byName进行装配,这样可以在多个类型一样的bean中,明确使用哪一个名字的bean来进行装配。@Qualifier注解起</span></span><br><p style="font-family:Arial, 'Microsoft YaHei';"><span><span style="font-size:14px;"><span style="color:#333333;">到了缩小自动装配候选bean的范围的作用。</span></span></span></p>
@Inject 是JSR-330提供的注解
按类型匹配注入的Bean的,只不过它没有required属性。必须强制装配,否则报错。可以与@Named一起使用
<span><span style="font-size:14px;"><span style="color:#333333;">@Named</span></span></span>是JSR-330提供的注解
<span><span style="font-size:14px;">使用byName进行装配</span></span>
<span><span style="font-size:14px;"><span style="color:#333333;">两套自动装配的注解组合</span></span></span>
<span><span style="font-size:14px;"><span style="color:#333333;"></span><span style="color:#000000;background-color:rgb(255,255,153);">@Autowired与@Qualifier是spring提供的,@Inject与@Named是java ee的</span></span></span>
@Resource 是JSR-250提供的注解
@Resource要求提供一个Bean名称的属性,如果属性为空,则自动采用标注处的变量名或方法名作为Bean的名称。
如果@Resource未指定"value"属性,则也可以根据属性方法得到需要注入的Bean名称。@Resource则按名称匹配注入Bean。(类似于Xml中使用<span style="background-color: #ffff00;"><constructor-arg ref="logDao"></constructor-arg>或者</span><span style="background-color: #ffff00;"><property name="logDao" ref="logDao"></property>进行注入,如果使用了@Autowired或者Resource等,这不需要在定义Bean时使用属性注入和构造方法注入了)</span>
装配顺序
<div><div>如果同时指定了name和type,则从Spring上下文中找到唯一匹配的bean进行装配,找不到则抛出异常<br><br> 如果指定了name,则从上下文中查找名称(id)匹配的bean进行装配,找不到则抛出异常<br><br>如果指定了type,则从上下文中找到类型匹配的唯一bean进行装配,找不到或者找到多个,都会抛出异常<br><br>如果既没有指定name,又没有指定type,则自动按照byName方式进行装配;如果没有匹配,则回退为一个原始类型进行匹配,如果匹配则自动装配;</div></div>
@Inject注解来源于Java依赖注入规范
@value
作用:对简单类型的属性自动注入<br>
@Value接收一个String的值,该值指定了将要被注入到内置的java类型属性值
@Value会与properties文件结合使用
SpEL
<pre class="prettyprint" name="code"><code class="hljs java has-numbering"> <span class="hljs-comment">//SpEL表达方式,其中代表xml配置文件中的id值configProperties</span>
<span class="hljs-annotation">@Value</span>(<span class="hljs-string">"#{configProperties['jdbc.username']}"</span>)
<span class="hljs-keyword">private</span> String userName;</code></pre>
<pre class="prettyprint" name="code"><code class="language-xml hljs has-numbering"> <span class="hljs-comment"><!--基于SpEL表达式 配置多个properties id值为configProperties 提供java代码中使用 --></span><br> <b><span class="hljs-tag"><<span class="hljs-title">bean</span> <span class="hljs-attribute">id</span>=<span class="hljs-value">"configProperties"</span> <span class="hljs-attribute">class</span>=<span class="hljs-value">"org.springframework.beans.factory.config.PropertiesFactoryBean"</span>></span><br> <span class="hljs-tag"><<span class="hljs-title">property</span> <span class="hljs-attribute">name</span>=<span class="hljs-value">"locations"</span>></span><br> <span class="hljs-tag"><<span class="hljs-title">list</span>></span><br> <span class="hljs-tag"><<span class="hljs-title">value</span>></span>classpath:/conf/jdbc.properties<span class="hljs-tag"></<span class="hljs-title">value</span>></span><br> <span class="hljs-tag"></<span class="hljs-title">list</span>></span><br> <span class="hljs-tag"></<span class="hljs-title">property</span>></span><br> <span class="hljs-tag"></<span class="hljs-title">bean</span>></span><br></b><br> <span class="hljs-comment"><!--基于SpEL表达式 配置单个properties --></span><br> <span class="hljs-comment"><b><util:properties id="configProperties" location="classpath:conf/jdbc.properties"/></b></span></code></pre>
占位符
<pre class="prettyprint" name="code"><code class="hljs java has-numbering"> <span class="hljs-comment">//占位符方式</span>
<span class="hljs-annotation">@Value</span>(<span class="hljs-string">"${jdbc.url}"</span>)
<span class="hljs-keyword">private</span> String url;</code></pre>
<pre class="prettyprint" name="code"><code class="language-xml hljs has-numbering"> <span class="hljs-comment"><!--基于占位符方式 配置单个properties --></span><br> <b> <span class="hljs-comment"><context:property-placeholder location="conf/jdbc.properties"/></span></b><br> <span class="hljs-comment"><!--基于占位符方式 配置多个properties --></span><br> <b> <span class="hljs-tag"><<span class="hljs-title">bean</span> <span class="hljs-attribute">id</span>=<span class="hljs-value">"propertyConfigurer"</span> <span class="hljs-attribute">class</span>=<span class="hljs-value">"org.springframework.beans.factory.config.PreferencesPlaceholderConfigurer"</span>></span><br> <span class="hljs-tag"><<span class="hljs-title">property</span> <span class="hljs-attribute">name</span>=<span class="hljs-value">"location"</span> <span class="hljs-attribute">value</span>=<span class="hljs-value">"conf/jdbc.properties"</span>/></span><br> <span class="hljs-tag"></<span class="hljs-title">bean</span>></span></b></code></pre>
基于xml的自动装配
<span><span style="font-size:14px;">装配的bean必须是唯一与属性进行吻合的,不能多也不能少,有且只有一个可以进行装配的bean,才能自动装配成功。否则会</span></span><br><p style="font-family:Arial, 'Microsoft YaHei';color:rgb(51,51,51);"><span><span style="font-size:14px;">抛出异常。如果要统一所有bean的自动装配类型,可以在<b><beans>标签中配置default-autowire</b>属性。当然如果配置了autowire属</span></span></p><br><p style="font-family:Arial, 'Microsoft YaHei';color:rgb(51,51,51);"><span><span style="font-size:14px;">性,我们依然可以手动装配属性,手动装配会覆盖自动装配。</span></span></p>
自动装配依赖对象 <br><p> <br></p> <br><p> <beanid=“foo”class=“...Foo” autowire=“autowire type”></p>
概念
<span><span style="font-size:14px;"><span style="color:#ff0000;">开发人员不必知道具体要装配哪个bean的引用,这个识别的工作会由spring来完成。<br>在传统的依赖</span></span></span><span><span style="font-size:14px;"><span style="color:#ff0000;">注入配置中,我们必须要明确要给属性装配哪一个bean的引用,一旦bean很多,就不好维护了</span><span style="color:#333333;">。基于这样的场景,</span><span style="color:#ff0000;">spring使用注解</span></span></span><br><p style="font-family:Arial, 'Microsoft YaHei';"><span><span style="font-size:14px;"><span style="color:#ff0000;">来进行自动装配,解决这个问题。自动装配就是开发人员不必知道具体要装配哪个bean的引用,这个识别的工作会由spring来完</span></span></span></p><br><p style="font-family:Arial, 'Microsoft YaHei';"><span><span style="font-size:14px;"><span style="color:#ff0000;">成。与自动装配配合的还有“自动检测”,这 个动作会自动识别哪些类需要被配置成bean,进而来进行装配。这样我们就明白了,<b>自</b></span></span></span></p><b><br></b><p style="font-family:Arial, 'Microsoft YaHei';"><b><span><span style="font-size:14px;"><span style="color:#ff0000;">动装配是为了将依赖注入“自动化”的一个简化配置的操作。</span></span></span></b></p>
<font color="#c41230"><b>自动向Bean注入依赖</b></font>
手工装配依赖对象
* 在xml配置文件中,通过在bean节点下配置
<p> <br></p>
属性注入
通过setXxx()方法注入Bean的属性值或依赖对象
注入简单值
<span style="color:#008080;"><</span><span style="color:#3F7F7F;">property</span><span style="color:#7F007F;">name</span>=<em><span style="color:#2A00FF;">"name"</span></em><span style="color:#7F007F;">value</span>=<em><span style="color:#2A00FF;">"</span><span style="color:#2A00FF;">陈冠希"</span></em><span style="color:#008080;">></</span><span style="color:#3F7F7F;">property</span><span style="color:#008080;">></span>
注入其他bean
<span style="color:#008080;"><</span><span style="color:#3F7F7F;">property</span><span style="color:#7F007F;">name</span>=<em><span style="color:#2A00FF;">"address"</span></em><span style="color:#7F007F;">ref</span>=<em><span style="color:#2A00FF;">"address"</span></em><span style="color:#008080;">></</span><span style="color:#3F7F7F;">property</span><span style="color:#008080;">></span>
注入数组
<span style="color:#008080;"><</span><span style="color:#3F7F7F;">property</span><span style="color:#7F007F;"> name</span>=<em><span style="color:#2A00FF;">"books"</span></em><span style="color:#008080;">></span><br> <span style="color:#008080;"><</span><span style="color:#3F7F7F;">array</span><span style="color:#008080;">></span><br><p> <span style="color:#008080;"><</span><span style="color:#3F7F7F;">value</span><span style="color:#008080;">></span>小白书<span style="color:#008080;"></</span><span style="color:#3F7F7F;">value</span><span style="color:#008080;">></span></p><br><p> <span style="color:#008080;"><</span><span style="color:#3F7F7F;">value</span><span style="color:#008080;">></span>白皮书<span style="color:#008080;"></</span><span style="color:#3F7F7F;">value</span><span style="color:#008080;">></span></p><br><p> <span style="color:#008080;"><</span><span style="color:#3F7F7F;">value</span><span style="color:#008080;">></span>把妹秘籍<span style="color:#008080;"></</span><span style="color:#3F7F7F;">value</span><span style="color:#008080;">></span></p><br><p> <span style="color:#008080;"></</span><span style="color:#3F7F7F;">array</span><span style="color:#008080;">><br></span> <span style="color:#008080;"></</span><span style="color:#3F7F7F;">property</span><span style="color:#008080;">></span><br><span style="color:#008080;"></span></p>
注入集合
注入list
<p> <span style="color:#008080;"><</span><span style="color:#3F7F7F;">property</span><span style="color:#7F007F;">name</span>=<em><span style="color:#2A00FF;">"courses"</span></em><span style="color:#008080;">></span></p><br><p> <span style="color:#008080;"><</span><span style="color:#3F7F7F;">list</span><span style="color:#008080;">></span></p><br><p> <span style="color:#008080;"><</span><span style="color:#3F7F7F;">value</span><span style="color:#008080;">></span>java从入门到精通<span style="color:#008080;"></</span><span style="color:#3F7F7F;">value</span><span style="color:#008080;">></span></p><br><p> <span style="color:#008080;"><</span><span style="color:#3F7F7F;">value</span><span style="color:#008080;">></span>java从精通到精辟<span style="color:#008080;"></</span><span style="color:#3F7F7F;">value</span><span style="color:#008080;">></span></p><br><p> <span style="color:#008080;"></</span><span style="color:#3F7F7F;">list</span><span style="color:#008080;">></span></p><br><p> <span style="color:#008080;"></</span><span style="color:#3F7F7F;">property</span><span style="color:#008080;">></span></p>
注入set
<p> <span style="color:#3F5FBF;"><!-- Set </span><span style="color:#3F5FBF;">注入 --></span></p><br><p> <span style="color:#008080;"><</span><span style="color:#3F7F7F;">property</span><span style="color:#7F007F;">name</span>=<em><span style="color:#2A00FF;">"games"</span></em><span style="color:#008080;">></span></p><br><p> <span style="color:#008080;"><</span><span style="color:#3F7F7F;">set</span><span style="color:#008080;">></span></p><br><p> <span style="color:#008080;"><</span><span style="color:#3F7F7F;">value</span><span style="color:#008080;">></span>王者荣耀<span style="color:#008080;"></</span><span style="color:#3F7F7F;">value</span><span style="color:#008080;">></span></p><br><p> <span style="color:#008080;"><</span><span style="color:#3F7F7F;">value</span><span style="color:#008080;">></span>LOL<span style="color:#008080;"></</span><span style="color:#3F7F7F;">value</span><span style="color:#008080;">></span></p><br><p> <span style="color:#008080;"><</span><span style="color:#3F7F7F;">value</span><span style="color:#008080;">></span><u>dota</u><span style="color:#008080;"></</span><span style="color:#3F7F7F;">value</span><span style="color:#008080;">></span></p><br><p> <span style="color:#008080;"></</span><span style="color:#3F7F7F;">set</span><span style="color:#008080;">></span></p>
注入map
<span style="color:#008080;"><</span><span style="color:#3F7F7F;">property</span><span style="color:#7F007F;">name</span>=<em><span style="color:#2A00FF;">"cards"</span></em><span style="color:#008080;">></span><br><p> <span style="color:#008080;"><</span><span style="color:#3F7F7F;">map</span><span style="color:#008080;">></span></p><br><p> <span style="color:#008080;"><</span><span style="color:#3F7F7F;">entry</span><span style="color:#008080;">></span></p><br><p> <span style="color:#008080;"><</span><span style="color:#3F7F7F;">key</span><span style="color:#008080;">><</span><span style="color:#3F7F7F;">value</span><span style="color:#008080;">></span>ICBC<span style="color:#008080;"></</span><span style="color:#3F7F7F;">value</span><span style="color:#008080;">></</span><span style="color:#3F7F7F;">key</span><span style="color:#008080;">></span></p><br><p> <span style="color:#008080;"><</span><span style="color:#3F7F7F;">value</span><span style="color:#008080;">></span>工商银行<span style="color:#008080;"></</span><span style="color:#3F7F7F;">value</span><span style="color:#008080;">></span></p><br><p> <span style="color:#008080;"></</span><span style="color:#3F7F7F;">entry</span><span style="color:#008080;">></span> </p><br><p> <span style="color:#008080;"><</span><span style="color:#3F7F7F;">entry</span><span style="color:#7F007F;">key</span>=<em><span style="color:#2A00FF;">"ABC"</span></em><span style="color:#008080;">></span></p><br><p> <span style="color:#008080;"><</span><span style="color:#3F7F7F;">value</span><span style="color:#008080;">></span>农业银行<span style="color:#008080;"></</span><span style="color:#3F7F7F;">value</span><span style="color:#008080;">></span></p><br><p> <span style="color:#008080;"></</span><span style="color:#3F7F7F;">entry</span><span style="color:#008080;">></span> </p><br><p> <span style="color:#008080;"></</span><span style="color:#3F7F7F;">map</span><span style="color:#008080;">></span></p><br><p> <span style="color:#008080;"></</span><span style="color:#3F7F7F;">property</span><span style="color:#008080;">></span></p>
注入空值
<span style="color:#008080;"><</span><span style="color:#3F7F7F;">property</span><span style="color:#7F007F;">name</span>=<em><span style="color:#2A00FF;">"wife"</span></em><span style="color:#008080;">><</span><span style="color:#3F7F7F;">null</span><span style="color:#008080;">/></</span><span style="color:#3F7F7F;">property</span><span style="color:#008080;">></span>
注入Properties
<span style="color:#008080;"><</span><span style="color:#3F7F7F;">property</span><span style="color:#7F007F;">name</span>=<em><span style="color:#2A00FF;">"properties"</span></em><span style="color:#008080;">></span><br><p> <span style="color:#008080;"><</span><span style="color:#3F7F7F;">props</span><span style="color:#008080;">></span></p><br><p> <span style="color:#008080;"><</span><span style="color:#3F7F7F;">prop</span><span style="color:#7F007F;">key</span>=<em><span style="color:#2A00FF;">"driver"</span></em><span style="color:#008080;">></span>com.mysql.jdbc.Driver<span style="color:#008080;"></</span><span style="color:#3F7F7F;">prop</span><span style="color:#008080;">></span></p><br><p> <span style="color:#008080;"><</span><span style="color:#3F7F7F;">prop</span><span style="color:#7F007F;">key</span>=<em><span style="color:#2A00FF;">"url"</span></em><span style="color:#008080;">></span>jdbc:mysql://<u>localhost</u>:3306/<u>mybatis</u><span style="color:#008080;"></</span><span style="color:#3F7F7F;">prop</span><span style="color:#008080;">></span></p><br><p> <span style="color:#008080;"><</span><span style="color:#3F7F7F;">prop</span><span style="color:#7F007F;">key</span>=<em><span style="color:#2A00FF;">"username"</span></em><span style="color:#008080;">></span>root<span style="color:#008080;"></</span><span style="color:#3F7F7F;">prop</span><span style="color:#008080;">></span></p><br><p> <span style="color:#008080;"><</span><span style="color:#3F7F7F;">prop</span><span style="color:#7F007F;">key</span>=<em><span style="color:#2A00FF;">"password"</span></em><span style="color:#008080;">></span>root<span style="color:#008080;"></</span><span style="color:#3F7F7F;">prop</span><span style="color:#008080;">></span></p><br><p> <span style="color:#008080;"></</span><span style="color:#3F7F7F;">props</span><span style="color:#008080;">></span> </p><br><p> <span style="color:#008080;"></</span><span style="color:#3F7F7F;">property</span><span style="color:#008080;">></span></p>
<ul><li><span style="font-size:16px;">属性过多时,构造函数变的臃肿可怕</span></li><li><span style="font-size:16px;">构造函数注入灵活性不强,有时需要为属性注入null值</span></li><li><span style="font-size:16px;">多个构造函数时,配置上产生歧义,复杂度升高</span></li><li><span style="font-size:16px;">构造函数不利于类的继承和扩展</span></li><li><span style="font-size:16px;">构造函数注入会引起循环依赖的问题</span></li></ul>
构造函数注入
使用构造函数注入的前提是Bean必须提供带参数的构造函数
<pre> <span style="color: #0000ff;"><</span><span style="color: #800000;">constructor-arg </span><span style="color: #ff0000;">ref</span><span style="color: #0000ff;">="logDao"</span><span style="color: #0000ff;">></</span><span style="color: #800000;">constructor-arg</span><span style="color: #0000ff;">></span></pre>
<ul><li><span style="font-size:16px;">构造函数保证重要属性预先设置</span></li><li><span style="font-size:16px;">无需提供每个属性Setter方法,减少类的方法个数</span></li><li><span style="font-size:16px;">可更好的封装类变量,避免外部错误调用</span></li></ul>
静态工厂
public class CarFactory {<br> public <font color="#c41230"><b>static</b></font> Car createHongQiCar(){<br> Car car = new Car();<br> car.setBrand("红旗CA72");<br> return car;<br> }<br> <br> public static Car createCar(){<br> Car car = new Car();<br> return car;<br> }<br>}
<pre> <span style="color: #0000ff;"><</span><span style="color: #800000;">bean </span><span style="color: #ff0000;">id</span><span style="color: #0000ff;">="car6"</span><span style="color: #ff0000;"> class</span><span style="color: #0000ff;">="com.baobaotao.ditype.CarFactory"</span><span style="color: #ff0000;">
factory-method</span><span style="color: #0000ff;">="createCar"</span><span style="color: #0000ff;">></</span><span style="color: #800000;">bean</span><span style="color: #0000ff;">></span></pre>
实例工厂
public class CarFactory {<br> public Car createHongQiCar(){<br> Car car = new Car();<br> car.setBrand("红旗CA72");<br> return car;<br> }<br> <br> public static Car createCar(){<br> Car car = new Car();<br> return car;<br> }<br>}
<pre> <span style="color: #008000;"><!--</span><span style="color: #008000;"> 工厂方法</span><span style="color: #008000;">--></span>
<span style="color: #0000ff;"><</span><span style="color: #800000;">bean </span><span style="color: #ff0000;">id</span><span style="color: #0000ff;">="carFactory"</span><span style="color: #ff0000;"> class</span><span style="color: #0000ff;">="com.baobaotao.ditype.CarFactory"</span> <span style="color: #0000ff;">/></span>
<span style="color: #0000ff;"><</span><span style="color: #800000;">bean </span><span style="color: #ff0000;">id</span><span style="color: #0000ff;">="car5"</span><span style="color: #ff0000;"> factory-bean</span><span style="color: #0000ff;">="carFactory"</span><span style="color: #ff0000;"> factory-method</span><span style="color: #0000ff;">="createHongQiCar"</span><span style="color: #0000ff;">></span>
<span style="color: #0000ff;"></</span><span style="color: #800000;">bean</span><span style="color: #0000ff;">></span></pre>
* 在java代码中使用@Autowired或@Resource注解方式进行装配
注解注入<br><span><span style="font-size:14px;">配置文件中配置<br><context:annotation-config /></span></span>
@Autowired Spring提供的注解
<span><span style="font-size:14px;"><span style="color:#333333;"></span><span style="color:#ff0000;">@Autowired注解是byType类</span></span></span><br><p style="font-family:Arial, 'Microsoft YaHei';"><br><span><span style="font-size:14px;"><span style="color:#ff0000;">型的,这个注解可以用在属性上面,setter方面上面以及构造器上面。使用这个注解时,就不需要在类中为属性添加setter方法</span></span></span></p><br><p style="font-family:Arial, 'Microsoft YaHei';"><br><span><span style="font-size:14px;"><span style="color:#ff0000;">了。但是这个属性是强制性的,也就是说必须得装配上,如果没有找到合适的bean能够装配上,就会抛出异常。这时可以使用requir</span></span></span></p><br><p style="font-family:Arial, 'Microsoft YaHei';"><br><span><span style="font-size:14px;"><span style="color:#ff0000;">ed=false来允许可以不被装配上,默认值为true。</span><span style="color:#333333;"></span></span></span></p>
<span><span style="font-size:14px;"><span><span style="color:#ff0000;">另一种情况是同时有多个bean是一个类型</span></span></span></span><br><p style="font-family:Arial, 'Microsoft YaHei';"><br><span><span style="font-size:14px;"><span style="color:#ff0000;"><span>的,</span>也会抛出这个异常。此时需要进一步明确要装配哪一个Bean,这时可以<b>组合使用@Qualifier</b>注解,值为Bean的名字即可。</span></span></span></p>
@Qualifier
@Qualifier注解限定Bean的名称
<span><span style="font-size:14px;"><span style="color:#ff0000;"></span><span style="color:#333333;">@Qu</span></span></span><span><span style="font-size:14px;">alifier注解使用byName进行装配,这样可以在多个类型一样的bean中,明确使用哪一个名字的bean来进行装配。@Qualifier注解起</span></span><br><p style="font-family:Arial, 'Microsoft YaHei';"><span><span style="font-size:14px;"><span style="color:#333333;">到了缩小自动装配候选bean的范围的作用。</span></span></span></p>
@Inject 是JSR-330提供的注解
按类型匹配注入的Bean的,只不过它没有required属性。必须强制装配,否则报错。可以与@Named一起使用
<span><span style="font-size:14px;"><span style="color:#333333;">@Named</span></span></span>是JSR-330提供的注解
<span><span style="font-size:14px;">使用byName进行装配</span></span>
<span><span style="font-size:14px;"><span style="color:#333333;">两套自动装配的注解组合</span></span></span>
<span><span style="font-size:14px;"><span style="color:#333333;"></span><span style="color:#000000;background-color:rgb(255,255,153);">@Autowired与@Qualifier是spring提供的,@Inject与@Named是java ee的</span></span></span>
@Resource 是JSR-250提供的注解
@Resource要求提供一个Bean名称的属性,如果属性为空,则自动采用标注处的变量名或方法名作为Bean的名称。
如果@Resource未指定"value"属性,则也可以根据属性方法得到需要注入的Bean名称。@Resource则按名称匹配注入Bean。(类似于Xml中使用<span style="background-color: #ffff00;"><constructor-arg ref="logDao"></constructor-arg>或者</span><span style="background-color: #ffff00;"><property name="logDao" ref="logDao"></property>进行注入,如果使用了@Autowired或者Resource等,这不需要在定义Bean时使用属性注入和构造方法注入了)</span>
@Resourced标签是按照<b>bean的名字</b>来进行注入的,如果我们没有在使用@Resource时指定bean的名字,同时Spring容器中又没有该名字的bean,这时候@Resource就会退化为@Autowired即按照类型注入,这样就有可能违背了使用@Resource的初衷。所以建议在使用@Resource时都显示指定一下bean的名字@Resource(name="xxx") <br>
@Inject注解来源于Java依赖注入规范
装配Bean
使用表达式装配
spEL的基本原理
在spEL值上执行操作
在spEL中筛选集合
自动装配bean属性
4种类型的自动装配
默认的自动装配
混合使用自动装配和显示装配
使用注解装配
使用@Autowired
借助@Inject实现基于标准的自动装配
在注解中使用表达式
自动检测Bean
为自动检测标注bean
过滤组件扫描
依赖注入和装配的关系
依赖注入的本质就是装配,装配是依赖注入的具体行为。
<span><span style="font-size:14px;"><bean id="hello" class="com.maven.Hello"><constructor-arg value="hello" /></bean>这是使用构造器注入来装配bean。</span></span>
bean的延迟加载
在某些情况下,我们可能希望把bean的创建延迟到使用阶段,以免消耗不必要的内存,Spring也非常自愿地支持了延迟bean的初始化。因此可以在配置文件中定义bean的延迟加载,这样Spring容器将会延迟bean的创建直到真正需要时才创建。通常情况下,从一个已创建的bean引用另外一个bean,或者显示查找一个bean时会触发bean的创建即使配置了延迟属性,因此如果Spring容器在启动时创建了那些设为延长加载的bean实例,不必惊讶,可能那些延迟初始化的bean可能被注入到一个非延迟创建且作用域为singleton的bean。<font color="#ff9999"><b>在xml文件中使用bean的lazy-init属性可以配置改bean是否延迟加载,如果需要配置整个xml文件的bean都延迟加载则使用defualt-lazy-init属性,请注意lazy-init属性会覆盖defualt-lazy-init属性。</b></font>
<pre class="prettyprint" name="code"><code class="hljs xml has-numbering"><span class="hljs-tag"> <span class="hljs-attribute">default-lazy-init</span>=<span class="hljs-value">"true"</span></span></code></pre>
<pre class="prettyprint" name="code"><code class="hljs xml has-numbering"> <span class="hljs-comment"><!-- lazy-init="false" 表示非延长加载--></span>
<span class="hljs-tag"><<span class="hljs-title">bean</span> <span class="hljs-attribute">name</span>=<span class="hljs-value">"accountDao"</span> <span class="hljs-attribute">lazy-init</span>=<span class="hljs-value">"false"</span>
<span class="hljs-attribute">class</span>=<span class="hljs-value">"com.zejian.spring.springIoc.dao.impl.AccountDaoImpl"</span>/></span></code></pre>
<h5 id="contextcomponent-scan与contextannotation-config"><font color="#BE1921"><context:component-scan/>与<context:annotation-config/></font></h5>
使用@Autowired、@Resource、@Value等自动装配注解时用<context:annotation-config/>进行注解驱动注册,从而使注解生效。实际上这样<context:annotation-config/>一条配置,它的作用是式地向Spring 容器注册<b>AutowiredAnnotationBeanPostProcessor</b>、<b>CommonAnnotationBeanPostProcessor</b>、<b>PersistenceAnnotationBeanPostProcessor</b>以及<b>RequiredAnnotationBeanPostProcessor </b>这 4 个BeanPostProcessor。
使用@Service、@Component、@Controller 、@Repository等注解时,需要在xml配置文件声明包扫描驱动<context:component-scan/>,它的作用是Spring容器在启动时会启动注解驱动去扫描对应包下的bean对象并将创建它们的实例,这样我们就无法一个个地进行bean配置声明了,极大简化了编程代码。请注意,<font color="#c41230"><b>当spring的xml配置文件出了<context:component-scan/>后,<context:annotation-config/>就可以退休了,因为<context:component-scan/>已包含了<context:annotation-config/>的功能了。在大部分情况下,都会直接使用<context:component-scan/>进行注解驱动注册和包扫描功能。</b></font>
spring事务
常见问题
事务不生效
Bean是否是代理对象
入口函数是否是public的
数据库是否支持事务(Mysql的MyIsam不支持事务)
切点是否配置正确
如果使用了SpringMVC,SpringMVC容器有没有重复扫描
容器装配顺序造成的事务无法回滚<br><br>两个文件的加载是有先后顺序的。Spring会<b>优先加载在context-param标签</b>中引入的文件,也就是这里的mybatis-context.xml,然后<b>再加载application-context.xml</b>。在加载mybatis-context.xml时,Spring就会装配@Controlle和@Service的容器,并把他们放到Spring的容器中来;接着加载application-context.xml,这时Spring也会把@Service和@Controller注解的实例装配到Spring容器中,但是这时由于先前在加载mybatis-context.xml时已经装配过@Service和@Controller的容器,所以这时新装配的容器会覆盖掉先前的容器,所以Spring容器中就只剩下后来装配的容器了。<br><br>这种装配顺序就会引来一个问题,由于我的事务是在mybatis-context.xml文件中声明的,所以这个文件中的Service容器是带有事务能力的;但是这里装配的Service容器会被后来application-context.xml中的Service容器替换掉,而application-context.xml中的Service容器是没有事务能力的,所以最后造成在Spring容器中的Service是没有事务能力的。<br>要解决这个问题,只需只在mybatis-context.xml中生成Service的带事务的容器,而在application-context.xml中就不生成Service容器了。又由于Service是Controller类中的一个属性,所以在装配Controller前要先装配好Service。<br><br>为了达到以上目的,由于是先加载myabtis-context.xml,后加载application-context.xml,所以我们只需在myabtis-context.xml装配Service,不装配Controller;然后在application-context.xml中装配Controller,不装配Service就可以了。
业务代码是否吞掉异常
基本概念
事务的目的
数据资源所承载的系统状态始终处于'正确'的状态
事务特性(ACID)
原子性(Atomicity)
一致性(Consistency)
<font color="#f15a23"><b>隔离性(Isolation)</b></font><br>
4种隔离级别
Read Uncommitted (读取未提交内容)
Read Committed (读取提交内容)
Repeatable (可重读)
Serializable(可串行化)
几个问题
脏读
<strong><span style="color:#009900;">事务 A 读取了事务 B 未提交的数据,并在这个基础上又做了其他操作。</span></strong>
不可重复读
<strong><span style="color:#009900;">事务 A 读取了事务 B</span></strong><strong><span style="color:#009900;"> 已提交的更改数据。</span></strong>
幻读
<strong><span style="color:#009900;">事务 A 读取了事务 B 已提交</span></strong><strong><span style="color:#009900;">的新增数据。</span></strong>
持久性(Durability)
事务的7种传播行为<br>事务的传播性一般在<b>事务嵌套</b>时候使用
PROPAGATION_REQUIRED
<span style="line-height:1.5;font-size:10pt;">如果没有,就新建一个事务;如果有,就加入当前事务。</span>
<img src="https://img-blog.csdn.net/20160823150749215" alt="">
<span style="font-size:14px;">内部事务, 抛了异常, 那么外部事务)如果没有特殊配置<b>此异常时事务提交</b> (即 <br>+MyCheckedException的用法), 那么整个事务是一定要 rollback 的</span>
PROPAGATION_REQUIRES_NEW
<span style="line-height:1.5;font-size:10pt;">如果没有,就新建一个事务;如果有,就将当前事务挂起且只</span><span style="line-height:1.5;font-size:10pt;">直到新的事务提交或者回滚才恢复执行。意思就是创建了一个新事务,它和原来的事务没有任何关系了。</span>
<br>
新起一个事务,那么就是存在两个不同的事务。如果 内部已经提交,那么 外部事务<br>失败回滚,内部事务是不会回滚的。如果内部事务失败回滚,如果他抛出的异常被 <br>外部事务捕获,外部事务事务仍然可能提交(主要看B抛出的异常是不是A会回滚的异常)。
PROPAGATION_NESTED
<span style="line-height:1.5;font-size:10pt;"><span>如果没有,就新建一个事务;如果有,</span>就<span>在当前事务中嵌套其他事务。</span>也就是传说中的“嵌套事务”了,所嵌套的子事务与主事务之间是有关联的(当主事务提交或回滚,子事务也会提交或回滚,反之,子事务不影响主事务)。</span>
内嵌事务并不是一个独立的事务,它依赖于外部事务的存在,只有通过外部的事务提交,才能引起内部事务的提交,嵌套的子事务不能单独提交。
<span style="font-size:14px;"><span style="color:#ff0000;">它是已经存在事务的一个真正的子事务. 潜套事务开始执行时, 它将取得一个 savepoint. 如果这个嵌套事务失败, 我们将回滚到此 savepoint. 潜套事务是外部事务的一部分, 只有外部事务结束后它才会被提交. <br></span></span>
内部事务rollback了外部事务的两种选择
<code class="language-java hljs"><li><div class="hljs-ln-code"><div class="hljs-ln-line"> <span class="hljs-function"><span class="hljs-keyword">void</span> <span class="hljs-title">methodA</span><span class="hljs-params">()</span> </span>{ </div></div></li><li><div class="hljs-ln-code"><div class="hljs-ln-line"> <span class="hljs-keyword">try</span> { </div></div></li><li><div class="hljs-ln-code"><div class="hljs-ln-line"> ServiceB.methodB(); </div></div></li><li><div class="hljs-ln-code"><div class="hljs-ln-line"> } <span class="hljs-keyword">catch</span> (SomeException) { </div></div></li><li><div class="hljs-ln-code"><div class="hljs-ln-line"> <span class="hljs-comment">// 执行其他业务, 如 ServiceC.methodC(); </span></div></div></li><li><div class="hljs-ln-code"><div class="hljs-ln-line"> } </div></div></li><li><div class="hljs-ln-code"><div class="hljs-ln-line"> } </div></div></li></code>
<span style="font-size:14px;">它起到了分支执行的效果, 如果 ServiceB.methodB 失败, 那么执行
ServiceC.methodC(), 而 ServiceB.methodB 已经回滚到它执行之前的 SavePoint,
所以不会产生脏数据(相当于此方法从未执行过), 这种特性可以用在某些特殊的业务中, </span>
<span style="font-size:14px;">代码不做任何修改, 那么如果内部事务(即 ServiceB#methodB) rollback, 那么首先 ServiceB.methodB 回滚到它执行之前的 SavePoint(在任何情况下都会如此), <br><br> 外部事务(即 ServiceA#methodA) 将根据具体的配置决定自己是 commit 还是 <b>rollback (+MyCheckedException). </b><br></span>
PROPAGATION_NOT_SUPPORTED
<span style="line-height:1.5;font-size:10pt;">如果没有,就</span><span style="line-height:1.5;font-size:10pt;">以</span><span style="line-height:1.5;font-size:10pt;">非事务方式执行;如果有,就</span><span style="line-height:1.5;font-size:10pt;"></span><span style="line-height:1.5;font-size:10pt;">将当前事务挂起</span>(<span style="line-height:1.5;font-size:10pt;">这种方式非常强硬,</span><span style="line-height:1.5;font-size:10pt;">没有就没有,有我也不支持你,把你挂起来,不鸟你。</span>)
PROPAGATION_SUPPORTS
<span style="line-height:1.5;font-size:10pt;">如果没有,就以非事务方式执行;如果有,就使用当前事务</span>(<span style="line-height:1.5;font-size:10pt;">这种方式非常随意,没有就没有,有就有</span>)
PROPAGATION_MANDATORY
<span style="line-height:1.5;font-size:10pt;">如果没有,就抛出异常;如果有,就使用当前事务。</span>
PROPAGATION_NEVER
<span style="line-height:1.5;font-size:10pt;">如果没有,就<span style="line-height:1.5;font-size:10pt;">以</span><span style="line-height:1.5;font-size:10pt;">非事务方式执行;如果有,就抛出异常。</span></span>
Spring 解决的只是方法之间的事务传播
<span style="line-height:1.5;font-size:10pt;"><strong><span style="color:#009900;">事务超时(Transaction Timeout</span></strong></span>
<span style="line-height:1.5;font-size:10pt;"></span><span style="line-height:1.5;font-size:10pt;">为了解决事务时间太长,消耗太多的资源,所以故意给事务设置一个最大时常,如果超过了,就回滚事务。</span>
<span style="line-height:1.5;font-size:10pt;"><strong><span style="color:#009900;">只读事务(Readonly Transaction)</span></strong></span>
<span style="line-height:1.5;font-size:10pt;"></span><span style="line-height:1.5;font-size:10pt;">为了解决事务时间太长,消耗太多的资源,所以故意给事务设置一个最大时常,如果超过了,就回滚事务。</span>
事务的回滚规则<br>
默认回滚RuntimeException异常,而Checked Exception异常不回滚,捕获异常不抛出也不会回滚,但可以强制事务回滚:TransactionAspectSupport.currentTransactionStatus().isRollbackOnly();
spring事务的核心接口<br>
三个核心接口实现编程式事务
TransactionDefinition(定义事务(事务的规则))
<pre class="displaycode">public interface TransactionDefinition{
int getIsolationLevel();
int getPropagationBehavior();
int getTimeout();
boolean isReadOnly();
}</pre>
它包含了事务的静态属性,比如:事务传播行为、超时时间等等。
Spring 为我们提供了一个默认的实现类:DefaultTransactionDefinition
PlatformTransactionManager(<b>事务管理器</b>)<br>(执行具体的事务操作(回滚或提交))
<pre class="displaycode">Public interface PlatformTransactionManager{
TransactionStatus getTransaction(TransactionDefinition definition)
throws TransactionException;
void commit(TransactionStatus status)throws TransactionException;
void rollback(TransactionStatus status)throws TransactionException;
}</pre>
DataSourceTransactionManager:适用于使用JDBC和iBatis进行数据持久化操作的情况。
HibernateTransactionManager:适用于使用Hibernate进行数据持久化操作的情况。
JpaTransactionManager:适用于使用JPA进行数据持久化操作的情况。
另外还有JtaTransactionManager 、JdoTransactionManager、JmsTransactionManager等等。
如果我们使用JTA进行事务管理,我们可以通过 JNDI 和 Spring 的 JtaTransactionManager 来获取一个容器管理的
DataSource。JtaTransactionManager 不需要知道 DataSource
和其他特定的资源,因为它将使用容器提供的全局事务管理。而对于其他事务管理器,比如DataSourceTransactionManager,在定义时需要提供底层的数据源作为其属性,也就是
DataSource。与 HibernateTransactionManager 对应的是 SessionFactory,与
JpaTransactionManager 对应的是 EntityManagerFactory 等等。
TransactionStatus(运行着的事务的状态)
PlatformTransactionManager.getTransaction(…) 方法返回一个 TransactionStatus 对象。
<pre class="displaycode">public interface TransactionStatus{
boolean isNewTransaction();
void setRollbackOnly();
boolean isRollbackOnly();
}</pre>
事务管理的意义
“按照给定的事务规则来执行提交或者回滚操作”。
“给定的事务规则”就是用 TransactionDefinition 表示的,
“按照……来执行提交或者回滚操作”便是用 PlatformTransactionManager
而 TransactionStatus 用于表示一个运行着的事务的状态。
编程式事务
直接使用PlatformTransactionManager来进行编程式事务管理
使用框架底层API(JJDBC,Session)来进行事务控制
<pre class="displaycode">public class BankServiceImpl implements BankService {<br>private BankDao bankDao;<br>private TransactionDefinition txDefinition;<br>private PlatformTransactionManager txManager;<br>......<br>public boolean transfer(Long fromId, Long toId, double amount) {<br>TransactionStatus txStatus = txManager.getTransaction(txDefinition);<br>boolean result = false;<br>try {<br>result = bankDao.transfer(fromId, toId, amount);<br>txManager.commit(txStatus);<br>} catch (Exception e) {<br>result = false;<br>txManager.rollback(txStatus);<br>System.out.println("Transfer Error!");<br>}<br>return result;<br>}<br>}<br><br><bean id="bankService" class="footmark.spring.core.tx.programmatic.origin.BankServiceImpl">
<property name="bankDao" ref="bankDao"/>
<property name="txManager" ref="transactionManager"/>
<property name="txDefinition">
<bean class="org.springframework.transaction.support.DefaultTransactionDefinition">
<property name="propagationBehaviorName" value="PROPAGATION_REQUIRED"/>
</bean>
</property>
</bean></pre>
事务管理的代码散落在业务逻辑代码中,破坏了原有代码的条理性,并且每一个业务方法都包含了类似的启动事务、提交/回滚事务的样板代码。
直接使用TransactionTemplate来进行编程式事务管理
<div class="codesection">
<pre class="displaycode">public class BankServiceImpl implements BankService {
private BankDao bankDao;
private TransactionTemplate transactionTemplate;
......
public boolean transfer(final Long fromId, final Long toId, final double amount) {
return (Boolean) transactionTemplate.execute(new TransactionCallback(){
public Object doInTransaction(TransactionStatus status) {
Object result;
try {
result = bankDao.transfer(fromId, toId, amount);
} catch (Exception e) {
status.setRollbackOnly();
result = false;
System.out.println("Transfer Error!");
}
return result;
}
});
}
}</pre>
</div>
<p>相应的XML配置如下:</p>
<h5 id="N10127">清单 7. 基于 TransactionTemplate 的事务管理示例配置文件</h5>
<div class="codesection">
<pre class="displaycode"><bean id="bankService"
class="footmark.spring.core.tx.programmatic.template.BankServiceImpl">
<property name="bankDao" ref="bankDao"/>
<property name="transactionTemplate" ref="transactionTemplate"/>
</bean></pre>
</div>
创建基于SavePoint的嵌套事务
声明式事务<br>
配置方式
注解元数据驱动的声明式事务(@Transactional)
<br> <!-- 配置事务管理器 --><br><br> <bean id="transactionManager" <br><br> class="org.springframework.jdbc.datasource.DataSourceTransactionManager"><br><br> <property name="dataSource" ref="dataSource"></property><br><br> </bean><br><br> <br><br> <font color="#c41230"><b><!-- 启用事务注解 --><br><br> <tx:annotation-driven transaction-manager="transactionManager"/></b></font>
在需要使用事务的类上添加注解即可 @Transactional
<pre class="displaycode">@Transactional(propagation = Propagation.REQUIRED)<br>public boolean transfer(Long fromId, Long toId, double amount) {<br>return bankDao.transfer(fromId, toId, amount);<br>}</pre>
propagation:事务传播行为,<br> isolation:事务隔离级别定义;默认为“DEFAULT”<br> timeout:事务超时时间设置,单位为秒,默认-1,表示事务超时将依赖于底层事务系统;<br> readonly:事务只读设置,默认为false,表示不是只读;<br> rollbackfor:需要触发回滚的异常定义,可定义多个,以“,”分割,默认任何RuntimeException都将导致事务回滚,而任何Checked Exception将不导致事务回滚;<br> norollbackfor:不被触发进行回滚的 Exception(s);可定义多个,以“,”分割;
@Transactional 可以作用于接口、接口方法、类以及类方法上。当作用于类上时,该类的所有 public 方法将都具有该类型的事务属性,同时,我们也可以在方法级别使用该注解来覆盖类级别的定义。<br><br>虽然 @Transactional 注解可以作用于接口、接口方法、类以及类方法上,但是 Spring 建议不要在接口或者接口方法上使用该注解,因为这只有在使用基于接口的代理时它才会生效。另外, @Transactional 注解应该只被应用到 public 方法上,这是由 Spring AOP 的本质决定的。如果你在 protected、private 或者默认可见性的方法上使用 @Transactional 注解,这将被忽略,也不会抛出任何异常。
XML元数据驱动的声明式事务
<h5 id="N10151"> 基于 TransactionInterceptor和ProxyFactoryBean 的事务管理</h5>
<pre class="displaycode"><beans...><br>......<br><bean id="transactionInterceptor"<br>class="org.springframework.transaction.interceptor.<b>TransactionInterceptor</b>"><br><property name="<b>transactionManager</b>" ref="transactionManager"/><br><property name="<b>transactionAttributes</b>"><br><props><br><prop key="transfer">PROPAGATION_REQUIRED</prop><br></props><br></property><br></bean><br><bean id="bankServiceTarget"<br>class="footmark.spring.core.tx.declare.origin.BankServiceImpl"><br><property name="bankDao" ref="bankDao"/><br></bean><br><bean id="bankService"<br>class="org.springframework.aop.framework.<b>ProxyFactoryBean</b>"><br><property name="<b>target"</b> ref="bankServiceTarget"/><br><property name="<b>interceptorNames</b>"><br><list><br><idref bean="transactionInterceptor"/><br></list><br></property><br></bean><br>......<br></beans></pre>
TransactionInterceptor的两个主要属性
transactionManager(指定一个事务管理器,并将具体事务相关的操作委托给它)
Properties 类型的 transactionAttributes 属性(来定义事务规则)
来定义事务规则,该属性的每一个键值对中,键指定的是方法名,方法名可以使用通配符,而值就表示相应方法的所应用的事务属性。
事务的规则(<pre class="displaycode">传播行为 [,隔离级别] [,只读属性] [,超时属性] [不影响提交的异常] [,导致回滚的异常]</pre>)
传播行为是唯一必须设置的属性,其他都可以忽略,Spring为我们提供了合理的默认值。
传播行为的取值必须以“PROPAGATION_”开头,具体包括:PROPAGATION_MANDATORY、PROPAGATION_NESTED、PROPAGATION_NEVER、PROPAGATION_NOT_SUPPORTED、PROPAGATION_REQUIRED、PROPAGATION_REQUIRES_NEW、PROPAGATION_SUPPORTS,共七种取值。
隔离级别的取值必须以“ISOLATION_”开头,具体包括:ISOLATION_DEFAULT、ISOLATION_READ_COMMITTED、ISOLATION_READ_UNCOMMITTED、ISOLATION_REPEATABLE_READ、ISOLATION_SERIALIZABLE,共五种取值。
如果事务是只读的,那么我们可以指定只读属性,使用“readOnly”指定。否则我们不需要设置该属性。
超时属性的取值必须以“TIMEOUT_”开头,后面跟一个int类型的值,表示超时时间,单位是秒。
<ul class="ibm-bullet-list"><li>超时属性的取值必须以“TIMEOUT_”开头,后面跟一个int类型的值,表示超时时间,单位是秒。</li></ul>
不影响提交的异常是指,即使事务中抛出了这些类型的异常,事务任然正常提交。必须在每一个异常的名字前面加上“+”。异常的名字可以是类名的一部分。比如“+RuntimeException”、“+tion”等等。
导致回滚的异常是指,当事务中抛出这些类型的异常时,事务将回滚。必须在每一个异常的名字前面加上“-”。异常的名字可以是类名的全部或者部分,比如“-RuntimeException”、“-tion”等等。
示例
<pre class="displaycode"><property name="*Service"><br>PROPAGATION_REQUIRED,ISOLATION_READ_COMMITTED,TIMEOUT_20,<br>+AbcException,+DefException,-HijException<br></property></pre>
针对所有方法名以 Service 结尾的方法,使用 PROPAGATION_REQUIRED 事务传播行为,事务的隔离级别是
ISOLATION_READ_COMMITTED,超时时间为20秒,当事务抛出 AbcException 或者 DefException
类型的异常,则仍然提交,当抛出 HijException 类型的异常时必须回滚事务。这里没有指定"readOnly",表示事务不是只读的。
<pre class="displaycode"><property name="test">PROPAGATION_REQUIRED,readOnly</property></pre>
针对所有方法名为 test 的方法,使用 PROPAGATION_REQUIRED
事务传播行为,并且该事务是只读的。除此之外,其他的属性均使用默认值。比如,隔离级别和超时时间使用底层事务性资源的默认值,并且当发生未检查异常,则回滚事务,发生已检查异常则仍提交事务。
配置好了 TransactionInterceptor,我们还需要配置一个 ProxyFactoryBean 来组装 target
和advice。这也是典型的 Spring AOP 的做法。通过 ProxyFactoryBean
生成的代理类就是织入了事务管理逻辑后的目标类。
配置文件太多。我们必须针对每一个目标对象配置一个 ProxyFactoryBean;另外,虽然可以通过父子 Bean 的方式来复用
TransactionInterceptor 的配置,但是实际的复用几率也不高;这样,加上目标对象本身,每一个业务类可能需要对应三个
<bean/> 配置,随着业务类的增多,配置文件将会变得越来越庞大,管理配置文件又成了问题。
基于TransactionProxyFactoryBean的配置 (Spring 经典的声明式事务管理)<br>(TransactionInterceptor 和 ProxyFactoryBean 的配置合二为一)
<pre class="displaycode"><beans......><br>......<br><bean id="bankServiceTarget"<br>class="footmark.spring.core.tx.declare.classic.BankServiceImpl"><br><property name="bankDao" ref="bankDao"/><br></bean><br><bean id="bankService"<br>class="org.springframework.transaction.interceptor.TransactionProxyFactoryBean"><br><property name="<b>target</b>" ref="bankServiceTarget"/><br><property name="<b>transactionManager</b>" ref="transactionManager"/><br><property name="<b>transactionAttributes</b>"><br><props><br><prop key="transfer">PROPAGATION_REQUIRED</prop><br></props><br></property><br></bean><br>......<br></beans></pre>
基于<tx/>命名空间的配置
<pre class="displaycode"><beans......><br>......<br><bean id="bankService" <br>class="footmark.spring.core.tx.declare.namespace.BankServiceImpl"><br><property name="bankDao" ref="bankDao"/><br></bean><br><tx:advice id="bankAdvice" transaction-manager="transactionManager"><br><tx:attributes><br><tx:method name="transfer" propagation="REQUIRED"/><br></tx:attributes><br></tx:advice><br><br><aop:config><br><aop:pointcut id="bankPointcut" expression="execution(* *.transfer(..))"/><br><aop:advisor advice-ref="bankAdvice" pointcut-ref="bankPointcut"/><br></aop:config><br>......<br></beans></pre>
<br><tx:advice>定义事务通知,用于指定事务属性,其中“transaction-manager”属性指定事务管理器,并通过<tx:attributes>指定具体需要拦截的方法<br><br><tx:method>拦截方法,其中参数有:<br> name:方法名称,将匹配的方法注入事务管理,可用通配符<br> propagation:事务传播行为,<br> isolation:事务隔离级别定义;默认为“DEFAULT”<br> timeout:事务超时时间设置,单位为秒,默认-1,表示事务超时将依赖于底层事务系统;<br> read-only:事务只读设置,默认为false,表示不是只读;<br> rollback-for:需要触发回滚的异常定义,可定义多个,以“,”分割,默认任何RuntimeException都将导致事务回滚,而任何Checked Exception将不导致事务回滚;<br> no-rollback-for:不被触发进行回滚的 Exception(s);可定义多个,以“,”分割;<br><br><!-- 定义切入点,expression为切人点表达式,如下是指定impl包下的所有方法,具体以自身实际要求自定义 --><br><aop:config><br> <aop:pointcut expression="execution(* com.kaizhi.*.service.impl.*.*(..))" id="pointcut"/><br> <!--<aop:advisor>定义切入点,与通知,<font color="#c41230"><b>把tx与aop的配置关联,才是完整的声明事务配置</b></font> --><br> <aop:advisor advice-ref="advice" pointcut-ref="pointcut"/><br></aop:config> <br>
如果配置的事务管理器 Bean 的名字取值为“transactionManager”,则我们可以省略 <tx:advice> 的 transaction-manager 属性,因为该属性的默认值即为“transactionManager”。
利用切点表达式,一个配置可以匹配多个方法
基于BeanNameAutoProxyCreator的配置
<ol class="dp-xml"><li><span class="comments"><span style="color:#008200;"><!-- 配置事务拦截器--></span></span><span>
</span></li><li><strong><span style="color:#006699;"><span class="tag"><</span><span class="tag-name">bean</span></span></strong><span>
</span><span class="attribute"><span style="color:#ff0000;">id</span></span><span>=</span><span class="attribute-value"><span style="color:#0000ff;">"transactionInterceptor"</span></span><span>
</span></li><li><span class="attribute"><span style="color:#ff0000;">class</span></span><span>=</span><span class="attribute-value"><span style="color:#0000ff;">"org.springframework.transaction.interceptor.TransactionInterceptor"</span></span><span class="tag"><strong><span style="color:#006699;">></span></strong></span><span>
</span></li><li><span></span><span class="comments"><span style="color:#008200;"><!-- 事务拦截器bean需要依赖注入一个事务管理器 --></span></span><span>
</span></li><li><span></span><strong><span style="color:#006699;"><span class="tag"><</span><span class="tag-name">property</span></span></strong><span>
</span><span class="attribute"><span style="color:#ff0000;">name</span></span><span>=</span><span class="attribute-value"><span style="color:#0000ff;">"transactionManager"</span></span><span>
</span><span class="attribute"><span style="color:#ff0000;">ref</span></span><span>=</span><span class="attribute-value"><span style="color:#0000ff;">"transactionManager"</span></span><span class="tag"><strong><span style="color:#006699;">/></span></strong></span><span>
</span></li><li><span></span><strong><span style="color:#006699;"><span class="tag"><</span><span class="tag-name">property</span></span></strong><span>
</span><span class="attribute"><span style="color:#ff0000;">name</span></span><span>=</span><span class="attribute-value"><span style="color:#0000ff;">"transactionAttributes"</span></span><span class="tag"><strong><span style="color:#006699;">></span></strong></span><span>
</span></li><li><span></span><span class="comments"><span style="color:#008200;"><!-- 下面定义事务传播属性--></span></span><span>
</span></li><li><span></span><strong><span style="color:#006699;"><span class="tag"><</span><span class="tag-name">props</span><span class="tag">></span></span></strong><span>
</span></li><li><span></span><strong><span style="color:#006699;"><span class="tag"><</span><span class="tag-name">prop</span></span></strong><span>
</span><span class="attribute"><span style="color:#ff0000;">key</span></span><span>=</span><span class="attribute-value"><span style="color:#0000ff;">"insert*"</span></span><span class="tag"><strong><span style="color:#006699;">></span></strong></span><span>PROPAGATION_REQUIRED</span><strong><span style="color:#006699;"><span class="tag"></</span><span class="tag-name">prop</span><span class="tag">></span></span></strong><span>
</span></li><li><span></span><strong><span style="color:#006699;"><span class="tag"><</span><span class="tag-name">prop</span></span></strong><span>
</span><span class="attribute"><span style="color:#ff0000;">key</span></span><span>=</span><span class="attribute-value"><span style="color:#0000ff;">"find*"</span></span><span class="tag"><strong><span style="color:#006699;">></span></strong></span><span>PROPAGATION_REQUIRED,readOnly</span><strong><span style="color:#006699;"><span class="tag"></</span><span class="tag-name">prop</span><span class="tag">></span></span></strong><span>
</span></li><li><span></span><strong><span style="color:#006699;"><span class="tag"><</span><span class="tag-name">prop</span></span></strong><span>
</span><span class="attribute"><span style="color:#ff0000;">key</span></span><span>=</span><span class="attribute-value"><span style="color:#0000ff;">"*"</span></span><span class="tag"><strong><span style="color:#006699;">></span></strong></span><span>PROPAGATION_REQUIRED</span><strong><span style="color:#006699;"><span class="tag"></</span><span class="tag-name">prop</span><span class="tag">></span></span></strong><span>
</span></li><li><span></span><strong><span style="color:#006699;"><span class="tag"></</span><span class="tag-name">props</span><span class="tag">></span></span></strong><span>
</span></li><li><span></span><strong><span style="color:#006699;"><span class="tag"></</span><span class="tag-name">property</span><span class="tag">></span></span></strong><span>
</span></li><li><span></span><strong><span style="color:#006699;"><span class="tag"></</span><span class="tag-name">bean</span><span class="tag">></span></span></strong><span>
</span></li><li><span><!-- 定义BeanNameAutoProxyCreator,该bean是个bean后处理器,无需被引用,因此没有id属性 </span></li><li><span>这个bean后处理器,根据事务拦截器为目标bean自动创建事务代理 </span></li><li><span></span><strong><span style="color:#006699;"><span class="tag"><</span><span class="tag-name">bean</span></span></strong><span>
</span><span class="attribute"><span style="color:#ff0000;">class</span></span><span>=</span><span class="attribute-value"><span style="color:#0000ff;">"org.springframework.aop.framework.autoproxy.BeanNameAutoProxyCreator"</span></span><span class="tag"><strong><span style="color:#006699;">></span></strong></span><span>
</span></li><li><span>指定对满足哪些bean name的bean自动生成业务代理 --</span><span class="tag"><strong><span style="color:#006699;">></span></strong></span><span>
</span></li><li><strong><span style="color:#006699;"><span class="tag"><</span><span class="tag-name">property</span></span></strong><span>
</span><span class="attribute"><span style="color:#ff0000;">name</span></span><span>=</span><span class="attribute-value"><span style="color:#0000ff;">"beanNames"</span></span><span class="tag"><strong><span style="color:#006699;">></span></strong></span><span>
</span></li><li><span></span><span class="comments"><span style="color:#008200;"><!-- 下面是所有需要自动创建事务代理的bean--></span></span><span>
</span></li><li><span></span><strong><span style="color:#006699;"><span class="tag"><</span><span class="tag-name">list</span><span class="tag">></span></span></strong><span>
</span></li><li><span></span><strong><span style="color:#006699;"><span class="tag"><</span><span class="tag-name">value</span><span class="tag">></span></span></strong><span>personDao</span><strong><span style="color:#006699;"><span class="tag"></</span><span class="tag-name">value</span><span class="tag">></span></span></strong><span>
</span></li><li><span></span><strong><span style="color:#006699;"><span class="tag"></</span><span class="tag-name">list</span><span class="tag">></span></span></strong><span>
</span></li><li><span></span><span class="comments"><span style="color:#008200;"><!-- 此处可增加其他需要自动创建事务代理的bean--></span></span><span>
</span></li><li><span></span><strong><span style="color:#006699;"><span class="tag"></</span><span class="tag-name">property</span><span class="tag">></span></span></strong><span>
</span></li><li><span></span><span class="comments"><span style="color:#008200;"><!-- 下面定义BeanNameAutoProxyCreator所需的事务拦截器--></span></span><span>
</span></li><li><span></span><strong><span style="color:#006699;"><span class="tag"><</span><span class="tag-name">property</span></span></strong><span>
</span><span class="attribute"><span style="color:#ff0000;">name</span></span><span>=</span><span class="attribute-value"><span style="color:#0000ff;">"interceptorNames"</span></span><span class="tag"><strong><span style="color:#006699;">></span></strong></span><span>
</span></li><li><span></span><strong><span style="color:#006699;"><span class="tag"><</span><span class="tag-name">list</span><span class="tag">></span></span></strong><span>
</span></li><li><span></span><strong><span style="color:#006699;"><span class="tag"><</span><span class="tag-name">value</span><span class="tag">></span></span></strong><span>transactionInterceptor</span><strong><span style="color:#006699;"><span class="tag"></</span><span class="tag-name">value</span><span class="tag">></span></span></strong><span>
</span></li><li><span></span><span class="comments"><span style="color:#008200;"><!-- 此处可增加其他新的Interceptor --></span></span><span>
</span></li><li><span></span><strong><span style="color:#006699;"><span class="tag"></</span><span class="tag-name">list</span><span class="tag">></span></span></strong><span>
</span></li><li><span></span><strong><span style="color:#006699;"><span class="tag"></</span><span class="tag-name">property</span><span class="tag">></span></span></strong><span>
</span></li><li><span></span><strong><span style="color:#006699;"><span class="tag"></</span><span class="tag-name">bean</span><span class="tag">></span></span></strong></li></ol>
是个bean后处理器,<b>BeanNameAutoProxyCreator是个根据bean名生成自动代理的代理创建器(可以跟自己创建的拦截器一起用)</b>
MethodInterceptor 接口,在调用目标对象的方法时,就可以实现在调用方法之前、调用方法过程中、调用方法之后对其进行控制。
<pre class="prettyprint" name="code"><code class="hljs java has-numbering"> <span class="hljs-keyword">public</span> <span class="hljs-keyword">static</span> <span class="hljs-class"><span class="hljs-keyword">class</span> <span class="hljs-title">adviseMethodInterceptor</span> <span class="hljs-keyword">implements</span> <b><span class="hljs-title">MethodInterceptor</span></b>{</span><br> <span class="hljs-annotation">@Override</span><br> <span class="hljs-keyword">public</span> Object <b><span class="hljs-title">invoke</span></b>(MethodInvocation methodInvocation) <span class="hljs-keyword">throws</span> Throwable {<br><br> Object result=<span class="hljs-keyword">null</span>;<br> <span class="hljs-keyword">try</span>{<br> System.out.println(<span class="hljs-string">"方法执行之前:"</span>+methodInvocation.getMethod().toString());<br><br> result= <b>methodInvocation.proceed();</b><br><br> System.out.println(<span class="hljs-string">"方法执行之后:"</span>+methodInvocation.getMethod().toString());<br> System.out.println(<span class="hljs-string">"方法正常运行结果:"</span>+result);<br><br> <span class="hljs-keyword">return</span> result;<br><br> }<span class="hljs-keyword">catch</span> (Exception e){<br> System.out.println(<span class="hljs-string">"方法出现异常:"</span>+e.toString());<br> System.out.println(<span class="hljs-string">"方法运行Exception结果:"</span>+result);<br> <span class="hljs-keyword">return</span> result;<br> }<br><br> }<br> }</code></pre>
<pre class="prettyprint" name="code"><code class="hljs java has-numbering"> ProxyFactory proxyFactory=<span class="hljs-keyword">new</span> ProxyFactory();//创建一个代理对象<br> proxyFactory.setTarget(<span class="hljs-keyword">new</span> TestMethodInterceptor());//设置代理对象的目标对象<br> proxyFactory.addAdvice(<span class="hljs-keyword">new</span> adviseMethodInterceptor());//设置代理对象的方法拦截器<br><br> Object proxy = proxyFactory.getProxy();//得到生成的代理对象<br> TestMethodInterceptor methodInterceptor = (TestMethodInterceptor) proxy;<br><br> methodInterceptor.doSomeThing(<span class="hljs-string">"通过代理工厂设置代理对象,拦截代理方法"</span>);//调用方法</code></pre>
<bean id="<code class="hljs java has-numbering"><span class="hljs-class"><span class="hljs-title">adviseMethodInterceptor</span></span></code>" class="com.i2p.admin.interceptor.<code class="hljs java has-numbering"><span class="hljs-class"><span class="hljs-title">adviseMethodInterceptor</span></span></code>" /><br><br> <!-- 根据 Bean 的名字自动实现代理拦截 --><br> <bean<br> class="org.springframework.aop.framework.autoproxy.<b>BeanNameAutoProxyCreator</b>"><br> <property name="<b>interceptorNames</b>"><br> <list><br> <value>methodTimeAdvice</value><br> </list><br> </property><br> <property name="<b>beanNames</b>"><br> <list><br> <!-- 添加到其中的 Bean 自动就被代理拦截了(下面的是对应的bean的名称,那么当请求InnovatePartBorrowController任何一个方法都会执行MethodTimeAdvice里面的Invoke方法) --><br> <value>innovatePartBorrowController</value><br> </list><br> </property><br> </bean>
参数
beanNames
设置哪些bean需要自动生成代理
interceptorNames
指定事务拦截器,自动创建事务代理时,系统会根据这些事务拦截器的属性来生成对应的事务代理。
定义了两个org.springframework.aop.framework.autoproxy.BeanNameAutoProxyCreator,按照顺序分别计作A,B,A会为目标对象T生成代理对象P1,B会为P1生成代理对象P2,代理逻辑就变成: <br>
P2代理P1,P1代理T,而不是P2、P1都代理T。
<p>所以,调用T的方法时,应该先执行P1,但P2代理了P1,最终先执行P2,再执行P1,在执行T。</p>
<p>这种情况下,如果T的方法上有注解,只有P1能够拿到注解信息,P2是拿不到的。</p>
<p>所以,不要定义个多个org.springframework.aop.framework.autoproxy.BeanNameAutoProxyCreator的bean。</p>
实现原理
AOP
PlatformTransactionManager
建立在 AOP 的基础之上的。其本质是对方法前后进行拦截,然后在目标方法开始之前创建或者加入一个事务,在执行完目标方法之后根据执行情况提交或者回滚事务。<br>它将事务管理代码从业务方法中分离出来, 以声明的方式来实现事务管理.事务管理作为一种横切关注点,可以通过AOP方法模块化.Spring 通过 SpringAOP 框架支持声明式事务管理.
最细粒度只能作用到方法级别
编程式事物与声明式事物d不同点
Spring的编程式事务即在代码中使用编程的方式进行事务处理,可以做到比声明式事务更细粒度。有两种方式一是使用TransactionManager,另外就是TransactionTemplate。
1)Spring的声明式事务管理在底层是建立在AOP的基础之上的。其本质是对<strong>方法前后进行拦截</strong>,然后在目标方法开始之前创建或者加入一个事务,在执行完目标方法之后根据执行情况提交或者回滚事务。声明式事务最大的优点就是不需要通过编程的方式管理事务,这样就不需要在业务逻辑代码中掺杂事务管理的代码,只需在配置文件中做相关的事务规则声明(或通过等价的基于标注的方式),便可以将事务规则应用到业务逻辑中。因为事务管理本身就是一个典型的横切逻辑,正是AOP的用武之地。依赖注入容器为声明式事务管理提供了基础设施,使得Bean对于Spring框架而言是可管理的;而Spring AOP则是声明式事务管理的直接实现者。和编程式事务相比,声明式事务唯一不足地方是,后者的最细粒度只能作用到方法级别,无法做到像编程式事务那样可以作用到代码块级别。但是即便有这样的需求,也存在很多变通的方法,比如,可以将需要进行事务管理的代码块独立为方法等等。
基本框架
核心容器
Spring上下文
SpringAOP
SpringDAO
SpringORM
SpringWeb模块
SpringMVC框架
面向切面编程<br>(Aspect Oriented Programming)<br>
AOP术语<br>
AOP概念
<div><span style="font-size:10.5pt;color:#FF0000;">在</span><span style="font-size:10.5pt;color:#FF0000;">AOP</span><span style="font-size:10.5pt;color:#FF0000;">的编程方法中,主要在于对关注点的提起及抽象</span><span style="font-size:10.5pt;">。我们可以</span><span style="font-size:10.5pt;color:#FF0000;">把一个复杂的系统看作是由多个关注点来有机组合来实现</span><span style="font-size:10.5pt;">,一个典型的系统可能会包括几个方面的关注点,如核心业务逻辑、性能、数据存储、日志、授权、安全、线程及错误检查等,另外还有开发过程中的关注点,如易维护、易扩展等。把每个关注点与核心业务模块分离,作为单独的功能,横切几个核心业务模块,使得每份功能代码不再单独入侵到核心业务类的代码中,</span>即核心模块只需关注自己相关的业务,当需要外围业务(日志,权限,性能监测、事务控制)时,这些外围业务会通过一种特殊的技术自动应用到核心模块中,这些关注点有个特殊的名称,叫做“横切关注点”,</div>
关注点
<div><span style="font-size:10.5pt;">关注点就是我们要考察或解决的问题。如订单的处理,用户的验证、用户日志记录等都属于关注点</span><span style="font-size:10.5pt;">。</span></div>
核心关注点
<span style="font-size:10.5pt;">是指系统中的核心功能,即真正的商业逻辑。如在一个电子商务系统中,订单处理、客户管理、库存及物流管理都是属于系统中的核心关注点。</span>
横切关注点
<span style="font-size:10.5pt;">他们分散在每个各个模块中解决同一样的问题,跨越多个模块。如用户验证、日志管理、事务处理、数据缓存都属于横切关注点。 </span>
<em>Aspect</em> 切面
<span style="color:#E84C22"><span style="color:#FF0000;">切面是一个关注点的模块化</span>,这个关注点可能会横切多个对象和模块,事务管理是横切关注点的很好的例子。<br>切面是通知和切点的结合</span><span style="color:black">。通知和切点定义了切面的全部内容——它是什么,在何时何处完成其功能。</span>
切面优先级
目标方法前执行(”<b>进入</b>”)的通知函数,最高优先级的通知将会<b>先</b>执行,在执行在目标方法后执行(“<b>退出</b>”)的通知函数,最高优先级会<b>最后</b>执行。而对于在同一个切面定义的通知函数将会根据在类中的声明顺序执行。
实现org.springframework.core.Ordered 接口,该接口用于控制切面类的优先级,同时重写getOrder方法,定制返回值,<b>返回值(int 类型)越小优先级越大。</b>
通知(增强)Advice
<span style="color:black">增强是织入到目标类连接点上的一段程序代码,通知定义了切面要完成的</span><span style="color:#E84C22">工作</span><span style="color:black">以及何时使用(</span><span style="color:#E84C22">该什么时候执行</span><span style="color:black">),应该应用在某个方法被调用之前?之后?还是抛出异常时?等等。</span>
5种通知类型<br>
Before 前置通知<br>
在方法<b>调用之前</b>调用通知<br>
After 后置通知<br>
在方法<b>完成之后</b>调用通知,<font color="#c41230">无论方法执行成功与否</font>
After-returning 后置返回通知<br>
在方法执行<b>成功之后</b>调用通知<br>
可以通过returning = “returnVal”注明参数的名称而且必须与通知函数的参数名称相同
After-throwing 异常通知<br>
在方法<b>抛出异常后</b>进行通知
由throwing来声明一个接收异常信息的变量,同样异常通知也用于Joinpoint参数,需要时加上即可,
Around 环绕通知<br>
通知包裹了被通知的方法,在被通知的方法调用之前和调用之后执行自定义的行为
第一个参数必须是<b>ProceedingJoinPoint</b>,通过该对象的proceed()方法来执行目标函数,proceed()的返回值就是环绕通知的返回值。同样的,ProceedingJoinPoint对象也是可以获取目标对象的信息,如类名称,方法参数,方法名称等等。
5种通知上都可以使用JoinPoint参数,是Spring提供的静态变量,通过joinPoint 参数,可以获取目标对象的信息,如类名称,方法参数,方法名称等,,该参数是可选的。
JoinPoint <br>
<span style="font-family:Arial;font-size:14px;line-height:26px;"> java.lang.Object[] getArgs():获取连接点方法运行时的入参列表; </span><br style="font-family:Arial;line-height:26px;"><span style="font-family:Arial;font-size:14px;line-height:26px;"> Signature getSignature() :</span><span style="font-family:Arial;font-size:14px;line-height:26px;"><br> 获取封装了署名信息的对象,在该对象中可以获取到目标方法名,所属类的Class等信息; <br></span><pre class="prettyprint java prettyprinted" style=""><span class="pun"></span><span class="pln">getSignature</span><span class="pun">().</span><span class="pln">getName</span><span class="pun">();</span><span class="pln"></span><span style="font-family:Arial;font-size:14px;line-height:26px;">获取</span><span style="font-family:Arial;font-size:14px;line-height:26px;"><span class="com">调用的方法名<br></span> java.lang.Object getTarget() :获取连接点所在的目标对象; </span><br style="font-family:Arial;line-height:26px;"></pre><span style="font-family:Arial;font-size:14px;line-height:26px;"> java.lang.Object getThis() :获取代理对象本身; <br></span>
ProceedingJoinPoint
<span style="font-family:Arial;font-size:14px;line-height:26px;"> java.lang.Object[] getArgs():获取连接点方法运行时的入参列表; </span><br style="font-family:Arial;line-height:26px;"><span style="font-family:Arial;font-size:14px;line-height:26px;"> Signature getSignature() :</span><span style="font-family:Arial;font-size:14px;line-height:26px;"><br> 获取封装了署名信息的对象,在该对象中可以获取到目标方法名,所属类的Class等信息; <br></span><pre class="prettyprint java prettyprinted" style=""><span class="pun"></span><span class="pln">getSignature</span><span class="pun">().</span><span class="pln">getName</span><span class="pun">();</span><span class="pln"></span><span style="font-family:Arial;font-size:14px;line-height:26px;">获取</span><span style="font-family:Arial;font-size:14px;line-height:26px;"><span class="com">调用的方法名<br></span> java.lang.Object getTarget() :获取连接点所在的目标对象; </span><br style="font-family:Arial;line-height:26px;"></pre><span style="font-family:Arial;font-size:14px;line-height:26px;"> java.lang.Object getThis() :获取代理对象本身; </span><br><span style="font-family:Arial;font-size:14px;line-height:26px;"><span style="font-family:Arial;font-size:14px;line-height:26px;"> java.lang.Object proceed() throws java.lang.Throwable:</span></span><span style="font-family:Arial;font-size:14px;line-height:26px;"><span style="font-family:Arial;font-size:14px;line-height:26px;"><code>//执行目标方法</code> <br></span></span><p><span style="font-family:Arial;font-size:14px;line-height:26px;"> java.lang.Object proceed(java.lang.Object[] args) throws java.lang.Throwable:</span><span style="font-family:Arial;font-size:14px;line-height:26px;"><code>//传入的新的参数去执行目标方法</code> </span></p>
<em>Join point</em> 连接点
<p style="margin:0in;font-family:微软雅黑;font-size:12.0pt;color:black">每个方法都是一个连接点</p>
<p style="margin:0in;font-family:微软雅黑;font-size:11.0pt"><span style="color:
#E84C22">就是spring允许你执行通知(Advice)的地方</span>,那可就真多了,基本每个方法的钱、后(两者都有也行),或抛出异常是时都可以是连接点,<span style="color:#E84C22">spring只支持方法连接点。</span>其他如AspectJ还可以让你在构造器或属性注入时都行,不过那不是咱们关注的,只要记住,和方法有关的前前后后都是连接点。</p>
切点
Pointcut
<br><span style="color:<br>black">(</span><span style="color:#E84C22">具体在哪些方法上织入通知、这是条件,筛选出需要织入的连接点</span><span style="color:black">)</span><br><span style="color:black">切点有助于缩小切面所通知的连接点的范围。如果说</span><span style="color:red">通知定义了切面的“什么”和“何时”的话,那么切点就定义了“何处”</span><span style="color:black">,</span><br>上面说的连接点的基础上,来定义切入点,你的一个类里,有15个方法,那就有十几个连接点了对吧,但是你并不想在所有方法附近都织入通知(使用叫织入),你只是想让其中几个,在调用这几个方法之前、之后或者抛出异常时干点什么,那么就用切入点来定义这几个方法,让<span style="color:#E84C22">切点来筛选连接点</span>,选中那几个你想要的方法。<br><br>
切入点指示符
通配符
..
匹配方法定义中的任意数量的参数,此外还匹配类定义中的任意数量包
+
匹配给定类的任意子类
*
匹配任意数量的字符
类型签名表达式(within)
只能指定(限定)包路径(类名也可以看做是包路径),表示<b>某个包下或者子包下</b>的所有方法
语法格式
<pre class="prettyprint" name="code"><code class="hljs fsharp has-numbering">within(<<span class="hljs-class"><span class="hljs-keyword">type</span> <span class="hljs-title">name</span>>)</span></code></pre>
案例
<pre class="prettyprint" name="code"><code class="hljs java has-numbering"><span class="hljs-comment">//匹配com.zejian.dao包及其子包中所有类中的所有方法</span>
<span class="hljs-annotation">@Pointcut</span>(<span class="hljs-string">"within(com.zejian.dao..*)"</span>)
<span class="hljs-comment">//匹配UserDaoImpl类中所有方法</span>
<span class="hljs-annotation">@Pointcut</span>(<span class="hljs-string">"within(com.zejian.dao.UserDaoImpl)"</span>)
<span class="hljs-comment">//匹配UserDaoImpl类及其子类中所有方法</span>
<span class="hljs-annotation">@Pointcut</span>(<span class="hljs-string">"within(com.zejian.dao.UserDaoImpl+)"</span>)
<span class="hljs-comment">//匹配所有实现UserDao接口的类的所有方法</span>
<span class="hljs-annotation">@Pointcut</span>(<span class="hljs-string">"within(com.zejian.dao.UserDao+)"</span>)</code></pre>
方法签名表达式(execution)
根据方法签名进行过滤
语法格式
<pre class="prettyprint" name="code"><code class="language-java hljs has-numbering"><span class="hljs-comment">//scope :方法作用域,如public,private,protect</span>
<span class="hljs-comment">//returnt-type:方法返回值类型</span>
<span class="hljs-comment">//fully-qualified-class-name:方法所在类的完全限定名称</span>
<span class="hljs-comment">//parameters 方法参数</span>
execution(<scope> <<span class="hljs-keyword">return</span>-type> <fully-qualified-class-name>.*(parameters))</code></pre>
案例
<pre class="prettyprint" name="code"><code class="hljs java has-numbering"><span class="hljs-comment">//匹配UserDaoImpl类中的所有方法</span>
<span class="hljs-annotation">@Pointcut</span>(<span class="hljs-string">"execution(* com.zejian.dao.UserDaoImpl.*(..))"</span>)
<span class="hljs-comment">//匹配UserDaoImpl类中的所有公共的方法</span>
<span class="hljs-annotation">@Pointcut</span>(<span class="hljs-string">"execution(public * com.zejian.dao.UserDaoImpl.*(..))"</span>)
<span class="hljs-comment">//匹配UserDaoImpl类中的所有公共方法并且返回值为int类型</span>
<span class="hljs-annotation">@Pointcut</span>(<span class="hljs-string">"execution(public int com.zejian.dao.UserDaoImpl.*(..))"</span>)
<span class="hljs-comment">//匹配UserDaoImpl类中第一个参数为int类型的所有公共的方法</span>
<span class="hljs-annotation">@Pointcut</span>(<span class="hljs-string">"execution(public * com.zejian.dao.UserDaoImpl.*(int , ..))"</span>)</code></pre>
bean
Spring AOP扩展的,AspectJ没有对于指示符,用于匹配特定名称的Bean对象的执行方法;
案例
<pre class="prettyprint" name="code"><code class="language-java hljs has-numbering"><span class="hljs-comment">//匹配名称中带有后缀Service的Bean。</span>
<span class="hljs-annotation">@Pointcut</span>(<span class="hljs-string">"bean(*Service)"</span>)
<span class="hljs-keyword">private</span> <span class="hljs-keyword">void</span> <span class="hljs-title">myPointcut1</span>(){}</code></pre>
this
用于匹配<b>当前AOP代理对象类型</b>的执行方法;请注意是AOP代理对象的类型匹配,这样就可能包括引入接口也类型匹配
案例<br>
<pre class="prettyprint" name="code"><code class="hljs java has-numbering"><span class="hljs-comment">//匹配了任意实现了UserDao接口的代理对象的方法进行过滤</span>
<span class="hljs-annotation">@Pointcut</span>(<span class="hljs-string">"this(com.zejian.spring.springAop.dao.UserDao)"</span>)
<span class="hljs-keyword">private</span> <span class="hljs-keyword">void</span> <span class="hljs-title">myPointcut2</span>(){}</code></pre>
target
用于匹配当前<b>目标对象类型</b>的执行方法;
案例
<pre class="prettyprint" name="code"><code class="hljs java has-numbering"><span class="hljs-comment">//匹配了任意实现了UserDao接口的目标对象的方法进行过滤</span>
<span class="hljs-annotation">@Pointcut</span>(<span class="hljs-string">"target(com.zejian.spring.springAop.dao.UserDao)"</span>)
<span class="hljs-keyword">private</span> <span class="hljs-keyword">void</span> <span class="hljs-title">myPointcut3</span>(){}</code></pre>
@target():限制连接点匹配目特定的执行对象,这些对象对应的类要具备指定类型的注解.
@within
用于匹配所以持有指定注解类型内的方法;请注意与within是有区别的, within是用于匹配指定类型内的方法执行;
案例
<pre class="prettyprint" name="code"><code class="hljs java has-numbering"><span class="hljs-comment">//匹配使用了MarkerAnnotation注解的类(注意是类)</span>
<span class="hljs-annotation">@Pointcut</span>(<span class="hljs-string">"@within(com.zejian.spring.annotation.MarkerAnnotation)"</span>)
<span class="hljs-keyword">private</span> <span class="hljs-keyword">void</span> <span class="hljs-title">myPointcut4</span>(){}</code></pre>
@annotation(com.zejian.spring.MarkerMethodAnnotation)
根据所应用的注解进行方法过滤
案例
<pre class="prettyprint" name="code"><code class="hljs java has-numbering"><span class="hljs-comment">//匹配使用了MarkerAnnotation注解的方法(注意是方法)</span>
<span class="hljs-annotation">@Pointcut</span>(<span class="hljs-string">"@annotation(com.zejian.spring.annotation.MarkerAnnotation)"</span>)
<span class="hljs-keyword">private</span> <span class="hljs-keyword">void</span> <span class="hljs-title">myPointcut5</span>(){}</code></pre>
args() <br>
限制连接点匹配参数为指定类型的执行方法,<b>限定方法的参数的类型</b>
案例
args(net.aazj.pojo.User): 参数为User类型的方法。
向注解处理方法传递参数
<pre class="prettyprint hljs kotlin" style="font-family:Menlo, Monaco, Consolas, 'Courier New', monospace;color:rgb(68,68,68);font-size:14px;line-height:1.5em;background-color:rgb(246,246,246);border:none;" name="code"><span style="color:rgb(0,0,0);"><span class="hljs-meta" style="color:rgb(31,113,153);">@Before(</span></span><span class="hljs-meta" style="color:rgb(31,113,153);"><span class="hljs-meta-string" style="color:rgb(77,153,191);">"execution(public * net.aazj.service..*.getUser(..)) && args(userId,..)"</span></span><span style="color:rgb(0,0,0);"><span class="hljs-meta" style="color:rgb(31,113,153);">)</span><br> </span><span style="color:rgb(0,0,255);"><span class="hljs-keyword" style="color:rgb(51,51,51);font-weight:700;">public</span></span> <span style="color:rgb(0,0,255);">void</span> before3(<span style="color:rgb(0,0,255);">int</span><span style="color:rgb(0,0,0);"> userId) {<br> System.<span class="hljs-keyword" style="color:rgb(51,51,51);font-weight:700;">out</span>.println(</span><span class="hljs-string" style="color:rgb(136,0,0);">"userId-----"</span> +<span style="color:rgb(0,0,0);"> userId);<br> } <br><br></span>它会拦截 net.aazj.service 包下或者子包下的getUser方法,并且该方法的第一个参数必须是int型的,<br> 那么使用切点表达式args(userId,..) 就可以使我们在切面中的处理方法before3中可以访问这个参数。<br><span style="color:rgb(0,0,0);"></span></pre>
<code class="java spaces" style="color:red; padding:0px!important; margin:0px!important; font-family:Consolas,'Bitstream Vera Sans Mono','Courier New',Courier,monospace!important; border:0px!important; bottom:auto!important; float:none!important; height:auto!important; left:auto!important; line-height:1.1em!important; outline:0px!important; overflow:visible!important; position:static!important; right:auto!important; top:auto!important; vertical-align:baseline!important; width:auto!important; font-size:1em!important; min-height:auto!important; background:none!important"> </code><code class="java color1" style="padding:0px!important; margin:0px!important; font-family:Consolas,'Bitstream Vera Sans Mono','Courier New',Courier,monospace!important; color:grey!important; border:0px!important; bottom:auto!important; float:none!important; height:auto!important; left:auto!important; line-height:1.1em!important; outline:0px!important; overflow:visible!important; position:static!important; right:auto!important; top:auto!important; vertical-align:baseline!important; width:auto!important; font-size:1em!important; min-height:auto!important; background:none!important">@AfterReturning</code><code class="java plain" style="padding:0px!important; margin:0px!important; font-family:Consolas,'Bitstream Vera Sans Mono','Courier New',Courier,monospace!important; border:0px!important; bottom:auto!important; float:none!important; height:auto!important; left:auto!important; line-height:1.1em!important; outline:0px!important; overflow:visible!important; position:static!important; right:auto!important; top:auto!important; vertical-align:baseline!important; width:auto!important; font-size:1em!important; min-height:auto!important; background:none!important">(</code><br><div class="line number10 index9 alt1" style="padding:0px 1em!important; margin:0px!important; border:0px!important; bottom:auto!important; float:none!important; height:auto!important; left:auto!important; line-height:1.1em!important; outline:0px!important; overflow:visible!important; position:static!important; right:auto!important; top:auto!important; vertical-align:baseline!important; width:auto!important; font-size:1em!important; min-height:auto!important; white-space:pre!important"><code class="java spaces" style="color:red; padding:0px!important; margin:0px!important; font-family:Consolas,'Bitstream Vera Sans Mono','Courier New',Courier,monospace!important; border:0px!important; bottom:auto!important; float:none!important; height:auto!important; left:auto!important; line-height:1.1em!important; outline:0px!important; overflow:visible!important; position:static!important; right:auto!important; top:auto!important; vertical-align:baseline!important; width:auto!important; font-size:1em!important; min-height:auto!important; background:none!important"> </code><code class="java plain" style="padding:0px!important; margin:0px!important; font-family:Consolas,'Bitstream Vera Sans Mono','Courier New',Courier,monospace!important; border:0px!important; bottom:auto!important; float:none!important; height:auto!important; left:auto!important; line-height:1.1em!important; outline:0px!important; overflow:visible!important; position:static!important; right:auto!important; top:auto!important; vertical-align:baseline!important; width:auto!important; font-size:1em!important; min-height:auto!important; background:none!important">pointcut=</code><code class="java string" style="padding:0px!important; margin:0px!important; font-family:Consolas,'Bitstream Vera Sans Mono','Courier New',Courier,monospace!important; color:blue!important; border:0px!important; bottom:auto!important; float:none!important; height:auto!important; left:auto!important; line-height:1.1em!important; outline:0px!important; overflow:visible!important; position:static!important; right:auto!important; top:auto!important; vertical-align:baseline!important; width:auto!important; font-size:1em!important; min-height:auto!important; background:none!important">"execution(* com.abc.service.*.access*(..)) && args(time, name)"</code><code class="java plain" style="padding:0px!important; margin:0px!important; font-family:Consolas,'Bitstream Vera Sans Mono','Courier New',Courier,monospace!important; border:0px!important; bottom:auto!important; float:none!important; height:auto!important; left:auto!important; line-height:1.1em!important; outline:0px!important; overflow:visible!important; position:static!important; right:auto!important; top:auto!important; vertical-align:baseline!important; width:auto!important; font-size:1em!important; min-height:auto!important; background:none!important">,</code><br></div><code class="java spaces" style="color:red; padding:0px!important; margin:0px!important; font-family:Consolas,'Bitstream Vera Sans Mono','Courier New',Courier,monospace!important; border:0px!important; bottom:auto!important; float:none!important; height:auto!important; left:auto!important; line-height:1.1em!important; outline:0px!important; overflow:visible!important; position:static!important; right:auto!important; top:auto!important; vertical-align:baseline!important; width:auto!important; font-size:1em!important; min-height:auto!important; background:none!important"> </code><code class="java plain" style="padding:0px!important; margin:0px!important; font-family:Consolas,'Bitstream Vera Sans Mono','Courier New',Courier,monospace!important; border:0px!important; bottom:auto!important; float:none!important; height:auto!important; left:auto!important; line-height:1.1em!important; outline:0px!important; overflow:visible!important; position:static!important; right:auto!important; top:auto!important; vertical-align:baseline!important; width:auto!important; font-size:1em!important; min-height:auto!important; background:none!important">returning=</code><code class="java string" style="padding:0px!important; margin:0px!important; font-family:Consolas,'Bitstream Vera Sans Mono','Courier New',Courier,monospace!important; color:blue!important; border:0px!important; bottom:auto!important; float:none!important; height:auto!important; left:auto!important; line-height:1.1em!important; outline:0px!important; overflow:visible!important; position:static!important; right:auto!important; top:auto!important; vertical-align:baseline!important; width:auto!important; font-size:1em!important; min-height:auto!important; background:none!important">"returnValue"</code><code class="java plain" style="padding:0px!important; margin:0px!important; font-family:Consolas,'Bitstream Vera Sans Mono','Courier New',Courier,monospace!important; border:0px!important; bottom:auto!important; float:none!important; height:auto!important; left:auto!important; line-height:1.1em!important; outline:0px!important; overflow:visible!important; position:static!important; right:auto!important; top:auto!important; vertical-align:baseline!important; width:auto!important; font-size:1em!important; min-height:auto!important; background:none!important">)</code><br><code class="java spaces" style="color:red; padding:0px!important; margin:0px!important; font-family:Consolas,'Bitstream Vera Sans Mono','Courier New',Courier,monospace!important; border:0px!important; bottom:auto!important; float:none!important; height:auto!important; left:auto!important; line-height:1.1em!important; outline:0px!important; overflow:visible!important; position:static!important; right:auto!important; top:auto!important; vertical-align:baseline!important; width:auto!important; font-size:1em!important; min-height:auto!important; background:none!important"> </code><code class="java keyword" style="padding:0px!important; margin:0px!important; font-family:Consolas,'Bitstream Vera Sans Mono','Courier New',Courier,monospace!important; color:rgb(0,102,153)!important; border:0px!important; bottom:auto!important; float:none!important; height:auto!important; left:auto!important; line-height:1.1em!important; outline:0px!important; overflow:visible!important; position:static!important; right:auto!important; top:auto!important; vertical-align:baseline!important; width:auto!important; font-weight:bold!important; font-size:1em!important; min-height:auto!important; background:none!important">public</code> <code class="java keyword" style="padding:0px!important; margin:0px!important; font-family:Consolas,'Bitstream Vera Sans Mono','Courier New',Courier,monospace!important; color:rgb(0,102,153)!important; border:0px!important; bottom:auto!important; float:none!important; height:auto!important; left:auto!important; line-height:1.1em!important; outline:0px!important; overflow:visible!important; position:static!important; right:auto!important; top:auto!important; vertical-align:baseline!important; width:auto!important; font-weight:bold!important; font-size:1em!important; min-height:auto!important; background:none!important">void</code> <code class="java plain" style="padding:0px!important; margin:0px!important; font-family:Consolas,'Bitstream Vera Sans Mono','Courier New',Courier,monospace!important; border:0px!important; bottom:auto!important; float:none!important; height:auto!important; left:auto!important; line-height:1.1em!important; outline:0px!important; overflow:visible!important; position:static!important; right:auto!important; top:auto!important; vertical-align:baseline!important; width:auto!important; font-size:1em!important; min-height:auto!important; background:none!important">access(Date time, Object returnValue, String name) {</code><br><code class="java spaces" style="color:red; padding:0px!important; margin:0px!important; font-family:Consolas,'Bitstream Vera Sans Mono','Courier New',Courier,monospace!important; border:0px!important; bottom:auto!important; float:none!important; height:auto!important; left:auto!important; line-height:1.1em!important; outline:0px!important; overflow:visible!important; position:static!important; right:auto!important; top:auto!important; vertical-align:baseline!important; width:auto!important; font-size:1em!important; min-height:auto!important; background:none!important"> </code><code class="java plain" style="padding:0px!important; margin:0px!important; font-family:Consolas,'Bitstream Vera Sans Mono','Courier New',Courier,monospace!important; border:0px!important; bottom:auto!important; float:none!important; height:auto!important; left:auto!important; line-height:1.1em!important; outline:0px!important; overflow:visible!important; position:static!important; right:auto!important; top:auto!important; vertical-align:baseline!important; width:auto!important; font-size:1em!important; min-height:auto!important; background:none!important">System.out.println(</code><code class="java string" style="padding:0px!important; margin:0px!important; font-family:Consolas,'Bitstream Vera Sans Mono','Courier New',Courier,monospace!important; color:blue!important; border:0px!important; bottom:auto!important; float:none!important; height:auto!important; left:auto!important; line-height:1.1em!important; outline:0px!important; overflow:visible!important; position:static!important; right:auto!important; top:auto!important; vertical-align:baseline!important; width:auto!important; font-size:1em!important; min-height:auto!important; background:none!important">"目标方法中的参数String = "</code> <code class="java plain" style="padding:0px!important; margin:0px!important; font-family:Consolas,'Bitstream Vera Sans Mono','Courier New',Courier,monospace!important; border:0px!important; bottom:auto!important; float:none!important; height:auto!important; left:auto!important; line-height:1.1em!important; outline:0px!important; overflow:visible!important; position:static!important; right:auto!important; top:auto!important; vertical-align:baseline!important; width:auto!important; font-size:1em!important; min-height:auto!important; background:none!important">+ name);</code><br><div class="line number14 index13 alt1" style="padding:0px 1em!important; margin:0px!important; border:0px!important; bottom:auto!important; float:none!important; height:auto!important; left:auto!important; line-height:1.1em!important; outline:0px!important; overflow:visible!important; position:static!important; right:auto!important; top:auto!important; vertical-align:baseline!important; width:auto!important; font-size:1em!important; min-height:auto!important; white-space:pre!important"><code class="java spaces" style="color:red; padding:0px!important; margin:0px!important; font-family:Consolas,'Bitstream Vera Sans Mono','Courier New',Courier,monospace!important; border:0px!important; bottom:auto!important; float:none!important; height:auto!important; left:auto!important; line-height:1.1em!important; outline:0px!important; overflow:visible!important; position:static!important; right:auto!important; top:auto!important; vertical-align:baseline!important; width:auto!important; font-size:1em!important; min-height:auto!important; background:none!important"> </code><code class="java plain" style="padding:0px!important; margin:0px!important; font-family:Consolas,'Bitstream Vera Sans Mono','Courier New',Courier,monospace!important; border:0px!important; bottom:auto!important; float:none!important; height:auto!important; left:auto!important; line-height:1.1em!important; outline:0px!important; overflow:visible!important; position:static!important; right:auto!important; top:auto!important; vertical-align:baseline!important; width:auto!important; font-size:1em!important; min-height:auto!important; background:none!important">System.out.println(</code><code class="java string" style="padding:0px!important; margin:0px!important; font-family:Consolas,'Bitstream Vera Sans Mono','Courier New',Courier,monospace!important; color:blue!important; border:0px!important; bottom:auto!important; float:none!important; height:auto!important; left:auto!important; line-height:1.1em!important; outline:0px!important; overflow:visible!important; position:static!important; right:auto!important; top:auto!important; vertical-align:baseline!important; width:auto!important; font-size:1em!important; min-height:auto!important; background:none!important">"目标方法中的参数Date = "</code> <code class="java plain" style="padding:0px!important; margin:0px!important; font-family:Consolas,'Bitstream Vera Sans Mono','Courier New',Courier,monospace!important; border:0px!important; bottom:auto!important; float:none!important; height:auto!important; left:auto!important; line-height:1.1em!important; outline:0px!important; overflow:visible!important; position:static!important; right:auto!important; top:auto!important; vertical-align:baseline!important; width:auto!important; font-size:1em!important; min-height:auto!important; background:none!important">+ time);</code></div><code class="java spaces" style="color:red; padding:0px!important; margin:0px!important; font-family:Consolas,'Bitstream Vera Sans Mono','Courier New',Courier,monospace!important; border:0px!important; bottom:auto!important; float:none!important; height:auto!important; left:auto!important; line-height:1.1em!important; outline:0px!important; overflow:visible!important; position:static!important; right:auto!important; top:auto!important; vertical-align:baseline!important; width:auto!important; font-size:1em!important; min-height:auto!important; background:none!important"> </code><code class="java plain" style="padding:0px!important; margin:0px!important; font-family:Consolas,'Bitstream Vera Sans Mono','Courier New',Courier,monospace!important; border:0px!important; bottom:auto!important; float:none!important; height:auto!important; left:auto!important; line-height:1.1em!important; outline:0px!important; overflow:visible!important; position:static!important; right:auto!important; top:auto!important; vertical-align:baseline!important; width:auto!important; font-size:1em!important; min-height:auto!important; background:none!important">System.out.println(</code><code class="java string" style="padding:0px!important; margin:0px!important; font-family:Consolas,'Bitstream Vera Sans Mono','Courier New',Courier,monospace!important; color:blue!important; border:0px!important; bottom:auto!important; float:none!important; height:auto!important; left:auto!important; line-height:1.1em!important; outline:0px!important; overflow:visible!important; position:static!important; right:auto!important; top:auto!important; vertical-align:baseline!important; width:auto!important; font-size:1em!important; min-height:auto!important; background:none!important">"目标方法的返回结果returnValue = "</code> <code class="java plain" style="padding:0px!important; margin:0px!important; font-family:Consolas,'Bitstream Vera Sans Mono','Courier New',Courier,monospace!important; border:0px!important; bottom:auto!important; float:none!important; height:auto!important; left:auto!important; line-height:1.1em!important; outline:0px!important; overflow:visible!important; position:static!important; right:auto!important; top:auto!important; vertical-align:baseline!important; width:auto!important; font-size:1em!important; min-height:auto!important; background:none!important">+ returnValue);</code><code class="java spaces" style="color:red; padding:0px!important; margin:0px!important; font-family:Consolas,'Bitstream Vera Sans Mono','Courier New',Courier,monospace!important; border:0px!important; bottom:auto!important; float:none!important; height:auto!important; left:auto!important; line-height:1.1em!important; outline:0px!important; overflow:visible!important; position:static!important; right:auto!important; top:auto!important; vertical-align:baseline!important; width:auto!important; font-size:1em!important; min-height:auto!important; background:none!important"></code><code class="java plain" style="padding:0px!important; margin:0px!important; font-family:Consolas,'Bitstream Vera Sans Mono','Courier New',Courier,monospace!important; border:0px!important; bottom:auto!important; float:none!important; height:auto!important; left:auto!important; line-height:1.1em!important; outline:0px!important; overflow:visible!important; position:static!important; right:auto!important; top:auto!important; vertical-align:baseline!important; width:auto!important; font-size:1em!important; min-height:auto!important; background:none!important">}<br><br></code><span style="padding:0px; margin:0px; color:rgb(0,176,80)">表达式中增加了args(time,
name)部分,意味着可以在增强处理方法(access方法)中定义time和name两个属性——这两个形参的类型可以随意指定,但一旦指定了这两个参数的类型,则这两个形参类型将用于限制该切入点只匹配第一个参数类型为Date,第二个参数类型为name的方法(<span style="padding:0px; margin:0px; color:rgb(255,0,0)">方法参数个数和类型若有不同均不匹配</span>)。</span><br><code class="java plain" style="padding:0px!important; margin:0px!important; font-family:Consolas,'Bitstream Vera Sans Mono','Courier New',Courier,monospace!important; border:0px!important; bottom:auto!important; float:none!important; height:auto!important; left:auto!important; line-height:1.1em!important; outline:0px!important; overflow:visible!important; position:static!important; right:auto!important; top:auto!important; vertical-align:baseline!important; width:auto!important; font-size:1em!important; min-height:auto!important; background:none!important"></code>
@args()
限制连接点匹配参数由指定注解标注的执行方法
案例
@args(org.springframework.transaction.annotation.Transactional): 参数的类型 带有 @Transactional 注解 的所有方法 <br>
bean()
指定某个bean的名称
案例<br>
<p style="font-size:16px;line-height:1.7em;text-indent:1em;color:rgb(51,51,51);font-family:'Helvetica Neue', Helvetica, Tahoma, Arial, STXihei, 'Microsoft YaHei', '微软雅黑', sans-serif;background-color:rgb(254,254,254);">bean(userService): bean的id为 "userService" 的所有方法;</p><br>bean(*Service): bean的id为 "Service"字符串结尾的所有方法;
切点指示符可以使用运算符语法进行表达式的混编,如and、or、not(或者&&、||、!)
引入
Introduction
<div><span style="font-size:10.5pt;">引入是指给一个现有类添加方法或字段属性,</span><strong><span style="font-size:10.5pt;color:#0000FF;">引入还可以在不改变现有类代码的情况下,让现有的Java类实现新的接口</span></strong><span style="font-size:10.5pt;">(</span><strong><span style="font-size:10.5pt;color:#0000FF;">以及一个对应的实现</span></strong><span style="font-size:10.5pt;">)。</span><strong><span style="font-size:10.5pt;color:#FF0000;">相对于Advice可以动态改变程序的功能或流程来说,引介(Introduction)则用来改变一个类的静态结构</span></strong><span style="font-size:10.5pt;">。比如你可以使用一个引入来使bean实现 IsModified 接口,以便简化缓存机制</span></div>
织入
Weaving
<span style="color:<br>black">“引入”我把它看做是一个定义,也就是一个名词,而“织入”我把它看做是一个动作,一个动词,也就是</span><span style="color:#E84C22">切面在指定的连接点被织入到目标对象中。</span>简单理解为aspect(切面)应用到目标函数(类)的过程<br><br>
织入方式<br>
<span style="font-size:10.5pt;"><span style="color:#0000FF;">运行时织入</span></span>
动态织入(Spring AOP)
在运行时动态将要增强的代码织入到目标类中,这样往往是通过动态代理技术完成的
动态代理技术
Java JDK的动态代理(Proxy,底层通过<b><font color="#c41230">反射</font></b>实现) <b>必须要有接口</b><br>
示例
<pre class="prettyprint" name="code"><code class="hljs java has-numbering"><span class="hljs-comment">//自定义的接口类,JDK动态代理的实现必须有对应的接口类</span><br><span class="hljs-keyword">public</span> <span class="hljs-class"><span class="hljs-keyword">interface</span> <span class="hljs-title">ExInterface</span> {</span><br> <span class="hljs-keyword">void</span> execute();<br>}<br><br><span class="hljs-comment">//A类,实现了ExInterface接口类</span><br><span class="hljs-keyword">public</span> <span class="hljs-class"><span class="hljs-keyword">class</span> <span class="hljs-title">A</span> <span class="hljs-keyword">implements</span> <span class="hljs-title">ExInterface</span>{</span><br> <span class="hljs-keyword">public</span> <span class="hljs-keyword">void</span> <span class="hljs-title">execute</span>(){<br> System.out.println(<span class="hljs-string">"执行A的execute方法..."</span>);<br> }<br>}<br><span class="hljs-comment">//代理类的实现</span><br><span class="hljs-keyword">public</span> <span class="hljs-class"><span class="hljs-keyword">class</span> <span class="hljs-title">JDKProxy</span> <span class="hljs-keyword">implements</span> <span class="hljs-title">InvocationHandler</span>{</span><br><br> <span class="hljs-javadoc">/**<br> * 要被代理的目标对象<br> */</span><br> <span class="hljs-keyword">private</span> A target;<br><br> <span class="hljs-keyword">public</span> <span class="hljs-title">JDKProxy</span>(A target){<br> <span class="hljs-keyword">this</span>.target=target;<br> }<br><br> <span class="hljs-javadoc">/**<br> * 创建代理类<br> *<span class="hljs-javadoctag"> @return</span><br></span></code><code class="hljs java has-numbering"><span class="hljs-javadoc"><code class="hljs java has-numbering"><span class="hljs-javadoc"> *<span class="hljs-javadoctag"> @param</span> loader 类加载器,一般传递目标对象(A类即被代理的对象)的类加载器<br> *<span class="hljs-javadoctag"> @param</span> interfaces 目标对象(A)的实现接口<br> *<span class="hljs-javadoctag"> @param</span> </span></code></span></code><code class="hljs java has-numbering"><span class="hljs-javadoc"><code class="hljs java has-numbering"><span class="hljs-javadoc">InvocationHandler接口 回调处理句柄(后面会分析到)<br></span></code> */</span><br> <span class="hljs-keyword">public</span> ExInterface <span class="hljs-title">createProxy</span>(){<br> <span class="hljs-keyword">return</span> (ExInterface) Proxy.newProxyInstance(target.getClass().getClassLoader(),target.getClass().getInterfaces(),<span class="hljs-keyword">this</span>);<br> }<br><br> <span class="hljs-javadoc">/**<br> * 调用被代理类(目标对象)的任意方法都会触发invoke方法<br> *<span class="hljs-javadoctag"> @param</span> proxy 代理类<br> *<span class="hljs-javadoctag"> @param</span> method 被代理类的方法<br> *<span class="hljs-javadoctag"> @param</span> args 被代理类的方法参数<br> *<span class="hljs-javadoctag"> @return</span><br> *<span class="hljs-javadoctag"> @throws</span> Throwable<br> */</span><br> <span class="hljs-annotation">@Override</span><br> <span class="hljs-keyword">public</span> Object <span class="hljs-title">invoke</span>(Object proxy, Method method, Object[] args) <span class="hljs-keyword">throws</span> Throwable {<br> <span class="hljs-comment">//过滤不需要该业务的方法</span><br> <span class="hljs-keyword">if</span>(<span class="hljs-string">"execute"</span>.equals(method.getName())) {<br> <span class="hljs-comment">//调用前验证权限</span><br> AuthCheck.authCheck();<br> <span class="hljs-comment">//调用目标对象的方法</span><br> Object result = method.invoke(target, args);<br> <span class="hljs-comment">//记录日志数据</span><br> Report.recordLog();<br> <span class="hljs-keyword">return</span> result;<br> }eles <span class="hljs-keyword">if</span>(<span class="hljs-string">"delete"</span>.equals(method.getName())){<br> <span class="hljs-comment">//.....</span><br> }<br> <span class="hljs-comment">//如果不需要增强直接执行原方法</span><br> <span class="hljs-keyword">return</span> method.invoke(target,args);<br> }<br>}<br><br> <span class="hljs-comment">//测试验证</span><br> <span class="hljs-keyword">public</span> <span class="hljs-keyword">static</span> <span class="hljs-keyword">void</span> <span class="hljs-title">main</span>(String args[]){<br> A a=<span class="hljs-keyword">new</span> A();<br> <span class="hljs-comment">//创建JDK代理</span><br> JDKProxy jdkProxy=<span class="hljs-keyword">new</span> JDKProxy(a);<br> <span class="hljs-comment">//创建代理对象</span><br> ExInterface proxy=jdkProxy.createProxy();<br> <span class="hljs-comment">//执行代理对象方法</span><br> proxy.execute();<br> }</code></pre>
<font color="#c41230"><b>Proxy.newProxyInstance</b></font>(ClassLoader loader,Class<?>[]interfaces,<font color="#c41230"><b>InvocationHandler</b></font> h)<br>完全可以把InvocationHandler看成一个回调函数(Callback),Proxy方法创建代理对象proxy后,当调用任何方法(<b>接口中的所有方法</b>)时,将会回调InvocationHandler#invoke方法,因此我们可以在invoke方法中来控制被代理对象(目标对象)的方法执行,从而在该方法前后动态增加其他需要执行的业务。<br><br>
CGLIB的动态代理(底层通过<font color="#c41230"><b>继承</b></font>实现) 字节码生成技术实现AOP
示例
<pre class="prettyprint" name="code"><code class="language-java hljs has-numbering"><span class="hljs-comment">//被代理的类即目标对象</span>
<span class="hljs-keyword">public</span> <span class="hljs-class"><span class="hljs-keyword">class</span> <span class="hljs-title">A</span> {</span>
<span class="hljs-keyword">public</span> <span class="hljs-keyword">void</span> <span class="hljs-title">execute</span>(){
System.out.println(<span class="hljs-string">"执行A的execute方法..."</span>);
}
}
<span class="hljs-comment">//代理类</span>
<span class="hljs-keyword">public</span> <span class="hljs-class"><span class="hljs-keyword">class</span> <span class="hljs-title">CGLibProxy</span> <span class="hljs-keyword">implements</span> <span class="hljs-title">MethodInterceptor</span> {</span>
<span class="hljs-javadoc">/**
* 被代理的目标类
*/</span>
<span class="hljs-keyword">private</span> A target;
<span class="hljs-keyword">public</span> <span class="hljs-title">CGLibProxy</span>(A target) {
<span class="hljs-keyword">super</span>();
<span class="hljs-keyword">this</span>.target = target;
}
<span class="hljs-javadoc">/**
* 创建代理对象
*<span class="hljs-javadoctag"> @return</span>
*/</span>
<span class="hljs-keyword">public</span> A <span class="hljs-title">createProxy</span>(){
<span class="hljs-comment">// 使用CGLIB生成代理:</span>
<span class="hljs-comment">// 1.声明增强类实例,用于生产代理类</span>
Enhancer enhancer = <span class="hljs-keyword">new</span> Enhancer();
<span class="hljs-comment">// 2.设置被代理类字节码,CGLIB根据字节码生成被代理类的子类</span>
enhancer.setSuperclass(target.getClass());
<span class="hljs-comment">// 3.//设置回调函数,即一个方法拦截</span>
enhancer.setCallback(<span class="hljs-keyword">this</span>);
<span class="hljs-comment">// 4.创建代理:</span>
<span class="hljs-keyword">return</span> (A) enhancer.create();
}
<span class="hljs-javadoc">/**
* 回调函数
*<span class="hljs-javadoctag"> @param</span> proxy 代理对象
*<span class="hljs-javadoctag"> @param</span> method 委托类方法
*<span class="hljs-javadoctag"> @param</span> args 方法参数
*<span class="hljs-javadoctag"> @param</span> methodProxy 每个被代理的方法都对应一个MethodProxy对象,
* methodProxy.invokeSuper方法最终调用委托类(目标类)的原始方法
*<span class="hljs-javadoctag"> @return</span>
*<span class="hljs-javadoctag"> @throws</span> Throwable
*/</span>
<span class="hljs-annotation">@Override</span>
<span class="hljs-keyword">public</span> Object <span class="hljs-title">intercept</span>(Object proxy, Method method, Object[] args, MethodProxy methodProxy) <span class="hljs-keyword">throws</span> Throwable {
<span class="hljs-comment">//过滤不需要该业务的方法</span>
<span class="hljs-keyword">if</span>(<span class="hljs-string">"execute"</span>.equals(method.getName())) {
<span class="hljs-comment">//调用前验证权限(动态添加其他要执行业务)</span>
AuthCheck.authCheck();
<span class="hljs-comment">//调用目标对象的方法(执行A对象即被代理对象的execute方法)</span>
Object result = methodProxy.invokeSuper(proxy, args);
<span class="hljs-comment">//记录日志数据(动态添加其他要执行业务)</span>
Report.recordLog();
<span class="hljs-keyword">return</span> result;
}<span class="hljs-keyword">else</span> <span class="hljs-keyword">if</span>(<span class="hljs-string">"delete"</span>.equals(method.getName())){
<span class="hljs-comment">//.....</span>
<span class="hljs-keyword">return</span> methodProxy.invokeSuper(proxy, args);
}
<span class="hljs-comment">//如果不需要增强直接执行原方法</span>
<span class="hljs-keyword">return</span> methodProxy.invokeSuper(proxy, args);
}
}</code></pre>
被代理的类无需接口即可实现动态代理,而CGLibProxy代理类需要实现一个方法拦截器接口<font color="#c41230"><b>MethodInterceptor</b></font>并<b>重写intercept</b>方法,类似JDK动态代理的InvocationHandler接口,也是理解为回调函数,同理每次调用代理对象的方法时,intercept方法都会被调用,利用该方法便可以在运行时对方法执行前后进行动态增强。关于代理对象创建则通过<font color="#c41230"><b>Enhancer</b></font>类来设置的,Enhancer是一个用于产生代理对象的类,作用类似JDK的Proxy类,因为CGLib底层是通过继承实现的动态代理,因此需要传递目标对象(如A)的Class,同时需要设置一个回调函数对调用方法进行拦截并进行相应处理,最后通过create()创建目标对象(如A)的代理对象,运行结果与前面的JDK动态代理效果相同。
<br>
<span style="font-size:10.5pt;"><span style="color:#0000FF;">类加载器织入</span></span>
<span style="font-size:10.5pt;">-指通过<b>特殊的的类加载器</b>,在虚拟机</span><span style="font-size:10.5pt;">JVM</span><span style="font-size:10.5pt;">加载字节码的时候进行织入,比如</span><strong><span style="font-size:10.5pt;color:#FF0000;">AspectWerkz(</span></strong><strong><span style="font-size:10.5pt;color:#FF0000;">已并入</span></strong><strong><span style="font-size:10.5pt;color:#FF0000;">AspecJ)</span></strong><strong><span style="font-size:10.5pt;color:#FF0000;">及</span></strong><strong><span style="font-size:10.5pt;color:#FF0000;">JBoss</span></strong><strong><span style="font-size:10.5pt;color:#FF0000;">就使用这种方式</span></strong><span style="font-size:10.5pt;">。</span>
<span style="font-size:10.5pt;"><span style="color:#0000FF;">编译器织入</span></span>
静态织入 (AspectJ)<br>
编译期织入
在这个期间使用AspectJ的<b>acj编译器</b>(类似javac)把aspect类编译成class字节码后,在java目标类编译时织入,即先编译aspect类再编译目标类。
<div><br><img src="file:///C:\Users\Adameve\AppData\Roaming\Tencent\Users\1135656594\QQ\WinTemp\RichOle\9VWM0KXGB~UYBDI7B~[PF]8.png"><br></div>
ajc编译器,是一种能够识别aspect语法的编译器
链接期(编译后)织入
将aspect类和java目标类同时编译成字节码文件后,再进行织入处理,这种方式比较有助于已编译好的第三方jar和Class文件进行织入操作
aop原理
spring用代理类包裹切面,把他们织入到Spring管理的bean中。也就是说代理类伪装成目标类,它会截取对目标类中方法的调用,让调用者对目标类的调用都先变成调用伪装类,伪装类中就先执行了切面,再把调用转发给真正的目标bean。
<p> 现在可以自己想一想,怎么搞出来这个伪装类,才不会被调用者发现(过JVM的检查,JAVA是强类型检查,哪里都要检查类型)。</p>
<p> 1.实现和目标类相同的接口,我也实现和你一样的接口,反正上层都是接口级别的调用,这样我就伪装成了和目标类一样的类(实现了同一接口,咱是兄弟了),也就逃过了类型检查,到java运行期的时候,利用多态的后期绑定(所以spring采用运行时),伪装类(代理类)就变成了接口的真正实现,而他里面包裹了真实的那个目标类,最后实现具体功能的还是目标类,只不过伪装类在之前干了点事情(写日志,安全检查,事物等)。</p>
<p> 这就好比,一个人让你办件事,每次这个时候,你弟弟就会先出来,当然他分不出来了,以为是你,你这个弟弟虽然办不了这事,但是他知道你能办,所以就答应下来了,并且收了点礼物(写日志),收完礼物了,给把事给人家办了啊,所以你弟弟又找你这个哥哥来了,最后把这是办了的还是你自己。但是你自己并不知道你弟弟已经收礼物了,你只是专心把这件事情做好。</p>
<p> 顺着这个思路想,要是本身这个类就没实现一个接口呢,你怎么伪装我,我就压根没有机会让你搞出这个双胞胎的弟弟,那么就用第2种代理方式,创建一个目标类的子类,生个儿子,让儿子伪装我</p>
<p> 2.生成子类调用,这次用子类来做为伪装类,当然这样也能逃过JVM的强类型检查,我继承的吗,当然查不出来了,子类重写了目标类的所有方法,当然在这些重写的方法中,不仅实现了目标类的功能,还在这些功能之前,实现了一些其他的(写日志,安全检查,事物等)。</p>
<p> 这次的对比就是,儿子先从爸爸那把本事都学会了,所有人都找儿子办事情,但是儿子每次办和爸爸同样的事之前,都要收点小礼物(写日志),然后才去办真正的事。当然爸爸是不知道儿子这么干的了。这里就有件事情要说,某些本事是爸爸独有的(final的),儿子学不了,学不了就办不了这件事,办不了这个事情,自然就不能收人家礼了。</p>
<p> 前一种兄弟模式,spring会使用JDK的java.lang.reflect.Proxy类,它允许Spring动态生成一个新类来实现必要的接口,织入通知,并且把对这些接口的任何调用都转发到目标类。</p>
<p> 后一种父子模式,spring使用CGLIB库生成目标类的一个子类,在创建这个子类的时候,spring织入通知,并且把对这个子类的调用委托到目标类。</p>
<p> 相比之下,还是兄弟模式好些,他能更好的实现松耦合,尤其在今天都高喊着面向接口编程的情况下,父子模式只是在没有实现接口的时候,也能织入通知,应当做一种例外。</p>
Spring Aop(动态AOP)<br>
概念
Spring AOP 与ApectJ 的目的一致,都是为了<b>统一处理横切业</b>务,Spring AOP 更注重的是与Spring IOC容器的结合,并结合该优势来解决横切业务的问题,因此在AOP的功能完善方面,相对来说AspectJ具有更大的优势,同时,Spring转向采用<b>动态代理技术</b>的实现原理来构建Spring<br> AOP的内部机制(动态织入),这是与AspectJ(静态织入)最根本的区别。Spring 2.0后便使用了与AspectJ一样的注解。<br>请注意,Spring 只是使用了与 AspectJ 5 一样的注解,但仍然没有使用 AspectJ 的编译器,底层依是动态代理技术的实现,因此并不依赖于 AspectJ 的编译器。
开发方式<br>
基于注解开发
示例
<pre class="prettyprint" name="code"><code class="hljs java has-numbering"><span class="hljs-annotation">在通知上使用</span></code><code class="hljs java has-numbering"><span class="hljs-annotation">execution关键字定义的切点表达式</span></code></pre>
<pre class="prettyprint" name="code"><code class="hljs java has-numbering"><span class="hljs-annotation"><br>@Aspect</span><br><span class="hljs-keyword">public</span> <span class="hljs-class"><span class="hljs-keyword">class</span> <span class="hljs-title">MyAspect</span> {</span><br><br> <span class="hljs-javadoc">/**<br> * 前置通知<br> */</span><br> <span class="hljs-annotation">@Before</span>(<span class="hljs-string">"execution(* com.zejian.spring.springAop.dao.UserDao.addUser(..))"</span>)<br> <span class="hljs-keyword">public</span> <span class="hljs-keyword">void</span> <span class="hljs-title">before</span>(){<br> System.out.println(<span class="hljs-string">"前置通知...."</span>);<br> }<br><br> <span class="hljs-javadoc">/**<br> * 后置返回通知<br> * returnVal,切点方法执行后的返回值<br> */</span><br> <span class="hljs-annotation">@AfterReturning</span>(value=<span class="hljs-string">"execution(* com.zejian.spring.springAop.dao.UserDao.addUser(..))"</span>,returning = <span class="hljs-string">"returnVal"</span>)<br> <span class="hljs-keyword">public</span> <span class="hljs-keyword">void</span> <span class="hljs-title">AfterReturning</span>(Object returnVal){<br> System.out.println(<span class="hljs-string">"后置返回通知...."</span>+returnVal);<br> }<br><br><br> <span class="hljs-javadoc">/**<br> * 环绕通知<br> *<span class="hljs-javadoctag"> @param</span> joinPoint 可用于执行切点的类<br> *<span class="hljs-javadoctag"> @return</span><br> *<span class="hljs-javadoctag"> @throws</span> Throwable<br> */</span><br> <span class="hljs-annotation">@Around</span>(<span class="hljs-string">"execution(* com.zejian.spring.springAop.dao.UserDao.addUser(..))"</span>)<br> <span class="hljs-keyword">public</span> Object <span class="hljs-title">around</span>(ProceedingJoinPoint joinPoint) <span class="hljs-keyword">throws</span> Throwable {<br> System.out.println(<span class="hljs-string">"环绕通知前...."</span>);<br> Object obj= (Object) joinPoint.proceed();<br> System.out.println(<span class="hljs-string">"环绕通知后...."</span>);<br> <span class="hljs-keyword">return</span> obj;<br> }<br><br> <span class="hljs-javadoc">/**<br> * 异常通知<br> *<span class="hljs-javadoctag"> @param</span> e<br> */</span><br> <span class="hljs-annotation">@AfterThrowing</span>(value=<span class="hljs-string">"execution(* com.zejian.spring.springAop.dao.UserDao.addUser(..))"</span>,throwing = <span class="hljs-string">"e"</span>)<br> <span class="hljs-keyword">public</span> <span class="hljs-keyword">void</span> <span class="hljs-title">afterThrowable</span>(Throwable e){<br> System.out.println(<span class="hljs-string">"异常通知:msg="</span>+e.getMessage());<br> }<br><br> <span class="hljs-javadoc">/**<br> * 无论什么情况下都会执行的方法<br> */</span><br> <span class="hljs-annotation">@After</span>(value=<span class="hljs-string">"execution(* com.zejian.spring.springAop.dao.UserDao.addUser(..))"</span>)<br> <span class="hljs-keyword">public</span> <span class="hljs-keyword">void</span> <span class="hljs-title">after</span>(){<br> System.out.println(<span class="hljs-string">"后置通知...."</span>);<br> }<br>}<br><br></code><code class="hljs java has-numbering"><code class="language-xml hljs has-numbering"><font color="#c41230"><b><span class="hljs-tag"></span></b></font></code></code></pre>
使用@pointcut来定义切点匹配表达式
<pre class="prettyprint" name="code"><code class="hljs java has-numbering"><span class="hljs-javadoc">/**<br> * 使用Pointcut定义切点<br> */</span><br><span class="hljs-annotation">@Pointcut</span>(<span class="hljs-string">"execution(* com.zejian.spring.springAop.dao.UserDao.addUser(..))"</span>)<br><span class="hljs-keyword">private</span> <span class="hljs-keyword">void</span> <span class="hljs-title">myPointcut</span>(){}<br><br><span class="hljs-javadoc">/**<br> * 应用切入点函数<br> */</span><br><span class="hljs-annotation">@After</span>(value=<span class="hljs-string">"myPointcut()"</span>)<br><span class="hljs-keyword">public</span> <span class="hljs-keyword">void</span> <span class="hljs-title">afterDemo</span>(){<br> System.out.println(<span class="hljs-string">"后置通知...."</span>);<br>}</code></pre>
一定要在配置文件中启动Aspect的注解功能支持<br><pre class="prettyprint" name="code"><br><code class="hljs java has-numbering"><code class="language-xml hljs has-numbering"> <font color="#c41230"><b> <span class="hljs-comment"><!-- 启动@aspectj的自动代理支持--></span><br> <span class="hljs-tag"><<span class="hljs-title">aop:aspectj-autoproxy</span> /></span></b></font></code></code></pre>
基于Xml开发
示例
切面类
<pre class="prettyprint" name="code"><code class="language-java hljs has-numbering"><span class="hljs-keyword">public</span> <span class="hljs-class"><span class="hljs-keyword">class</span> <span class="hljs-title">MyAspectXML</span> {</span><br><br> <span class="hljs-keyword">public</span> <span class="hljs-keyword">void</span> <span class="hljs-title">before</span>(){<br> System.out.println(<span class="hljs-string">"MyAspectXML====前置通知"</span>);<br> }<br><br> <span class="hljs-keyword">public</span> <span class="hljs-keyword">void</span> <span class="hljs-title">afterReturn</span>(Object returnVal){<br> System.out.println(<span class="hljs-string">"后置返回通知-->返回值:"</span>+returnVal);<br> }<br><br> <span class="hljs-keyword">public</span> Object <span class="hljs-title">around</span>(ProceedingJoinPoint joinPoint) <span class="hljs-keyword">throws</span> Throwable {<br> System.out.println(<span class="hljs-string">"MyAspectXML=====环绕通知前"</span>);<br> Object object= joinPoint.proceed();<br> System.out.println(<span class="hljs-string">"MyAspectXML=====环绕通知后"</span>);<br> <span class="hljs-keyword">return</span> object;<br> }<br><br> <span class="hljs-keyword">public</span> <span class="hljs-keyword">void</span> <span class="hljs-title">afterThrowing</span>(Throwable throwable){<br> System.out.println(<span class="hljs-string">"MyAspectXML======异常通知:"</span>+ throwable.getMessage());<br> }<br><br> <span class="hljs-keyword">public</span> <span class="hljs-keyword">void</span> <span class="hljs-title">after</span>(){<br> System.out.println(<span class="hljs-string">"MyAspectXML=====后置通知..来了"</span>);<br> }<br>}</code></pre>
xml配置
<pre class="prettyprint" name="code"><code class="hljs xml has-numbering"> <span class="hljs-comment"><!-- 定义切面 --></span>
<span class="hljs-tag"><<span class="hljs-title">bean</span> <span class="hljs-attribute">name</span>=<span class="hljs-value">"myAspectXML"</span> <span class="hljs-attribute">class</span>=<span class="hljs-value">"com.zejian.spring.springAop.AspectJ.MyAspectXML"</span> /></span>
<span class="hljs-comment"><!-- 配置AOP 切面 --></span>
<span class="hljs-tag"><<span class="hljs-title">aop:config</span>></span>
<span class="hljs-comment"><!-- 定义切点函数 --></span>
<span class="hljs-tag"><<span class="hljs-title">aop:pointcut</span> <span class="hljs-attribute">id</span>=<span class="hljs-value">"pointcut"</span> <span class="hljs-attribute">expression</span>=<span class="hljs-value">"execution(* com.zejian.spring.springAop.dao.ProductDao.add(..))"</span> /></span>
<span class="hljs-comment"><!-- 定义其他切点函数 --></span>
<span class="hljs-tag"><<span class="hljs-title">aop:pointcut</span> <span class="hljs-attribute">id</span>=<span class="hljs-value">"delPointcut"</span> <span class="hljs-attribute">expression</span>=<span class="hljs-value">"execution(* com.zejian.spring.springAop.dao.ProductDao.delete(..))"</span> /></span>
<span class="hljs-comment"><!-- 定义通知 order 定义优先级,值越小优先级越大--></span>
<span class="hljs-tag"><<span class="hljs-title">aop:aspect</span> <span class="hljs-attribute">ref</span>=<span class="hljs-value">"myAspectXML"</span> <span class="hljs-attribute">order</span>=<span class="hljs-value">"0"</span>></span>
<span class="hljs-comment"><!-- 定义通知
method 指定通知方法名,必须与MyAspectXML中的相同
pointcut 指定切点函数
--></span>
<span class="hljs-tag"><<span class="hljs-title">aop:before</span> <span class="hljs-attribute">method</span>=<span class="hljs-value">"before"</span> <span class="hljs-attribute">pointcut-ref</span>=<span class="hljs-value">"pointcut"</span> /></span>
<span class="hljs-comment"><!-- 后置通知 returning="returnVal" 定义返回值 必须与类中声明的名称一样--></span>
<span class="hljs-tag"><<span class="hljs-title">aop:after-returning</span> <span class="hljs-attribute">method</span>=<span class="hljs-value">"afterReturn"</span> <span class="hljs-attribute">pointcut-ref</span>=<span class="hljs-value">"pointcut"</span> <span class="hljs-attribute">returning</span>=<span class="hljs-value">"returnVal"</span> /></span>
<span class="hljs-comment"><!-- 环绕通知 --></span>
<span class="hljs-tag"><<span class="hljs-title">aop:around</span> <span class="hljs-attribute">method</span>=<span class="hljs-value">"around"</span> <span class="hljs-attribute">pointcut-ref</span>=<span class="hljs-value">"pointcut"</span> /></span>
<span class="hljs-comment"><!--异常通知 throwing="throwable" 指定异常通知错误信息变量,必须与类中声明的名称一样--></span>
<span class="hljs-tag"><<span class="hljs-title">aop:after-throwing</span> <span class="hljs-attribute">method</span>=<span class="hljs-value">"afterThrowing"</span> <span class="hljs-attribute">pointcut-ref</span>=<span class="hljs-value">"pointcut"</span> <span class="hljs-attribute">throwing</span>=<span class="hljs-value">"throwable"</span>/></span>
<span class="hljs-comment"><!--
method : 通知的方法(最终通知)
pointcut-ref : 通知应用到的切点方法
--></span>
<span class="hljs-tag"><<span class="hljs-title">aop:after</span> <span class="hljs-attribute">method</span>=<span class="hljs-value">"after"</span> <span class="hljs-attribute">pointcut-ref</span>=<span class="hljs-value">"pointcut"</span>/></span>
<span class="hljs-tag"></<span class="hljs-title">aop:aspect</span>></span>
<span class="hljs-tag"></<span class="hljs-title">aop:config</span>></span></code></pre>
织入方式
Spring AOP 确实是通过 CGLIB或者JDK代理 来动态地生成代理对象,这个代理对象指的就是 AOP 代理累,而 AOP 代理类的方法则通过在目标对象的切入点<b>动态地织入</b>增强处理,从而完成了对目标方法的增强。
AspectJ-Aop(静态AOP)
概念
AspectJ是一个java实现的AOP框架,它能够对<b>java代码进行AOP编译(一般在编译期进行)</b>,让java代码具有AspectJ的AOP功能(<b>依赖于特殊编译器(<font color="#c41230">ajc编译器</font></b>)),可以这样说AspectJ是目前实现AOP框架中最成熟,功能最丰富的语言,更幸运的是,AspectJ与java程序完全兼容,几乎是无缝关联
示例
<pre class="prettyprint" name="code"><code class="language-java hljs has-numbering"><span class="hljs-keyword">public</span> aspect MyAspectJDemo {<br> <span class="hljs-javadoc">/**<br> * 定义切点,日志记录切点<br></span></code><code class="language-java hljs has-numbering"><span class="hljs-javadoc">pointcut 函数名 : 匹配表达式 <br></span></code><code class="language-java hljs has-numbering"><span class="hljs-javadoc">函数一般使用call()或者execution()进行匹配 <br> */</span><br> pointcut recordLog():call(* HelloWord.sayHello(..));<br><br> <span class="hljs-javadoc">/**<br> * 定义切点,权限验证(实际开发中日志和权限一般会放在不同的切面中,这里仅为方便演示)<br> */</span><br> pointcut authCheck():call(* HelloWord.sayHello(..));<br><br> <span class="hljs-javadoc">/**<br> * 定义前置通知!<br> */</span><br> before():authCheck(){<br> System.out.println(<span class="hljs-string">"sayHello方法执行前验证权限"</span>);<br> }<br><br> <span class="hljs-javadoc">/**<br> * 定义后置通知<br> */</span><br> after():recordLog(){<br> System.out.println(<span class="hljs-string">"sayHello方法执行后记录日志"</span>);<br> }<br></code><br><code class="language-java hljs has-numbering"><code class="language-aspect hljs java has-numbering"> <span class="hljs-javadoc">/**<br> * 定义后置通知带返回值<br> * after(参数)returning(返回值类型):连接点函数{<br> * 函数体<br> * }<br> */</span><br> after()returning(<span class="hljs-keyword">int</span> x): get(){<br> System.out.println(<span class="hljs-string">"返回值为:"</span>+x);<br> }<br></code></code><br><code class="language-java hljs has-numbering"><code class="language-aspect hljs java has-numbering"><code class="language-aspect hljs java has-numbering"> <span class="hljs-javadoc">/**<br> * 异常通知<br> * after(参数) throwing(返回值类型):连接点函数{<br> * 函数体<br> * }<br> */</span><br> after() throwing(Exception e):sayHello2(){<br> System.out.println(<span class="hljs-string">"抛出异常:"</span>+e.toString());<br> }</code><br></code></code><br><code class="language-java hljs has-numbering"><code class="language-aspect hljs java has-numbering"><code class="language-aspect hljs java has-numbering"> <span class="hljs-javadoc">/**<br> * 环绕通知 可通过proceed()控制目标函数是否执行<br> * Object around(参数):连接点函数{<br> * 函数体<br> * Object result=proceed();//执行目标函数<br> * return result;<br> * }<br> */</span><br> Object around():aroundAdvice(){<br> System.out.println(<span class="hljs-string">"sayAround 执行前执行"</span>);<br> Object result=proceed();<span class="hljs-comment">//执行目标函数</span><br> System.out.println(<span class="hljs-string">"sayAround 执行后执行"</span>);<br> <span class="hljs-keyword">return</span> result;<br> }</code><br></code>}</code></pre>
AspectJ的织入方式
静态编译期织入
<span style="font-size: 14px;"><span lang="zh-cn" xml:lang="zh-cn"><font face="宋体">1</font></span></span><span style="font-size: 14px;">.</span><span style="font-size: 14px;"><span lang="zh-cn" xml:lang="zh-cn"><font face="宋体">基于代理的</font></span></span><span style="font-size: 14px;">AOP</span><span style="font-size: 14px;"><span lang="zh-cn" xml:lang="zh-cn"><font face="宋体">编程</font></span></span><p align="left" style="line-height: 15px; font-size: 15px;"><span style="font-size: 14px;"><span lang="zh-cn" xml:lang="zh-cn"><font face="宋体">2</font></span></span><span style="font-size: 14px;">.@Aspectj </span><span style="font-size: 14px;"><span lang="zh-cn" xml:lang="zh-cn"><font face="宋体">注解驱动的切面</font></span></span></p><p align="left" style="line-height: 15px; font-size: 15px;"><span style="font-size: 14px;"><span lang="zh-cn" xml:lang="zh-cn"><font face="宋体">3</font></span></span><span style="font-size: 14px;">.</span><span style="font-size: 14px;"><span lang="zh-cn" xml:lang="zh-cn"><font face="宋体">纯</font></span></span><span style="font-size: 14px;">POJO</span><span style="font-size: 14px;"><span lang="zh-cn" xml:lang="zh-cn"><font face="宋体">切面</font></span></span></p><p align="left" style="line-height: 15px; font-size: 15px;"><span style="font-size: 14px;">4.</span><span style="font-size: 14px;"><span lang="zh-cn" xml:lang="zh-cn"><font face="宋体">注入式</font></span></span><span style="font-size: 14px;">Aspectj</span><span style="font-family: "Droid Sans Fallback";"><span style="font-size: 14px;"><span lang="zh-cn" xml:lang="zh-cn"><font face="宋体">切面编程</font></span></span></span></p><br><span style="font-size: 14px;"><span lang="zh-cn" xml:lang="zh-cn"><font face="宋体">前面3个是</font></span></span><span style="font-size: 14px;">spring</span><span style="font-size: 14px;"><span lang="zh-cn" xml:lang="zh-cn"><font face="宋体">基于代理的</font></span></span><span style="font-size: 14px;">AOP</span><span style="font-size: 14px;"><span lang="zh-cn" xml:lang="zh-cn"><font face="宋体">编程,所以局限于方法拦截.如果要对属性或构造器拦截者应调用 </font></span></span><span style="font-size: 14px;">Aspectj</span><span style="font-family: "Droid Sans Fallback";"><span style="font-size: 14px;"><span lang="zh-cn" xml:lang="zh-cn"><font face="宋体">里面的切面.</font></span></span></span>
<span style="font-family:'Helvetica Neue', Helvetica, Arial, sans-serif;"><strong><span style="font-size:18px;color:#ff0000;">在运行时,动态地将代码切入到类的指定方法、指定位置上的编程思想就是面向切面的编程。<br></span></strong></span><span style="font-family:'KaiTi_GB2312';font-size:18px;"><span>可以延迟对象的加载,即在运行期再确定调用者和被调用者的关系。(解耦)</span></span><br><span style="font-family:'Helvetica Neue', Helvetica, Arial, sans-serif;"><strong><span style="font-size:18px;color:#ff0000;"></span></strong></span>
为Spring添加REST功能
了解REST
编写面向资源的控制器
表达资源
编写REST客户端
提交RESTful表单
spring计划任务
<span style="color: rgb(153, 153, 153); font-family: -apple-system, "SF UI Text", Arial, "PingFang SC", "Hiragino Sans GB", "Microsoft YaHei", "WenQuanYi Micro Hei", sans-serif; font-size: 14px; font-style: normal; font-variant-ligatures: common-ligatures; font-variant-caps: normal; font-weight: 400; letter-spacing: normal; orphans: 2; text-align: justify; text-indent: 0px; text-transform: none; white-space: normal; widows: 2; word-spacing: 0px; -webkit-text-stroke-width: 0px; background-color: rgb(238, 240, 244); text-decoration-style: initial; text-decoration-color: initial; display: inline !important; float: none;">创建计划任务执行类</span>
<span class="hljs-annotation" style="box-sizing: border-box; outline: 0px; color: rgb(155, 133, 157); font-size: 14px; word-break: break-all; font-family: Consolas, Inconsolata, Courier, monospace; font-style: normal; font-variant-ligatures: common-ligatures; font-variant-caps: normal; font-weight: 400; letter-spacing: normal; orphans: 2; text-align: start; text-indent: 0px; text-transform: none; white-space: pre; widows: 2; word-spacing: 0px; -webkit-text-stroke-width: 0px; text-decoration-style: initial; text-decoration-color: initial;">@Service</span><span style="color: rgb(0, 0, 0); font-family: Consolas, Inconsolata, Courier, monospace; font-size: 14px; font-style: normal; font-variant-ligatures: common-ligatures; font-variant-caps: normal; font-weight: 400; letter-spacing: normal; orphans: 2; text-align: start; text-indent: 0px; text-transform: none; white-space: pre; widows: 2; word-spacing: 0px; -webkit-text-stroke-width: 0px; background-color: rgb(246, 248, 250); text-decoration-style: initial; text-decoration-color: initial; display: inline !important; float: none;">
</span><span class="hljs-keyword" style="box-sizing: border-box; outline: 0px; color: rgb(0, 0, 136); font-size: 14px; word-break: break-all; font-family: Consolas, Inconsolata, Courier, monospace; font-style: normal; font-variant-ligatures: common-ligatures; font-variant-caps: normal; font-weight: 400; letter-spacing: normal; orphans: 2; text-align: start; text-indent: 0px; text-transform: none; white-space: pre; widows: 2; word-spacing: 0px; -webkit-text-stroke-width: 0px; text-decoration-style: initial; text-decoration-color: initial;">public</span><span style="color: rgb(0, 0, 0); font-family: Consolas, Inconsolata, Courier, monospace; font-size: 14px; font-style: normal; font-variant-ligatures: common-ligatures; font-variant-caps: normal; font-weight: 400; letter-spacing: normal; orphans: 2; text-align: start; text-indent: 0px; text-transform: none; white-space: pre; widows: 2; word-spacing: 0px; -webkit-text-stroke-width: 0px; background-color: rgb(246, 248, 250); text-decoration-style: initial; text-decoration-color: initial; display: inline !important; float: none;"> </span><span class="hljs-class" style="box-sizing: border-box; outline: 0px; font-size: 14px; word-break: break-all; color: rgb(0, 0, 0); font-family: Consolas, Inconsolata, Courier, monospace; font-style: normal; font-variant-ligatures: common-ligatures; font-variant-caps: normal; font-weight: 400; letter-spacing: normal; orphans: 2; text-align: start; text-indent: 0px; text-transform: none; white-space: pre; widows: 2; word-spacing: 0px; -webkit-text-stroke-width: 0px; text-decoration-style: initial; text-decoration-color: initial;"><span class="hljs-keyword" style="box-sizing: border-box; outline: 0px; color: rgb(0, 0, 136); font-size: inherit; word-break: break-all;">class</span> <span class="hljs-title" style="box-sizing: border-box; outline: 0px; color: rgb(79, 79, 79); font-size: inherit; word-break: break-all;">ScheduledTaskService</span> {</span><span style="color: rgb(0, 0, 0); font-family: Consolas, Inconsolata, Courier, monospace; font-size: 14px; font-style: normal; font-variant-ligatures: common-ligatures; font-variant-caps: normal; font-weight: 400; letter-spacing: normal; orphans: 2; text-align: start; text-indent: 0px; text-transform: none; white-space: pre; widows: 2; word-spacing: 0px; -webkit-text-stroke-width: 0px; background-color: rgb(246, 248, 250); text-decoration-style: initial; text-decoration-color: initial; display: inline !important; float: none;">
</span><span class="hljs-keyword" style="box-sizing: border-box; outline: 0px; color: rgb(0, 0, 136); font-size: 14px; word-break: break-all; font-family: Consolas, Inconsolata, Courier, monospace; font-style: normal; font-variant-ligatures: common-ligatures; font-variant-caps: normal; font-weight: 400; letter-spacing: normal; orphans: 2; text-align: start; text-indent: 0px; text-transform: none; white-space: pre; widows: 2; word-spacing: 0px; -webkit-text-stroke-width: 0px; text-decoration-style: initial; text-decoration-color: initial;">private</span><span style="color: rgb(0, 0, 0); font-family: Consolas, Inconsolata, Courier, monospace; font-size: 14px; font-style: normal; font-variant-ligatures: common-ligatures; font-variant-caps: normal; font-weight: 400; letter-spacing: normal; orphans: 2; text-align: start; text-indent: 0px; text-transform: none; white-space: pre; widows: 2; word-spacing: 0px; -webkit-text-stroke-width: 0px; background-color: rgb(246, 248, 250); text-decoration-style: initial; text-decoration-color: initial; display: inline !important; float: none;"> </span><span class="hljs-keyword" style="box-sizing: border-box; outline: 0px; color: rgb(0, 0, 136); font-size: 14px; word-break: break-all; font-family: Consolas, Inconsolata, Courier, monospace; font-style: normal; font-variant-ligatures: common-ligatures; font-variant-caps: normal; font-weight: 400; letter-spacing: normal; orphans: 2; text-align: start; text-indent: 0px; text-transform: none; white-space: pre; widows: 2; word-spacing: 0px; -webkit-text-stroke-width: 0px; text-decoration-style: initial; text-decoration-color: initial;">static</span><span style="color: rgb(0, 0, 0); font-family: Consolas, Inconsolata, Courier, monospace; font-size: 14px; font-style: normal; font-variant-ligatures: common-ligatures; font-variant-caps: normal; font-weight: 400; letter-spacing: normal; orphans: 2; text-align: start; text-indent: 0px; text-transform: none; white-space: pre; widows: 2; word-spacing: 0px; -webkit-text-stroke-width: 0px; background-color: rgb(246, 248, 250); text-decoration-style: initial; text-decoration-color: initial; display: inline !important; float: none;"> </span><span class="hljs-keyword" style="box-sizing: border-box; outline: 0px; color: rgb(0, 0, 136); font-size: 14px; word-break: break-all; font-family: Consolas, Inconsolata, Courier, monospace; font-style: normal; font-variant-ligatures: common-ligatures; font-variant-caps: normal; font-weight: 400; letter-spacing: normal; orphans: 2; text-align: start; text-indent: 0px; text-transform: none; white-space: pre; widows: 2; word-spacing: 0px; -webkit-text-stroke-width: 0px; text-decoration-style: initial; text-decoration-color: initial;">final</span><span style="color: rgb(0, 0, 0); font-family: Consolas, Inconsolata, Courier, monospace; font-size: 14px; font-style: normal; font-variant-ligatures: common-ligatures; font-variant-caps: normal; font-weight: 400; letter-spacing: normal; orphans: 2; text-align: start; text-indent: 0px; text-transform: none; white-space: pre; widows: 2; word-spacing: 0px; -webkit-text-stroke-width: 0px; background-color: rgb(246, 248, 250); text-decoration-style: initial; text-decoration-color: initial; display: inline !important; float: none;"> SimpleDateFormat FORMAT = </span><span class="hljs-keyword" style="box-sizing: border-box; outline: 0px; color: rgb(0, 0, 136); font-size: 14px; word-break: break-all; font-family: Consolas, Inconsolata, Courier, monospace; font-style: normal; font-variant-ligatures: common-ligatures; font-variant-caps: normal; font-weight: 400; letter-spacing: normal; orphans: 2; text-align: start; text-indent: 0px; text-transform: none; white-space: pre; widows: 2; word-spacing: 0px; -webkit-text-stroke-width: 0px; text-decoration-style: initial; text-decoration-color: initial;">new</span><span style="color: rgb(0, 0, 0); font-family: Consolas, Inconsolata, Courier, monospace; font-size: 14px; font-style: normal; font-variant-ligatures: common-ligatures; font-variant-caps: normal; font-weight: 400; letter-spacing: normal; orphans: 2; text-align: start; text-indent: 0px; text-transform: none; white-space: pre; widows: 2; word-spacing: 0px; -webkit-text-stroke-width: 0px; background-color: rgb(246, 248, 250); text-decoration-style: initial; text-decoration-color: initial; display: inline !important; float: none;"> SimpleDateFormat(</span><span class="hljs-string" style="box-sizing: border-box; outline: 0px; color: rgb(0, 153, 0); font-size: 14px; word-break: break-all; font-family: Consolas, Inconsolata, Courier, monospace; font-style: normal; font-variant-ligatures: common-ligatures; font-variant-caps: normal; font-weight: 400; letter-spacing: normal; orphans: 2; text-align: start; text-indent: 0px; text-transform: none; white-space: pre; widows: 2; word-spacing: 0px; -webkit-text-stroke-width: 0px; text-decoration-style: initial; text-decoration-color: initial;">"HH:mm:ss"</span><span style="color: rgb(0, 0, 0); font-family: Consolas, Inconsolata, Courier, monospace; font-size: 14px; font-style: normal; font-variant-ligatures: common-ligatures; font-variant-caps: normal; font-weight: 400; letter-spacing: normal; orphans: 2; text-align: start; text-indent: 0px; text-transform: none; white-space: pre; widows: 2; word-spacing: 0px; -webkit-text-stroke-width: 0px; background-color: rgb(246, 248, 250); text-decoration-style: initial; text-decoration-color: initial; display: inline !important; float: none;">);
</span><span class="hljs-annotation" style="box-sizing: border-box; outline: 0px; color: rgb(155, 133, 157); font-size: 14px; word-break: break-all; font-family: Consolas, Inconsolata, Courier, monospace; font-style: normal; font-variant-ligatures: common-ligatures; font-variant-caps: normal; font-weight: 400; letter-spacing: normal; orphans: 2; text-align: start; text-indent: 0px; text-transform: none; white-space: pre; widows: 2; word-spacing: 0px; -webkit-text-stroke-width: 0px; text-decoration-style: initial; text-decoration-color: initial;">@Scheduled</span><span style="color: rgb(0, 0, 0); font-family: Consolas, Inconsolata, Courier, monospace; font-size: 14px; font-style: normal; font-variant-ligatures: common-ligatures; font-variant-caps: normal; font-weight: 400; letter-spacing: normal; orphans: 2; text-align: start; text-indent: 0px; text-transform: none; white-space: pre; widows: 2; word-spacing: 0px; -webkit-text-stroke-width: 0px; background-color: rgb(246, 248, 250); text-decoration-style: initial; text-decoration-color: initial; display: inline !important; float: none;">(fixedRate = </span><span class="hljs-number" style="box-sizing: border-box; outline: 0px; color: rgb(0, 102, 102); font-size: 14px; word-break: break-all; font-family: Consolas, Inconsolata, Courier, monospace; font-style: normal; font-variant-ligatures: common-ligatures; font-variant-caps: normal; font-weight: 400; letter-spacing: normal; orphans: 2; text-align: start; text-indent: 0px; text-transform: none; white-space: pre; widows: 2; word-spacing: 0px; -webkit-text-stroke-width: 0px; text-decoration-style: initial; text-decoration-color: initial;">5000</span><span style="color: rgb(0, 0, 0); font-family: Consolas, Inconsolata, Courier, monospace; font-size: 14px; font-style: normal; font-variant-ligatures: common-ligatures; font-variant-caps: normal; font-weight: 400; letter-spacing: normal; orphans: 2; text-align: start; text-indent: 0px; text-transform: none; white-space: pre; widows: 2; word-spacing: 0px; -webkit-text-stroke-width: 0px; background-color: rgb(246, 248, 250); text-decoration-style: initial; text-decoration-color: initial; display: inline !important; float: none;">)
</span><span class="hljs-keyword" style="box-sizing: border-box; outline: 0px; color: rgb(0, 0, 136); font-size: 14px; word-break: break-all; font-family: Consolas, Inconsolata, Courier, monospace; font-style: normal; font-variant-ligatures: common-ligatures; font-variant-caps: normal; font-weight: 400; letter-spacing: normal; orphans: 2; text-align: start; text-indent: 0px; text-transform: none; white-space: pre; widows: 2; word-spacing: 0px; -webkit-text-stroke-width: 0px; text-decoration-style: initial; text-decoration-color: initial;">public</span><span style="color: rgb(0, 0, 0); font-family: Consolas, Inconsolata, Courier, monospace; font-size: 14px; font-style: normal; font-variant-ligatures: common-ligatures; font-variant-caps: normal; font-weight: 400; letter-spacing: normal; orphans: 2; text-align: start; text-indent: 0px; text-transform: none; white-space: pre; widows: 2; word-spacing: 0px; -webkit-text-stroke-width: 0px; background-color: rgb(246, 248, 250); text-decoration-style: initial; text-decoration-color: initial; display: inline !important; float: none;"> </span><span class="hljs-keyword" style="box-sizing: border-box; outline: 0px; color: rgb(0, 0, 136); font-size: 14px; word-break: break-all; font-family: Consolas, Inconsolata, Courier, monospace; font-style: normal; font-variant-ligatures: common-ligatures; font-variant-caps: normal; font-weight: 400; letter-spacing: normal; orphans: 2; text-align: start; text-indent: 0px; text-transform: none; white-space: pre; widows: 2; word-spacing: 0px; -webkit-text-stroke-width: 0px; text-decoration-style: initial; text-decoration-color: initial;">void</span><span style="color: rgb(0, 0, 0); font-family: Consolas, Inconsolata, Courier, monospace; font-size: 14px; font-style: normal; font-variant-ligatures: common-ligatures; font-variant-caps: normal; font-weight: 400; letter-spacing: normal; orphans: 2; text-align: start; text-indent: 0px; text-transform: none; white-space: pre; widows: 2; word-spacing: 0px; -webkit-text-stroke-width: 0px; background-color: rgb(246, 248, 250); text-decoration-style: initial; text-decoration-color: initial; display: inline !important; float: none;"> </span><span class="hljs-title" style="box-sizing: border-box; outline: 0px; color: rgb(0, 153, 0); font-size: 14px; word-break: break-all; font-family: Consolas, Inconsolata, Courier, monospace; font-style: normal; font-variant-ligatures: common-ligatures; font-variant-caps: normal; font-weight: 400; letter-spacing: normal; orphans: 2; text-align: start; text-indent: 0px; text-transform: none; white-space: pre; widows: 2; word-spacing: 0px; -webkit-text-stroke-width: 0px; text-decoration-style: initial; text-decoration-color: initial;">reportCurrentTime</span><span style="color: rgb(0, 0, 0); font-family: Consolas, Inconsolata, Courier, monospace; font-size: 14px; font-style: normal; font-variant-ligatures: common-ligatures; font-variant-caps: normal; font-weight: 400; letter-spacing: normal; orphans: 2; text-align: start; text-indent: 0px; text-transform: none; white-space: pre; widows: 2; word-spacing: 0px; -webkit-text-stroke-width: 0px; background-color: rgb(246, 248, 250); text-decoration-style: initial; text-decoration-color: initial; display: inline !important; float: none;">() {
System.out.println(</span><span class="hljs-string" style="box-sizing: border-box; outline: 0px; color: rgb(0, 153, 0); font-size: 14px; word-break: break-all; font-family: Consolas, Inconsolata, Courier, monospace; font-style: normal; font-variant-ligatures: common-ligatures; font-variant-caps: normal; font-weight: 400; letter-spacing: normal; orphans: 2; text-align: start; text-indent: 0px; text-transform: none; white-space: pre; widows: 2; word-spacing: 0px; -webkit-text-stroke-width: 0px; text-decoration-style: initial; text-decoration-color: initial;">"每隔5秒执行一次:"</span><span style="color: rgb(0, 0, 0); font-family: Consolas, Inconsolata, Courier, monospace; font-size: 14px; font-style: normal; font-variant-ligatures: common-ligatures; font-variant-caps: normal; font-weight: 400; letter-spacing: normal; orphans: 2; text-align: start; text-indent: 0px; text-transform: none; white-space: pre; widows: 2; word-spacing: 0px; -webkit-text-stroke-width: 0px; background-color: rgb(246, 248, 250); text-decoration-style: initial; text-decoration-color: initial; display: inline !important; float: none;"> + FORMAT.format(</span><span class="hljs-keyword" style="box-sizing: border-box; outline: 0px; color: rgb(0, 0, 136); font-size: 14px; word-break: break-all; font-family: Consolas, Inconsolata, Courier, monospace; font-style: normal; font-variant-ligatures: common-ligatures; font-variant-caps: normal; font-weight: 400; letter-spacing: normal; orphans: 2; text-align: start; text-indent: 0px; text-transform: none; white-space: pre; widows: 2; word-spacing: 0px; -webkit-text-stroke-width: 0px; text-decoration-style: initial; text-decoration-color: initial;">new</span><span style="color: rgb(0, 0, 0); font-family: Consolas, Inconsolata, Courier, monospace; font-size: 14px; font-style: normal; font-variant-ligatures: common-ligatures; font-variant-caps: normal; font-weight: 400; letter-spacing: normal; orphans: 2; text-align: start; text-indent: 0px; text-transform: none; white-space: pre; widows: 2; word-spacing: 0px; -webkit-text-stroke-width: 0px; background-color: rgb(246, 248, 250); text-decoration-style: initial; text-decoration-color: initial; display: inline !important; float: none;"> Date()));
}
</span><span class="hljs-annotation" style="box-sizing: border-box; outline: 0px; color: rgb(155, 133, 157); font-size: 14px; word-break: break-all; font-family: Consolas, Inconsolata, Courier, monospace; font-style: normal; font-variant-ligatures: common-ligatures; font-variant-caps: normal; font-weight: 400; letter-spacing: normal; orphans: 2; text-align: start; text-indent: 0px; text-transform: none; white-space: pre; widows: 2; word-spacing: 0px; -webkit-text-stroke-width: 0px; text-decoration-style: initial; text-decoration-color: initial;">@Scheduled</span><span style="color: rgb(0, 0, 0); font-family: Consolas, Inconsolata, Courier, monospace; font-size: 14px; font-style: normal; font-variant-ligatures: common-ligatures; font-variant-caps: normal; font-weight: 400; letter-spacing: normal; orphans: 2; text-align: start; text-indent: 0px; text-transform: none; white-space: pre; widows: 2; word-spacing: 0px; -webkit-text-stroke-width: 0px; background-color: rgb(246, 248, 250); text-decoration-style: initial; text-decoration-color: initial; display: inline !important; float: none;">(fixedDelay = </span><span class="hljs-number" style="box-sizing: border-box; outline: 0px; color: rgb(0, 102, 102); font-size: 14px; word-break: break-all; font-family: Consolas, Inconsolata, Courier, monospace; font-style: normal; font-variant-ligatures: common-ligatures; font-variant-caps: normal; font-weight: 400; letter-spacing: normal; orphans: 2; text-align: start; text-indent: 0px; text-transform: none; white-space: pre; widows: 2; word-spacing: 0px; -webkit-text-stroke-width: 0px; text-decoration-style: initial; text-decoration-color: initial;">10000</span><span style="color: rgb(0, 0, 0); font-family: Consolas, Inconsolata, Courier, monospace; font-size: 14px; font-style: normal; font-variant-ligatures: common-ligatures; font-variant-caps: normal; font-weight: 400; letter-spacing: normal; orphans: 2; text-align: start; text-indent: 0px; text-transform: none; white-space: pre; widows: 2; word-spacing: 0px; -webkit-text-stroke-width: 0px; background-color: rgb(246, 248, 250); text-decoration-style: initial; text-decoration-color: initial; display: inline !important; float: none;">)
</span><span class="hljs-keyword" style="box-sizing: border-box; outline: 0px; color: rgb(0, 0, 136); font-size: 14px; word-break: break-all; font-family: Consolas, Inconsolata, Courier, monospace; font-style: normal; font-variant-ligatures: common-ligatures; font-variant-caps: normal; font-weight: 400; letter-spacing: normal; orphans: 2; text-align: start; text-indent: 0px; text-transform: none; white-space: pre; widows: 2; word-spacing: 0px; -webkit-text-stroke-width: 0px; text-decoration-style: initial; text-decoration-color: initial;">public</span><span style="color: rgb(0, 0, 0); font-family: Consolas, Inconsolata, Courier, monospace; font-size: 14px; font-style: normal; font-variant-ligatures: common-ligatures; font-variant-caps: normal; font-weight: 400; letter-spacing: normal; orphans: 2; text-align: start; text-indent: 0px; text-transform: none; white-space: pre; widows: 2; word-spacing: 0px; -webkit-text-stroke-width: 0px; background-color: rgb(246, 248, 250); text-decoration-style: initial; text-decoration-color: initial; display: inline !important; float: none;"> </span><span class="hljs-keyword" style="box-sizing: border-box; outline: 0px; color: rgb(0, 0, 136); font-size: 14px; word-break: break-all; font-family: Consolas, Inconsolata, Courier, monospace; font-style: normal; font-variant-ligatures: common-ligatures; font-variant-caps: normal; font-weight: 400; letter-spacing: normal; orphans: 2; text-align: start; text-indent: 0px; text-transform: none; white-space: pre; widows: 2; word-spacing: 0px; -webkit-text-stroke-width: 0px; text-decoration-style: initial; text-decoration-color: initial;">void</span><span style="color: rgb(0, 0, 0); font-family: Consolas, Inconsolata, Courier, monospace; font-size: 14px; font-style: normal; font-variant-ligatures: common-ligatures; font-variant-caps: normal; font-weight: 400; letter-spacing: normal; orphans: 2; text-align: start; text-indent: 0px; text-transform: none; white-space: pre; widows: 2; word-spacing: 0px; -webkit-text-stroke-width: 0px; background-color: rgb(246, 248, 250); text-decoration-style: initial; text-decoration-color: initial; display: inline !important; float: none;"> </span><span class="hljs-title" style="box-sizing: border-box; outline: 0px; color: rgb(0, 153, 0); font-size: 14px; word-break: break-all; font-family: Consolas, Inconsolata, Courier, monospace; font-style: normal; font-variant-ligatures: common-ligatures; font-variant-caps: normal; font-weight: 400; letter-spacing: normal; orphans: 2; text-align: start; text-indent: 0px; text-transform: none; white-space: pre; widows: 2; word-spacing: 0px; -webkit-text-stroke-width: 0px; text-decoration-style: initial; text-decoration-color: initial;">delayExecuteTask</span><span style="color: rgb(0, 0, 0); font-family: Consolas, Inconsolata, Courier, monospace; font-size: 14px; font-style: normal; font-variant-ligatures: common-ligatures; font-variant-caps: normal; font-weight: 400; letter-spacing: normal; orphans: 2; text-align: start; text-indent: 0px; text-transform: none; white-space: pre; widows: 2; word-spacing: 0px; -webkit-text-stroke-width: 0px; background-color: rgb(246, 248, 250); text-decoration-style: initial; text-decoration-color: initial; display: inline !important; float: none;">() {
System.out.println(</span><span class="hljs-string" style="box-sizing: border-box; outline: 0px; color: rgb(0, 153, 0); font-size: 14px; word-break: break-all; font-family: Consolas, Inconsolata, Courier, monospace; font-style: normal; font-variant-ligatures: common-ligatures; font-variant-caps: normal; font-weight: 400; letter-spacing: normal; orphans: 2; text-align: start; text-indent: 0px; text-transform: none; white-space: pre; widows: 2; word-spacing: 0px; -webkit-text-stroke-width: 0px; text-decoration-style: initial; text-decoration-color: initial;">"延迟10s之后,每隔10s执行一次"</span><span style="color: rgb(0, 0, 0); font-family: Consolas, Inconsolata, Courier, monospace; font-size: 14px; font-style: normal; font-variant-ligatures: common-ligatures; font-variant-caps: normal; font-weight: 400; letter-spacing: normal; orphans: 2; text-align: start; text-indent: 0px; text-transform: none; white-space: pre; widows: 2; word-spacing: 0px; -webkit-text-stroke-width: 0px; background-color: rgb(246, 248, 250); text-decoration-style: initial; text-decoration-color: initial; display: inline !important; float: none;">);
}</span>
<span style="color: rgb(0, 0, 0); font-family: Consolas, Inconsolata, Courier, monospace; font-size: 14px; font-style: normal; font-variant-ligatures: common-ligatures; font-variant-caps: normal; font-weight: 400; letter-spacing: normal; orphans: 2; text-align: start; text-indent: 0px; text-transform: none; white-space: pre; widows: 2; word-spacing: 0px; -webkit-text-stroke-width: 0px; background-color: rgb(246, 248, 250); text-decoration-style: initial; text-decoration-color: initial; display: inline !important; float: none;"> </span><span class="hljs-annotation" style="box-sizing: border-box; outline: 0px; color: rgb(155, 133, 157); font-size: 14px; word-break: break-all; font-family: Consolas, Inconsolata, Courier, monospace; font-style: normal; font-variant-ligatures: common-ligatures; font-variant-caps: normal; font-weight: 400; letter-spacing: normal; orphans: 2; text-align: start; text-indent: 0px; text-transform: none; white-space: pre; widows: 2; word-spacing: 0px; -webkit-text-stroke-width: 0px; text-decoration-style: initial; text-decoration-color: initial;">@Scheduled注解</span>
<span style="color: rgb(136, 0, 0); font-family: Consolas, Inconsolata, Courier, monospace; font-size: 14px; font-style: normal; font-variant-ligatures: common-ligatures; font-variant-caps: normal; font-weight: 400; letter-spacing: normal; orphans: 2; text-align: start; text-indent: 0px; text-transform: none; white-space: pre; widows: 2; word-spacing: 0px; -webkit-text-stroke-width: 0px; background-color: rgb(246, 248, 250); text-decoration-style: initial; text-decoration-color: initial; display: inline !important; float: none;">CronTrigger参数</span>
格式
<span style="color: rgb(136, 0, 0); font-family: Consolas, Inconsolata, Courier, monospace; font-size: 14px; font-style: normal; font-variant-ligatures: common-ligatures; font-variant-caps: normal; font-weight: 400; letter-spacing: normal; orphans: 2; text-align: start; text-indent: 0px; text-transform: none; white-space: pre; widows: 2; word-spacing: 0px; -webkit-text-stroke-width: 0px; background-color: rgb(246, 248, 250); text-decoration-style: initial; text-decoration-color: initial; display: inline !important; float: none;"> 格式: [秒] [分] [小时] [日] [月] [周] [年]
序号 说明 是否必填 允许填写的值 允许的通配符
1 秒 是 0-59 , - * /
2 分 是 0-59 , - * /
3 小时 是 0-23 , - * /
4 日 是 1-31 , - * ? / L W
5 月 是 1-12 or JAN-DEC , - * /
6 周 是 1-7 or SUN-SAT , - * ? / L #
7 年 否 empty 或 1970-2099 , - * /</span>
通配符说明
<span style="color: rgb(136, 0, 0); font-family: Consolas, Inconsolata, Courier, monospace; font-size: 14px; font-style: normal; font-variant-ligatures: common-ligatures; font-variant-caps: normal; font-weight: 400; letter-spacing: normal; orphans: 2; text-align: start; text-indent: 0px; text-transform: none; white-space: pre; widows: 2; word-spacing: 0px; -webkit-text-stroke-width: 0px; background-color: rgb(246, 248, 250); text-decoration-style: initial; text-decoration-color: initial; display: inline !important; float: none;"> * 表示所有值. 例如:在分的字段上设置 "*",表示每一分钟都会触发。<br> ? 表示不指定值。使用的场景为不需要关心当前设置这个字段的值。<br> 例如:要在每月的10号触发一个操作,但不关心是周几,所以需要周位置的那个字段设置为"?" 具体设置为 0 0 0 10 * ?<br> - 表示区间。例如在小时上设置 "10-12",表示 10,11,12点都会触发。<br> , 表示指定多个值,例如在周字段上设置 "MON,WED,FRI" 表示周一,周三和周五触发<br> / 用于递增触发。如在秒上面设置"5/15" 表示从5秒开始,每增15秒触发(5,20,35,50)。 <br> 在月字段上设置'1/3'所示每月1号开始,每隔三天触发一次。<br> L 表示最后的意思。在日字段设置上,表示当月的最后一天(依据当前月份,如果是二月还会依据是否是润年[leap]), <br> 在周字段上表示星期六,相当于"7"或"SAT"。如果在"L"前加上数字,则表示该数据的最后一个。<br> 例如在周字段上设置"6L"这样的格式,则表示“本 月最后一个星期五"<br> W 表示离指定日期的最近那个工作日(周一至周五). 例如在日字段上设置"15W",表示离每月15号最近的那个工作日触发。<br> 如果15号正好是周六,则找最近的周五(14号)触发, 如果15号是周未,则找最近的下周一(16号)触发.<br> 如果15号正好在工作日(周一至周五),则就在该天触发。如果指定格式为 "1W",它则表示每月1号往后最近的工作日触发。<br> 如果1号正是周六,则将在3号下周一触发。(注,"W"前只能设置具体的数字,不允许区间"-").<br> 小提示<br> 'L'和 'W'可以一组合使用。如果在日字段上设置"LW",则表示在本月的最后一个工作日触发(一般指发工资 )<br> # 序号(表示每月的第几个周几),例如在周字段上设置"6#3"表示在每月的第三个周六.注意如果指定"#5",<br> 正好第五周没有周六,则不会触发该配置(用 在母亲节和父亲节再合适不过了)<br> 小提示<br> 周字段的设置,若使用英文字母是不区分大小写的 MON 与mon相同.<br></span><br class="Apple-interchange-newline">
示例
<span style="color: rgb(136, 0, 0); font-family: Consolas, Inconsolata, Courier, monospace; font-size: 14px; font-style: normal; font-variant-ligatures: common-ligatures; font-variant-caps: normal; font-weight: 400; letter-spacing: normal; orphans: 2; text-align: start; text-indent: 0px; text-transform: none; white-space: pre; widows: 2; word-spacing: 0px; -webkit-text-stroke-width: 0px; background-color: rgb(246, 248, 250); text-decoration-style: initial; text-decoration-color: initial; display: inline !important; float: none;">0 0 12 * * ? 每天12点触发
0 15 10 ? * * 每天10点15分触发
0 15 10 * * ? 每天10点15分触发
0 15 10 * * ? * 每天10点15分触发
0 15 10 * * ? 2005 2005年每天10点15分触发
0 * 14 * * ? 每天下午的 2点到2点59分每分触发
0 0/5 14 * * ? 每天下午的 2点到2点59分(整点开始,每隔5分触发)
0 0/5 14,18 * * ? 每天下午的 2点到2点59分(整点开始,每隔5分触发) 每天下午的 18点到18点59分(整点开始,每隔5分触发)
0 0-5 14 * * ? 每天下午的 2点到2点05分每分触发
0 10,44 14 ? 3 WED 3月分每周三下午的 2点10分和2点44分触发
0 15 10 ? * MON-FRI 从周一到周五每天上午的10点15分触发
0 15 10 15 * ? 每月15号上午10点15分触发
0 15 10 L * ? 每月最后一天的10点15分触发
0 15 10 ? * 6L 每月最后一周的星期五的10点15分触发
0 15 10 ? * 6L 2002-2005 从2002年到2005年每月最后一周的星期五的10点15分触发
0 15 10 ? * 6#3 每月的第三周的星期五开始触发
0 0 12 1/5 * ? 每月的第一个中午开始每隔5天触发一次
0 11 11 11 11 ? 每年的11月11号 11点11分触发</span>
示例
<span class="hljs-annotation" style="box-sizing: border-box; outline: 0px; color: rgb(155, 133, 157); font-size: 14px; word-break: break-all; font-family: Consolas, Inconsolata, Courier, monospace; font-style: normal; font-variant-ligatures: common-ligatures; font-variant-caps: normal; font-weight: 400; letter-spacing: normal; orphans: 2; text-align: start; text-indent: 0px; text-transform: none; white-space: pre; widows: 2; word-spacing: 0px; -webkit-text-stroke-width: 0px; text-decoration-style: initial; text-decoration-color: initial;">@Scheduled</span><span style="color: rgb(0, 0, 0); font-family: Consolas, Inconsolata, Courier, monospace; font-size: 14px; font-style: normal; font-variant-ligatures: common-ligatures; font-variant-caps: normal; font-weight: 400; letter-spacing: normal; orphans: 2; text-align: start; text-indent: 0px; text-transform: none; white-space: pre; widows: 2; word-spacing: 0px; -webkit-text-stroke-width: 0px; background-color: rgb(246, 248, 250); text-decoration-style: initial; text-decoration-color: initial; display: inline !important; float: none;">(cron = </span><span class="hljs-string" style="box-sizing: border-box; outline: 0px; color: rgb(0, 153, 0); font-size: 14px; word-break: break-all; font-family: Consolas, Inconsolata, Courier, monospace; font-style: normal; font-variant-ligatures: common-ligatures; font-variant-caps: normal; font-weight: 400; letter-spacing: normal; orphans: 2; text-align: start; text-indent: 0px; text-transform: none; white-space: pre; widows: 2; word-spacing: 0px; -webkit-text-stroke-width: 0px; text-decoration-style: initial; text-decoration-color: initial;">"0 51 20 * * ?"</span><span style="color: rgb(0, 0, 0); font-family: Consolas, Inconsolata, Courier, monospace; font-size: 14px; font-style: normal; font-variant-ligatures: common-ligatures; font-variant-caps: normal; font-weight: 400; letter-spacing: normal; orphans: 2; text-align: start; text-indent: 0px; text-transform: none; white-space: pre; widows: 2; word-spacing: 0px; -webkit-text-stroke-width: 0px; background-color: rgb(246, 248, 250); text-decoration-style: initial; text-decoration-color: initial; display: inline !important; float: none;">)
</span><span class="hljs-keyword" style="box-sizing: border-box; outline: 0px; color: rgb(0, 0, 136); font-size: 14px; word-break: break-all; font-family: Consolas, Inconsolata, Courier, monospace; font-style: normal; font-variant-ligatures: common-ligatures; font-variant-caps: normal; font-weight: 400; letter-spacing: normal; orphans: 2; text-align: start; text-indent: 0px; text-transform: none; white-space: pre; widows: 2; word-spacing: 0px; -webkit-text-stroke-width: 0px; text-decoration-style: initial; text-decoration-color: initial;">public</span><span style="color: rgb(0, 0, 0); font-family: Consolas, Inconsolata, Courier, monospace; font-size: 14px; font-style: normal; font-variant-ligatures: common-ligatures; font-variant-caps: normal; font-weight: 400; letter-spacing: normal; orphans: 2; text-align: start; text-indent: 0px; text-transform: none; white-space: pre; widows: 2; word-spacing: 0px; -webkit-text-stroke-width: 0px; background-color: rgb(246, 248, 250); text-decoration-style: initial; text-decoration-color: initial; display: inline !important; float: none;"> </span><span class="hljs-keyword" style="box-sizing: border-box; outline: 0px; color: rgb(0, 0, 136); font-size: 14px; word-break: break-all; font-family: Consolas, Inconsolata, Courier, monospace; font-style: normal; font-variant-ligatures: common-ligatures; font-variant-caps: normal; font-weight: 400; letter-spacing: normal; orphans: 2; text-align: start; text-indent: 0px; text-transform: none; white-space: pre; widows: 2; word-spacing: 0px; -webkit-text-stroke-width: 0px; text-decoration-style: initial; text-decoration-color: initial;">void</span><span style="color: rgb(0, 0, 0); font-family: Consolas, Inconsolata, Courier, monospace; font-size: 14px; font-style: normal; font-variant-ligatures: common-ligatures; font-variant-caps: normal; font-weight: 400; letter-spacing: normal; orphans: 2; text-align: start; text-indent: 0px; text-transform: none; white-space: pre; widows: 2; word-spacing: 0px; -webkit-text-stroke-width: 0px; background-color: rgb(246, 248, 250); text-decoration-style: initial; text-decoration-color: initial; display: inline !important; float: none;"> </span><span class="hljs-title" style="box-sizing: border-box; outline: 0px; color: rgb(0, 153, 0); font-size: 14px; word-break: break-all; font-family: Consolas, Inconsolata, Courier, monospace; font-style: normal; font-variant-ligatures: common-ligatures; font-variant-caps: normal; font-weight: 400; letter-spacing: normal; orphans: 2; text-align: start; text-indent: 0px; text-transform: none; white-space: pre; widows: 2; word-spacing: 0px; -webkit-text-stroke-width: 0px; text-decoration-style: initial; text-decoration-color: initial;">fixTimeExecution</span><span style="color: rgb(0, 0, 0); font-family: Consolas, Inconsolata, Courier, monospace; font-size: 14px; font-style: normal; font-variant-ligatures: common-ligatures; font-variant-caps: normal; font-weight: 400; letter-spacing: normal; orphans: 2; text-align: start; text-indent: 0px; text-transform: none; white-space: pre; widows: 2; word-spacing: 0px; -webkit-text-stroke-width: 0px; background-color: rgb(246, 248, 250); text-decoration-style: initial; text-decoration-color: initial; display: inline !important; float: none;">() {
System.out.println(</span><span class="hljs-string" style="box-sizing: border-box; outline: 0px; color: rgb(0, 153, 0); font-size: 14px; word-break: break-all; font-family: Consolas, Inconsolata, Courier, monospace; font-style: normal; font-variant-ligatures: common-ligatures; font-variant-caps: normal; font-weight: 400; letter-spacing: normal; orphans: 2; text-align: start; text-indent: 0px; text-transform: none; white-space: pre; widows: 2; word-spacing: 0px; -webkit-text-stroke-width: 0px; text-decoration-style: initial; text-decoration-color: initial;">"在指定时间:"</span><span style="color: rgb(0, 0, 0); font-family: Consolas, Inconsolata, Courier, monospace; font-size: 14px; font-style: normal; font-variant-ligatures: common-ligatures; font-variant-caps: normal; font-weight: 400; letter-spacing: normal; orphans: 2; text-align: start; text-indent: 0px; text-transform: none; white-space: pre; widows: 2; word-spacing: 0px; -webkit-text-stroke-width: 0px; background-color: rgb(246, 248, 250); text-decoration-style: initial; text-decoration-color: initial; display: inline !important; float: none;">+FORMAT.format(</span><span class="hljs-keyword" style="box-sizing: border-box; outline: 0px; color: rgb(0, 0, 136); font-size: 14px; word-break: break-all; font-family: Consolas, Inconsolata, Courier, monospace; font-style: normal; font-variant-ligatures: common-ligatures; font-variant-caps: normal; font-weight: 400; letter-spacing: normal; orphans: 2; text-align: start; text-indent: 0px; text-transform: none; white-space: pre; widows: 2; word-spacing: 0px; -webkit-text-stroke-width: 0px; text-decoration-style: initial; text-decoration-color: initial;">new</span><span style="color: rgb(0, 0, 0); font-family: Consolas, Inconsolata, Courier, monospace; font-size: 14px; font-style: normal; font-variant-ligatures: common-ligatures; font-variant-caps: normal; font-weight: 400; letter-spacing: normal; orphans: 2; text-align: start; text-indent: 0px; text-transform: none; white-space: pre; widows: 2; word-spacing: 0px; -webkit-text-stroke-width: 0px; background-color: rgb(246, 248, 250); text-decoration-style: initial; text-decoration-color: initial; display: inline !important; float: none;"> Date())+</span><span class="hljs-string" style="box-sizing: border-box; outline: 0px; color: rgb(0, 153, 0); font-size: 14px; word-break: break-all; font-family: Consolas, Inconsolata, Courier, monospace; font-style: normal; font-variant-ligatures: common-ligatures; font-variant-caps: normal; font-weight: 400; letter-spacing: normal; orphans: 2; text-align: start; text-indent: 0px; text-transform: none; white-space: pre; widows: 2; word-spacing: 0px; -webkit-text-stroke-width: 0px; text-decoration-style: initial; text-decoration-color: initial;">"执行"</span><span style="color: rgb(0, 0, 0); font-family: Consolas, Inconsolata, Courier, monospace; font-size: 14px; font-style: normal; font-variant-ligatures: common-ligatures; font-variant-caps: normal; font-weight: 400; letter-spacing: normal; orphans: 2; text-align: start; text-indent: 0px; text-transform: none; white-space: pre; widows: 2; word-spacing: 0px; -webkit-text-stroke-width: 0px; background-color: rgb(246, 248, 250); text-decoration-style: initial; text-decoration-color: initial; display: inline !important; float: none;">);
}</span>
配置类
<span class="hljs-annotation" style="box-sizing: border-box; outline: 0px; color: rgb(155, 133, 157); font-size: 14px; word-break: break-all; font-family: Consolas, Inconsolata, Courier, monospace; font-style: normal; font-variant-ligatures: common-ligatures; font-variant-caps: normal; font-weight: 400; letter-spacing: normal; orphans: 2; text-align: start; text-indent: 0px; text-transform: none; white-space: pre; widows: 2; word-spacing: 0px; -webkit-text-stroke-width: 0px; text-decoration-style: initial; text-decoration-color: initial;">@Configuration</span><span style="color: rgb(0, 0, 0); font-family: Consolas, Inconsolata, Courier, monospace; font-size: 14px; font-style: normal; font-variant-ligatures: common-ligatures; font-variant-caps: normal; font-weight: 400; letter-spacing: normal; orphans: 2; text-align: start; text-indent: 0px; text-transform: none; white-space: pre; widows: 2; word-spacing: 0px; -webkit-text-stroke-width: 0px; background-color: rgb(246, 248, 250); text-decoration-style: initial; text-decoration-color: initial; display: inline !important; float: none;"><br></span><span class="hljs-annotation" style="box-sizing: border-box; outline: 0px; color: rgb(155, 133, 157); font-size: 14px; word-break: break-all; font-family: Consolas, Inconsolata, Courier, monospace; font-style: normal; font-variant-ligatures: common-ligatures; font-variant-caps: normal; font-weight: 400; letter-spacing: normal; orphans: 2; text-align: start; text-indent: 0px; text-transform: none; white-space: pre; widows: 2; word-spacing: 0px; -webkit-text-stroke-width: 0px; text-decoration-style: initial; text-decoration-color: initial;">@ComponentScan</span><span style="color: rgb(0, 0, 0); font-family: Consolas, Inconsolata, Courier, monospace; font-size: 14px; font-style: normal; font-variant-ligatures: common-ligatures; font-variant-caps: normal; font-weight: 400; letter-spacing: normal; orphans: 2; text-align: start; text-indent: 0px; text-transform: none; white-space: pre; widows: 2; word-spacing: 0px; -webkit-text-stroke-width: 0px; background-color: rgb(246, 248, 250); text-decoration-style: initial; text-decoration-color: initial; display: inline !important; float: none;">(</span><span class="hljs-string" style="box-sizing: border-box; outline: 0px; color: rgb(0, 153, 0); font-size: 14px; word-break: break-all; font-family: Consolas, Inconsolata, Courier, monospace; font-style: normal; font-variant-ligatures: common-ligatures; font-variant-caps: normal; font-weight: 400; letter-spacing: normal; orphans: 2; text-align: start; text-indent: 0px; text-transform: none; white-space: pre; widows: 2; word-spacing: 0px; -webkit-text-stroke-width: 0px; text-decoration-style: initial; text-decoration-color: initial;">"org.sang"</span><span style="color: rgb(0, 0, 0); font-family: Consolas, Inconsolata, Courier, monospace; font-size: 14px; font-style: normal; font-variant-ligatures: common-ligatures; font-variant-caps: normal; font-weight: 400; letter-spacing: normal; orphans: 2; text-align: start; text-indent: 0px; text-transform: none; white-space: pre; widows: 2; word-spacing: 0px; -webkit-text-stroke-width: 0px; background-color: rgb(246, 248, 250); text-decoration-style: initial; text-decoration-color: initial; display: inline !important; float: none;">)<br></span><span class="hljs-annotation" style="box-sizing: border-box; outline: 0px; color: rgb(155, 133, 157); font-size: 14px; word-break: break-all; font-family: Consolas, Inconsolata, Courier, monospace; font-style: normal; font-variant-ligatures: common-ligatures; font-variant-caps: normal; font-weight: 400; letter-spacing: normal; orphans: 2; text-align: start; text-indent: 0px; text-transform: none; white-space: pre; widows: 2; word-spacing: 0px; -webkit-text-stroke-width: 0px; text-decoration-style: initial; text-decoration-color: initial;">@EnableScheduling</span><span class="hljs-comment" style="box-sizing: border-box; outline: 0px; color: rgb(136, 0, 0); font-size: 14px; word-break: break-all; font-family: Consolas, Inconsolata, Courier, monospace; font-style: normal; font-variant-ligatures: common-ligatures; font-variant-caps: normal; font-weight: 400; letter-spacing: normal; orphans: 2; text-align: start; text-indent: 0px; text-transform: none; white-space: pre; widows: 2; word-spacing: 0px; -webkit-text-stroke-width: 0px; text-decoration-style: initial; text-decoration-color: initial;">//开启对计划任务的支持</span><span style="color: rgb(0, 0, 0); font-family: Consolas, Inconsolata, Courier, monospace; font-size: 14px; font-style: normal; font-variant-ligatures: common-ligatures; font-variant-caps: normal; font-weight: 400; letter-spacing: normal; orphans: 2; text-align: start; text-indent: 0px; text-transform: none; white-space: pre; widows: 2; word-spacing: 0px; -webkit-text-stroke-width: 0px; background-color: rgb(246, 248, 250); text-decoration-style: initial; text-decoration-color: initial; display: inline !important; float: none;"><br></span><span class="hljs-keyword" style="box-sizing: border-box; outline: 0px; color: rgb(0, 0, 136); font-size: 14px; word-break: break-all; font-family: Consolas, Inconsolata, Courier, monospace; font-style: normal; font-variant-ligatures: common-ligatures; font-variant-caps: normal; font-weight: 400; letter-spacing: normal; orphans: 2; text-align: start; text-indent: 0px; text-transform: none; white-space: pre; widows: 2; word-spacing: 0px; -webkit-text-stroke-width: 0px; text-decoration-style: initial; text-decoration-color: initial;">public</span><span style="color: rgb(0, 0, 0); font-family: Consolas, Inconsolata, Courier, monospace; font-size: 14px; font-style: normal; font-variant-ligatures: common-ligatures; font-variant-caps: normal; font-weight: 400; letter-spacing: normal; orphans: 2; text-align: start; text-indent: 0px; text-transform: none; white-space: pre; widows: 2; word-spacing: 0px; -webkit-text-stroke-width: 0px; background-color: rgb(246, 248, 250); text-decoration-style: initial; text-decoration-color: initial; display: inline !important; float: none;"> </span><span class="hljs-class" style="box-sizing: border-box; outline: 0px; font-size: 14px; word-break: break-all; color: rgb(0, 0, 0); font-family: Consolas, Inconsolata, Courier, monospace; font-style: normal; font-variant-ligatures: common-ligatures; font-variant-caps: normal; font-weight: 400; letter-spacing: normal; orphans: 2; text-align: start; text-indent: 0px; text-transform: none; white-space: pre; widows: 2; word-spacing: 0px; -webkit-text-stroke-width: 0px; text-decoration-style: initial; text-decoration-color: initial;"><span class="hljs-keyword" style="box-sizing: border-box; outline: 0px; color: rgb(0, 0, 136); font-size: inherit; word-break: break-all;">class</span> <span class="hljs-title" style="box-sizing: border-box; outline: 0px; color: rgb(79, 79, 79); font-size: inherit; word-break: break-all;">MyConfig</span> {</span><span style="color: rgb(0, 0, 0); font-family: Consolas, Inconsolata, Courier, monospace; font-size: 14px; font-style: normal; font-variant-ligatures: common-ligatures; font-variant-caps: normal; font-weight: 400; letter-spacing: normal; orphans: 2; text-align: start; text-indent: 0px; text-transform: none; white-space: pre; widows: 2; word-spacing: 0px; -webkit-text-stroke-width: 0px; background-color: rgb(246, 248, 250); text-decoration-style: initial; text-decoration-color: initial; display: inline !important; float: none;"><br>}</span>
spel
<li style="list-style-type: disc;">字面值:#{5} 值为5,<property name="" value="#{user}"> bean的id. 同时可以访问bean的方法和属性如:#{user.name},#{user.getAge()}</li><li style="list-style-type: disc;">操作类:T() 访问类的静态方法和属性. #{T(java.lang.Math).PI},#{T(java.lang.Math).random() }.</li><li style="list-style-type: disc;">运算操作:算术运算(+,-,*,/,%,^),关系运行(lt,gt,eq,le,ge),逻辑运算(and,or,not,|),条件运算(? : ),正则运算(matches).</li><li style="list-style-type: disc;"><util:list> :spring命名空间,定义bean的list集合. <util:list id="cities"> ....</util:list> ,取值用#{cities[2]}</li><li style="list-style-type: disc;">从java.util.Properties取值:<util:properties id="settings' location="classpath:settings.properties"/> #{settings['jdbc.Driver']}</li><li style="list-style-type: disc;">systemEnviroment: 包含应用程序所在机器的所有环境变量,时java.util.Properties的一个集合. #{systemEnviroment['HOME']}</li><li style="list-style-type: disc;">systemPorperties:包含java应用程序启动时所设置的所有属性. 如-Dapplication.home=/etc/myapp #{systemProperties['application.home']}</li><li style="list-style-type: disc;">查询结合 :".^[]"集合中第一个匹配项和".$[]"集合中最后一个匹配项.#{cities.^[population gt 100000]}</li><li style="list-style-type: disc;">投影集合".![]":从集合中的每一个成员中选择特定的属性放入一个新的集合中.</li>
面试
<h3 style="border:0px;font-size:20px;font-weight:normal;line-height:30px;font-family:'Microsoft YaHei', 'Myriad Pro', Lato, 'Helvetica Neue', Helvetica, Arial, sans-serif;" align="left"><span style="color:#006600;">BeanFactory和ApplicationContext有什么区别</span></h3>
<p style="border:0px;font-size:14px;font-family:'Microsoft YaHei', '宋体', 'Myriad Pro', Lato, 'Helvetica Neue', Helvetica, Arial, sans-serif;line-height:21px;"><br>BeanFactory 可以理解为含有bean集合的工厂类。BeanFactory 包含了种bean的定义,以便在接收到客户端请求时将对应的bean实例化。</p><br><p style="border:0px;font-size:14px;font-family:'Microsoft YaHei', '宋体', 'Myriad Pro', Lato, 'Helvetica Neue', Helvetica, Arial, sans-serif;line-height:21px;">BeanFactory还能在<b>实例化对象的时生成协作类之间的关系</b>。此举将bean自身与bean客户端的配置中解放出来。BeanFactory还包含了<b>bean生命周期的控制,调用客户端的初始化方法(initialization methods)和销毁方法(destruction methods)</b>。</p><br><p align="left" style="border:0px;font-size:14px;font-family:'Microsoft YaHei', '宋体', 'Myriad Pro', Lato, 'Helvetica Neue', Helvetica, Arial, sans-serif;line-height:21px;">application context是beanFactory的子接口,拥有BeanFactory的所有功能,但applicationcontext在此基础上还提供了其他的功能。</p><br><ol style="border:0px;font-size:14px;list-style-position:inside;font-family:'Microsoft YaHei', '宋体', 'Myriad Pro', Lato, 'Helvetica Neue', Helvetica, Arial, sans-serif;line-height:21px;"><li style="border:0px;">提供了支持国际化的文本消息</li><li style="border:0px;">统一的资源文件读取方式</li><li style="border:0px;">已在监听器中注册的bean的事件<br><b>且beanFactory是延迟加载,需要类的时候才创建类的实例,而ApplicationContext在初始化时就加载完成了所有的单例bean</b><br></li></ol><p align="left" style="border:0px;font-size:14px;font-family:'Microsoft YaHei', '宋体', 'Myriad Pro', Lato, 'Helvetica Neue', Helvetica, Arial, sans-serif;line-height:21px;">以下是三种较常见的 ApplicationContext 实现方式:</p><br><p style="border:0px;font-size:14px;font-family:'Microsoft YaHei', '宋体', 'Myriad Pro', Lato, 'Helvetica Neue', Helvetica, Arial, sans-serif;line-height:21px;">1、ClassPathXmlApplicationContext:从classpath的XML配置文件中读取上下文,并生成上下文定义。应用程序上下文从程序环境变量中取得</p><br><pre><code class="language-html hljs xml"> ApplicationContext context = new ClassPathXmlApplicationContext(“bean.xml”); </code></pre><span style="font-family:'Microsoft YaHei', '宋体', 'Myriad Pro', Lato, 'Helvetica Neue', Helvetica, Arial, sans-serif;font-size:14px;">2、FileSystemXmlApplicationContext :由文件系统中的XML配置文件读取上下文。</span><br><code class="language-html hljs xml">ApplicationContext context = new FileSystemXmlApplicationContext(“bean.xml”); </code><br><p>3、XmlWebApplicationContext:由Web应用的XML文件读取上下文。</p>
<h3 style="border:0px;font-size:20px;font-weight:normal;line-height:30px;font-family:'Microsoft YaHei', 'Myriad Pro', Lato, 'Helvetica Neue', Helvetica, Arial, sans-serif;"><span style="color:#006600;">解释Spring Bean的生命周期</span></h3>
<p style="border:0px;font-size:14px;font-family:'Microsoft YaHei', '宋体', 'Myriad Pro', Lato, 'Helvetica Neue', Helvetica, Arial, sans-serif;line-height:21px;"><br>Spring Bean的生命周期简单易懂。在一个bean实例被初始化时,需要执行一系列的初始化操作以达到可用的状态。同样的,当一个bean不在被调用时需要进行相关的析构操作,并从bean容器中移除。</p><br><p style="border:0px;font-size:14px;font-family:'Microsoft YaHei', '宋体', 'Myriad Pro', Lato, 'Helvetica Neue', Helvetica, Arial, sans-serif;line-height:21px;">Spring bean factory 负责管理在spring容器中被创建的bean的生命周期。Bean的生命周期由两组回调(call back)方法组成。</p><br><ol style="border:0px;font-size:14px;list-style-position:inside;font-family:'Microsoft YaHei', '宋体', 'Myriad Pro', Lato, 'Helvetica Neue', Helvetica, Arial, sans-serif;line-height:21px;"><li style="border:0px;">初始化之后调用的回调方法。</li><li style="border:0px;">销毁之前调用的回调方法。</li></ol><p style="border:0px;font-size:14px;font-family:'Microsoft YaHei', '宋体', 'Myriad Pro', Lato, 'Helvetica Neue', Helvetica, Arial, sans-serif;line-height:21px;"><br>Spring框架提供了以下四种方式来管理bean的生命周期事件:</p><br><ul style="border:0px;font-size:14px;list-style-position:inside;font-family:'Microsoft YaHei', '宋体', 'Myriad Pro', Lato, 'Helvetica Neue', Helvetica, Arial, sans-serif;line-height:21px;"><li style="border:0px;">InitializingBean和DisposableBean回调接口</li><li style="border:0px;">针对特殊行为的其他Aware接口</li><li style="border:0px;">Bean配置文件中的Custom init()方法和destroy()方法</li><li style="border:0px;">@PostConstruct和@PreDestroy注解方式<br><p style="border:0px;font-size:14px;font-family:'Microsoft YaHei', '宋体', 'Myriad Pro', Lato, 'Helvetica Neue', Helvetica, Arial, sans-serif;line-height:21px;"><br>使用<code style="border:0px;font-family:Monaco, Consolas, 'Andale Mono', 'DejaVu Sans Mono', monospace;">customInit()</code>和 <code style="border:0px;font-family:Monaco, Consolas, 'Andale Mono', 'DejaVu Sans Mono', monospace;">customDestroy()</code><code style="border:0px;font-family:Monaco, Consolas, 'Andale Mono', 'DejaVu Sans Mono', monospace;">方法管理</code><code style="border:0px;font-family:Monaco, Consolas, 'Andale Mono', 'DejaVu Sans Mono', monospace;">bean</code><code style="border:0px;font-family:Monaco, Consolas, 'Andale Mono', 'DejaVu Sans Mono', monospace;">生命周期的代码样例如下:</code></p><pre><code class="language-html hljs xml"><ol class="hljs-ln" style="width:1044px"><li><div class="hljs-ln-code"><div class="hljs-ln-line"> <span class="hljs-tag"><<span class="hljs-name">beans</span>></span> <span class="hljs-tag"><<span class="hljs-name">bean</span> <span class="hljs-attr">id</span>=<span class="hljs-string">"demoBean"</span> <span class="hljs-attr">class</span>=<span class="hljs-string">"com.somnus.task.DemoBean"</span> <span class="hljs-attr">init-method</span>=<span class="hljs-string">"customInit"</span> <span class="hljs-attr">destroy-method</span>=<span class="hljs-string">"customDestroy"</span>></span><span class="hljs-tag"></<span class="hljs-name">bean</span>></span> <span class="hljs-tag"></<span class="hljs-name">beans</span>></span> </div></div></li><li><div class="hljs-ln-code"><div class="hljs-ln-line"> </div></div></li></ol></code></pre></li></ul>
<h3 style="border:0px;font-size:20px;font-weight:normal;line-height:30px;font-family:'Microsoft YaHei', 'Myriad Pro', Lato, 'Helvetica Neue', Helvetica, Arial, sans-serif;"><span style="color:#006600;">Spring Bean的作用域</span></h3>
<p style="border:0px;font-size:14px;font-family:'Microsoft YaHei', '宋体', 'Myriad Pro', Lato, 'Helvetica Neue', Helvetica, Arial, sans-serif;line-height:21px;">
Spring容器中的bean可以分为5个范围。所有范围的名称都是自说明的,但是为了避免混淆,还是让我们来解释一下:</p>
<ol style="border:0px;font-size:14px;list-style-position:inside;font-family:'Microsoft YaHei', '宋体', 'Myriad Pro', Lato, 'Helvetica Neue', Helvetica, Arial, sans-serif;line-height:21px;"><li style="border:0px;">singleton:这种bean范围是默认的,这种范围确保不管接受到多少个请求,每个容器中只有一个bean的实例,单例的模式由bean factory自身来维护。</li><li style="border:0px;">prototype:原形范围与单例范围相反,为每一个bean请求提供一个实例。</li><li style="border:0px;">request:在请求bean范围内会每一个来自客户端的网络请求创建一个实例,在请求完成以后,bean会失效并被垃圾回收器回收。</li><li style="border:0px;">Session:与请求范围类似,确保每个session中有一个bean的实例,在session过期后,bean会随之失效。</li><li style="border:0px;">global-session:global-session和Portlet应用相关。当你的应用部署在Portlet容器中工作时,它包含很多portlet。如果你想要声明让所有的portlet共用全局的存储变量的话,那么这全局变量需要存储在global-session中。</li></ol>
全局作用域与Servlet中的session作用域效果相同。
<h3 style="border:0px;font-size:20px;font-weight:normal;line-height:30px;font-family:'Microsoft YaHei', 'Myriad Pro', Lato, 'Helvetica Neue', Helvetica, Arial, sans-serif;"><span style="color:#006600;">Spring框架中的单例Beans是线程安全的吗</span></h3>
Spring框架并没有对<a href="http://howtodoinjava.com/2012/10/22/singleton-design-pattern-in-java/" rel="nofollow" class="external" style="border:0px;text-decoration:none;color:rgb(0,153,204);" target="_blank">单例</a>bean进行任何多线程的封装处理。关于单例bean的<a href="http://howtodoinjava.com/2014/06/02/what-is-thread-safety/" rel="nofollow" class="external" style="border:0px;text-decoration:none;color:rgb(0,153,204);" target="_blank">线程安全</a>和并发问题需要开发者自行去搞定。但实际上,大部分的Spring
bean并没有可变的状态(比如Serview类和DAO类),所以在某种程度上说Spring的单例bean是线程安全的。如果你的bean有多种状态的话(比如 View Model 对象),就需要自行保证线程安全。<br>
最浅显的解决办法就是将多态bean的作用域由<span style="border:0px;">“singleton</span>”变更为“<span style="border:0px;">prototype</span>”。
<h3 style="border:0px;font-size:20px;font-weight:normal;line-height:30px;font-family:'Microsoft YaHei', 'Myriad Pro', Lato, 'Helvetica Neue', Helvetica, Arial, sans-serif;"><span style="color:#006600;">构造方法注入和设值注入有什么区别</span></h3>
<ol style="border:0px;font-size:14px;list-style-position:inside;font-family:'Microsoft YaHei', '宋体', 'Myriad Pro', Lato, 'Helvetica Neue', Helvetica, Arial, sans-serif;line-height:21px;"><li style="border:0px;">在设值注入方法支持大部分的依赖注入,如果我们仅需要注入int、string和long型的变量,我们不要用设值的方法注入。对于基本类型,如果我们没有注入的话,可以为基本类型设置默认值。在构造方法注入不支持大部分的依赖注入,因为在调用构造方法中必须传入正确的构造参数,否则的话为报错。</li><li style="border:0px;">设值注入不会重写构造方法的值。如果我们对同一个变量同时使用了构造方法注入又使用了设置方法注入的话,那么构造方法将不能覆盖由设值方法注入的值。很明显,因为构造方法尽在对象被创建时调用。</li><li style="border:0px;">在使用设值注入时有可能还不能保证某种依赖是否已经被注入,也就是说这时对象的依赖关系有可能是不完整的。而在另一种情况下,构造器注入则不允许生成依赖关系不完整的对象。</li><li style="border:0px;">在设值注入时如果对象A和对象B互相依赖,在创建对象A时Spring会抛出s<code style="border:0px;font-family:Monaco, Consolas, 'Andale Mono', 'DejaVu Sans Mono', monospace;">ObjectCurrentlyInCreationException异常,因为在B对象被创建之前A对象是不能被创建的,反之亦然。所以Spring用设值注入的方法解决了循环依赖的问题,因对象的设值方法是在对象被创建之前被调用的。</code></li></ol>
<h3 style="border:0px;font-size:20px;font-weight:normal;line-height:30px;font-family:'Microsoft YaHei', 'Myriad Pro', Lato, 'Helvetica Neue', Helvetica, Arial, sans-serif;"><span style="color:#006600;">Spring框架中有哪些不同类型的事件</span></h3>
<p style="border:0px;font-size:14px;font-family:'Microsoft YaHei', '宋体', 'Myriad Pro', Lato, 'Helvetica Neue', Helvetica, Arial, sans-serif;line-height:21px;">
Spring的<code style="border:0px;font-family:Monaco, Consolas, 'Andale Mono', 'DejaVu Sans Mono', monospace;">ApplicationContext</code> 提供了支持事件和代码中监听器的功能。</p>
<p style="border:0px;font-size:14px;font-family:'Microsoft YaHei', '宋体', 'Myriad Pro', Lato, 'Helvetica Neue', Helvetica, Arial, sans-serif;line-height:21px;">
我们可以创建bean用来监听在<code style="border:0px;font-family:Monaco, Consolas, 'Andale Mono', 'DejaVu Sans Mono', monospace;">ApplicationContext</code> 中发布的事件。<code style="border:0px;font-family:Monaco, Consolas, 'Andale Mono', 'DejaVu Sans Mono', monospace;">ApplicationEven</code>t类和在<code style="border:0px;font-family:Monaco, Consolas, 'Andale Mono', 'DejaVu Sans Mono', monospace;">ApplicationContext</code><code style="border:0px;font-family:Monaco, Consolas, 'Andale Mono', 'DejaVu Sans Mono', monospace;">接口</code>中处理的事件,如果一个bean实现了<code style="border:0px;font-family:Monaco, Consolas, 'Andale Mono', 'DejaVu Sans Mono', monospace;">ApplicationListener</code>接口,当一个<code style="border:0px;font-family:Monaco, Consolas, 'Andale Mono', 'DejaVu Sans Mono', monospace;">ApplicationEvent</code> 被发布以后,bean会自动被通知。</p>
<pre><code class="language-java hljs"><ol class="hljs-ln"><li><div class="hljs-ln-code"><div class="hljs-ln-line"> <span class="hljs-keyword">public</span> <span class="hljs-class"><span class="hljs-keyword">class</span> <span class="hljs-title">AllApplicationEventListener</span> <span class="hljs-keyword">implements</span> <span class="hljs-title">ApplicationListener</span> < <span class="hljs-title">ApplicationEvent</span> ></span>{ </div></div></li><li><div class="hljs-ln-code"><div class="hljs-ln-line"> <span class="hljs-meta">@Override</span> </div></div></li><li><div class="hljs-ln-code"><div class="hljs-ln-line"> <span class="hljs-function"><span class="hljs-keyword">public</span> <span class="hljs-keyword">void</span> <span class="hljs-title">onApplicationEvent</span><span class="hljs-params">(ApplicationEvent applicationEvent)</span> </span></div></div></li><li><div class="hljs-ln-code"><div class="hljs-ln-line"> { </div></div></li><li><div class="hljs-ln-code"><div class="hljs-ln-line"> <span class="hljs-comment">//process event </span></div></div></li><li><div class="hljs-ln-code"><div class="hljs-ln-line"> } </div></div></li><li><div class="hljs-ln-code"><div class="hljs-ln-line"> } </div></div></li></ol></code></pre><br><p style="border:0px;font-size:14px;font-family:'Microsoft YaHei', '宋体', 'Myriad Pro', Lato, 'Helvetica Neue', Helvetica, Arial, sans-serif;line-height:21px;">
Spring 提供了以下5中标准的事件:</p>
<ol style="border:0px;font-size:14px;list-style-position:inside;font-family:'Microsoft YaHei', '宋体', 'Myriad Pro', Lato, 'Helvetica Neue', Helvetica, Arial, sans-serif;line-height:21px;"><li style="border:0px;"><span style="border:0px;">上下文更新事件(ContextRefreshedEvent)</span>:该事件会在ApplicationContext被初始化或者更新时发布。也可以在调用ConfigurableApplicationContext 接口中的refresh()方法时被触发。</li><li style="border:0px;"><span style="border:0px;">上下文开始事件(ContextStartedEvent)</span>:当容器调用ConfigurableApplicationContext的Start()方法开始/重新开始容器时触发该事件。</li><li style="border:0px;"><span style="border:0px;">上下文停止事件(ContextStoppedEvent)</span>:当容器调用ConfigurableApplicationContext的Stop()方法停止容器时触发该事件。</li><li style="border:0px;"><span style="border:0px;">上下文关闭事件(ContextClosedEvent)</span>:当ApplicationContext被关闭时触发该事件。容器被关闭时,其管理的所有单例Bean都被销毁。</li><li style="border:0px;"><span style="border:0px;">请求处理事件(RequestHandledEvent)</span>:在Web应用中,当一个http请求(request)结束触发该事件。</li></ol><br><code class="language-java hljs"><ol class="hljs-ln" style="width:890px"><li><br></li></ol></code>
自定义事件
<p style="border:0px;font-size:14px;font-family:'Microsoft YaHei', '宋体', 'Myriad Pro', Lato, 'Helvetica Neue', Helvetica, Arial, sans-serif;line-height:21px;">扩展<code style="border:0px;font-family:Monaco, Consolas, 'Andale Mono', 'DejaVu Sans Mono', monospace;">ApplicationEvent</code> 类来开发自定义的事件。</p><br><pre><code class="language-java hljs"><ol class="hljs-ln"><li><div class="hljs-ln-code"><div class="hljs-ln-line"> <span class="hljs-keyword">public</span> <span class="hljs-class"><span class="hljs-keyword">class</span> <span class="hljs-title">CustomApplicationEvent</span> <span class="hljs-keyword">extends</span> <span class="hljs-title">ApplicationEvent</span></span>{ </div></div></li><li><div class="hljs-ln-code"><div class="hljs-ln-line"> <span class="hljs-function"><span class="hljs-keyword">public</span> <span class="hljs-title">CustomApplicationEvent</span> <span class="hljs-params">( Object source, <span class="hljs-keyword">final</span> String msg )</span></span>{ </div></div></li><li><div class="hljs-ln-code"><div class="hljs-ln-line"> <span class="hljs-keyword">super</span>(source); </div></div></li><li><div class="hljs-ln-code"><div class="hljs-ln-line"> System.out.println(<span class="hljs-string">"Created a Custom event"</span>); </div></div></li><li><div class="hljs-ln-code"><div class="hljs-ln-line"> } </div></div></li><li><div class="hljs-ln-code"><div class="hljs-ln-line"> } </div></div></li></ol></code></pre>为了监听这个事件,还需要创建一个监听器:<br><pre><code class="language-java hljs"><ol class="hljs-ln"><li><div class="hljs-ln-code"><div class="hljs-ln-line"> <span class="hljs-keyword">public</span> <span class="hljs-class"><span class="hljs-keyword">class</span> <span class="hljs-title">CustomEventListener</span> <span class="hljs-keyword">implements</span> <span class="hljs-title">ApplicationListener</span> < <span class="hljs-title">CustomApplicationEvent</span> ></span>{ </div></div></li><li><div class="hljs-ln-code"><div class="hljs-ln-line"> <span class="hljs-meta">@Override</span> </div></div></li><li><div class="hljs-ln-code"><div class="hljs-ln-line"> <span class="hljs-function"><span class="hljs-keyword">public</span> <span class="hljs-keyword">void</span> <span class="hljs-title">onApplicationEvent</span><span class="hljs-params">(CustomApplicationEvent applicationEvent)</span> </span>{ </div></div></li><li><div class="hljs-ln-code"><div class="hljs-ln-line"> <span class="hljs-comment">//handle event </span></div></div></li><li><div class="hljs-ln-code"><div class="hljs-ln-line"> } </div></div></li><li><div class="hljs-ln-code"><div class="hljs-ln-line"> } </div></div></li></ol></code></pre><br><br>之后通过applicationContext接口的<code style="border:0px;font-family:Monaco, Consolas, 'Andale Mono', 'DejaVu Sans Mono', monospace;">publishEvent()方法来发布自定义事件。</code><br><pre><code class="language-java hljs"><ol class="hljs-ln" style="width:890px"><li><div class="hljs-ln-code"><div class="hljs-ln-line"> CustomApplicationEvent customEvent = <span class="hljs-keyword">new</span> CustomApplicationEvent(applicationContext, <span class="hljs-string">"Test message"</span>); </div></div></li><li><div class="hljs-ln-code"><div class="hljs-ln-line"> applicationContext.publishEvent(customEvent); </div></div></li></ol></code></pre>
<h3 style="border:0px;font-size:20px;font-weight:normal;line-height:30px;font-family:'Microsoft YaHei', 'Myriad Pro', Lato, 'Helvetica Neue', Helvetica, Arial, sans-serif;"><span style="color:#006600;">FileSystemResource和ClassPathResource有何区别</span></h3>
<p style="border:0px;font-size:14px;font-family:'Microsoft YaHei', '宋体', 'Myriad Pro', Lato, 'Helvetica Neue', Helvetica, Arial, sans-serif;line-height:21px;">
在<code style="border:0px;font-family:Monaco, Consolas, 'Andale Mono', 'DejaVu Sans Mono', monospace;">FileSystemResource</code> 中需要给出<code style="border:0px;font-family:Monaco, Consolas, 'Andale Mono', 'DejaVu Sans Mono', monospace;">spring-config.xml</code>文件在你项目中的相对路径或者绝对路径。在<code style="border:0px;font-family:Monaco, Consolas, 'Andale Mono', 'DejaVu Sans Mono', monospace;">ClassPathResource</code>中spring会在ClassPath中自动搜寻配置文件,所以要把<code style="border:0px;font-family:Monaco, Consolas, 'Andale Mono', 'DejaVu Sans Mono', monospace;">ClassPathResource</code> 文件放在ClassPath下。</p>
<p style="border:0px;font-size:14px;font-family:'Microsoft YaHei', '宋体', 'Myriad Pro', Lato, 'Helvetica Neue', Helvetica, Arial, sans-serif;line-height:21px;">
如果将<code style="border:0px;font-family:Monaco, Consolas, 'Andale Mono', 'DejaVu Sans Mono', monospace;">spring-config.xml</code>保存在了src文件夹下的话,只需给出配置文件的名称即可,因为src文件夹是默认。</p>
<p style="border:0px;font-size:14px;font-family:'Microsoft YaHei', '宋体', 'Myriad Pro', Lato, 'Helvetica Neue', Helvetica, Arial, sans-serif;line-height:21px;">
<span style="border:0px;">简而言之,ClassPathResource在环境变量中读取配置文件,FileSystemResource在配置文件中读取配置文件。</span></p>
<h3 style="border:0px;font-size:20px;font-weight:normal;line-height:30px;font-family:'Microsoft YaHei', 'Myriad Pro', Lato, 'Helvetica Neue', Helvetica, Arial, sans-serif;"><span style="color:#006600;">Spring 框架中都用到了哪些设计模式</span></h3>
<p style="border:0px;font-size:14px;font-family:'Microsoft YaHei', '宋体', 'Myriad Pro', Lato, 'Helvetica Neue', Helvetica, Arial, sans-serif;line-height:21px;">
Spring框架中使用到了大量的设计模式,下面列举了比较有代表性的:</p>
<ul style="border:0px;font-size:14px;list-style-position:inside;font-family:'Microsoft YaHei', '宋体', 'Myriad Pro', Lato, 'Helvetica Neue', Helvetica, Arial, sans-serif;line-height:21px;"><li style="border:0px;">代理模式—在AOP和remoting中被用的比较多。</li><li style="border:0px;">单例模式—在spring配置文件中定义的bean默认为单例模式。<span style="border:0px;"></span></li><li style="border:0px;">模板方法—用来解决代码重复的问题。比如. <a title="Spring RESTFul Client – RestTemplate Example" href="http://howtodoinjava.com/2015/02/20/spring-restful-client-resttemplate-example/" rel="nofollow" class="external" style="border:0px;text-decoration:none;color:rgb(0,153,204);" target="_blank"><span style="border:0px;">RestTemplate</span></a>, <code style="border:0px;font-family:Monaco, Consolas, 'Andale Mono', 'DejaVu Sans Mono', monospace;font-style:inherit;font-weight:inherit;">JmsTemplate</code>, <code style="border:0px;font-family:Monaco, Consolas, 'Andale Mono', 'DejaVu Sans Mono', monospace;font-style:inherit;font-weight:inherit;">JpaTemplate。</code></li><li style="border:0px;">前端控制器—Spring提供了<code style="border:0px;font-family:Monaco, Consolas, 'Andale Mono', 'DejaVu Sans Mono', monospace;">DispatcherServlet</code><code style="border:0px;font-family:Monaco, Consolas, 'Andale Mono', 'DejaVu Sans Mono', monospace;">来对请求进行分发。</code></li><li style="border:0px;">视图帮助(<span style="border:0px;">View Helper</span> )—Spring提供了一系列的JSP标签,高效宏来辅助将分散的代码整合在视图里。</li><li style="border:0px;">依赖注入—贯穿于<code style="border:0px;font-family:Monaco, Consolas, 'Andale Mono', 'DejaVu Sans Mono', monospace;">BeanFactory</code> / <code style="border:0px;font-family:Monaco, Consolas, 'Andale Mono', 'DejaVu Sans Mono', monospace;">ApplicationContext</code><code style="border:0px;font-family:Monaco, Consolas, 'Andale Mono', 'DejaVu Sans Mono', monospace;">接口的核心理念。</code></li><li style="border:0px;">工厂模式—BeanFactory用来创建对象的实例。</li></ul>
<span style="font-size:18px;background-color:rgb(255,204,204);">S<strong>pring<span style="font-family:'宋体';">的优点</span></strong></span>
<span style="font-size:18px;">1.<span style="font-family:'宋体';">降低了组件之间的耦合性 ,实现了软件各层之间的解耦</span><span style="font-family:Calibri;"> </span><br><span></span>2.<span style="font-family:'宋体';">可以使用容易提供的众多服务,如事务管理,消息服务等</span><span style="font-family:Calibri;"> </span><br><span></span>3.<span style="font-family:'宋体';">容器提供单例模式支持</span><span style="font-family:Calibri;"> </span><br><span></span>4.<span style="font-family:'宋体';">容器提供了</span><span style="font-family:Calibri;">AOP</span><span style="font-family:'宋体';">技术,利用它很容易实现如权限拦截,运行期监控等功能</span><span style="font-family:Calibri;"> </span><br><span></span>5.<span style="font-family:'宋体';">容器提供了众多的辅助类,能加快应用的开发</span><span style="font-family:Calibri;"> </span><br><span></span>6.spring<span style="font-family:'宋体';">对于主流的应用框架提供了集成支持,如</span><span style="font-family:Calibri;">hibernate</span><span style="font-family:'宋体';">,</span><span style="font-family:Calibri;">JPA</span><span style="font-family:'宋体';">,</span><span style="font-family:Calibri;">Struts</span><span style="font-family:'宋体';">等</span><span style="font-family:Calibri;"> </span><br><span></span>7.spring<span style="font-family:'宋体';">属于低侵入式设计,代码的污染极低</span><span style="font-family:Calibri;"> </span><br><span></span>8.<span style="font-family:'宋体';">独立于各种应用服务器</span><span style="font-family:Calibri;"> </span><br><span></span>9.spring<span style="font-family:'宋体';">的</span><span style="font-family:Calibri;">DI</span><span style="font-family:'宋体';">机制降低了业务对象替换的复杂性</span><span style="font-family:Calibri;"> </span><br><span></span>10.Spring<span style="font-family:'宋体';">的高度开放性,并不强制应用完全依赖于</span><span style="font-family:Calibri;">Spring</span><span style="font-family:'宋体';">,开发者可以自由选择</span><span style="font-family:Calibri;">spring</span>
<span style="font-family:'宋体';">的部分或全部</span> <br></span>


Collect
Get Started

Collect
Get Started
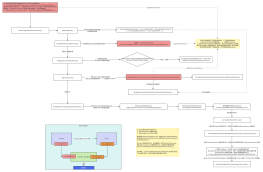
Collect
Get Started
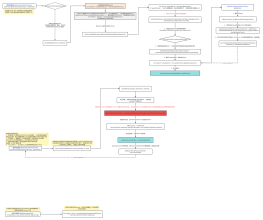
Collect
Get Started
评论
0 条评论
下一页

